Aircraft Models
Aircraft modeling represents one of the most rewarding and diverse hobbies available, offering enthusiasts the opportunity to recreate aviation history, explore engineering marvels, and develop exceptional craftsmanship skills. Whether you’re drawn to the weathered patina of a World War II fighter, the pristine elegance of a modern airliner, or the experimental nature of prototype aircraft, this hobby provides endless creative possibilities. Yet newcomers often feel overwhelmed by the sheer variety of subjects, scales, materials, and techniques available.
This comprehensive resource explores the fundamental aspects of aircraft modeling, from selecting your first kit and understanding scale differences to mastering advanced finishing techniques and even venturing into flying models. We’ll examine the practical considerations that affect your modeling experience—workspace constraints, tool selection, material properties—while also diving into the artistic dimensions of weathering, custom markings, and achieving historical accuracy. By understanding these core concepts, you’ll be equipped to make informed decisions that align with your interests, budget, and available space.
Getting Started: Overcoming Common Barriers
Many aspiring modelers never complete their first kit, not due to lack of interest, but because of preventable mistakes made at the outset. Understanding these common pitfalls can dramatically increase your chances of success and enjoyment.
The Psychology and Economics of Beginning
The initial investment in aircraft modeling can feel daunting. Beyond the kit itself, you’ll encounter recommendations for specialized tools, paints, and accessories. However, the reality is that you can begin with a surprisingly minimal toolkit—a few basic brushes, cement, sandpaper, and paints specific to your chosen subject. The marketing hype surrounding expensive airbrush systems and extensive tool collections can wait until you’ve determined your commitment level. Start with a simple, well-regarded kit in the 1/72 or 1/48 scale, which offers a balance between detail and manageable size.
Complexity and the Abandonment Trap
Perhaps the most common mistake is selecting an overly complex first project. That beautiful 1/32 scale B-17 with photo-etched parts and resin engines might be visually stunning, but it requires techniques you haven’t yet developed. Beginning with a complex kit leads to frustration when parts don’t fit as expected, paint schemes prove challenging, or delicate components break. Instead, choose a subject with fewer than 100 parts, simple camouflage schemes, and forgiving assembly tolerances. Single-engine fighters or trainers make excellent first projects.
Space Considerations and Scale Selection
Living space constraints significantly impact your modeling experience. A 1/32 scale fighter aircraft measures roughly 12 inches long, while a 1/72 version of the same subject occupies less than half that space. Consider not only display area but also your workspace lighting—adequate illumination from multiple angles prevents eyestrain and helps you spot fit issues, paint imperfections, and glue disasters before they become permanent. A simple adjustable desk lamp with daylight-spectrum bulbs transforms your ability to see fine details.
Understanding Scale, Materials, and Build Types
The diversity of aircraft models extends far beyond subject matter. Understanding the implications of scale, material choices, and construction methods helps you select projects that match your goals and circumstances.
Scale Fidelity and Its Practical Impact
Scale represents the mathematical relationship between your model and the real aircraft. Common scales include 1/72, 1/48, 1/32, and 1/144, each offering distinct advantages. Smaller scales like 1/144 allow you to build entire squadrons in limited space, while larger scales like 1/32 provide room for extensive detailing and weathering. However, there’s a subtle trap: over-scaling details. A rivet that’s barely visible on the real aircraft shouldn’t dominate your 1/48 model. Understanding this principle of scale effect—how certain details become proportionally more prominent as scale increases—separates visually convincing models from technically accurate but aesthetically awkward ones.
Material Comparisons: Plastic, Resin, and Metal
Most kits utilize injection-molded plastic, offering excellent detail, ease of assembly, and straightforward painting. However, metal models—particularly die-cast variants—appeal to collectors seeking durability and investment potential. Metal models resist accidental damage better than plastic, making them ideal for environments where handling occurs. They also possess a distinctive heft that communicates quality. The trade-off involves limited customization options and the need for specialized cleaning techniques for delicate metal surfaces. When considering shelf display, remember that metal models weigh considerably more than plastic equivalents, potentially requiring reinforced shelving for large-scale subjects or extensive collections.
Scratch-Building Versus Aftermarket Enhancement
Not every detail you envision exists in kit form. Aftermarket parts—photo-etched metal sets, resin details, turned metal barrels—allow you to enhance kit accuracy and detail. Alternatively, scratch-building involves fabricating parts from raw materials like plastic sheet, wire, and putty. While scratch-building offers unlimited creative freedom and is essential for unique or experimental subjects, it demands patience and tool investment. For most modelers, a hybrid approach works best: using the kit as a foundation, selectively adding aftermarket parts for visible areas, and scratch-building only when commercially unavailable parts are essential to your vision.
Achieving Accuracy and Museum-Quality Results
The pursuit of accuracy drives many modelers, whether replicating a specific aircraft that flew a particular mission or achieving the aesthetic standards of museum displays. This journey requires understanding both technical research and practical execution.
Sourcing Reliable Technical Data
Historical accuracy begins with research. Aviation reference books, wartime photographs, technical manuals, and online communities provide essential information about paint schemes, markings, equipment fit, and configuration changes throughout an aircraft’s service life. Be aware that aircraft often underwent modification phases—a P-51 Mustang from early production differs significantly from later variants. Cross-reference multiple sources, as published references occasionally contain errors that perpetuate through the modeling community.
Geometric Accuracy and Dimensional Challenges
Even well-regarded kits sometimes contain dimensional inaccuracies—a fuselage slightly too narrow, wings with incorrect dihedral, or poorly shaped canopies. Improving geometric accuracy might involve reshaping parts with heat, adding plastic strip to build up thin areas, or carefully sanding away excess material. However, obsessing over millimeter-level discrepancies rarely improves the finished model’s visual impact. Focus corrections on areas visible from normal viewing distances, particularly the profile silhouette, canopy shape, and wing-fuselage junction.
From Static Display to Dynamic Flight
Flying models represent a fascinating intersection between static modeling craftsmanship and radio-controlled aviation. This discipline requires additional considerations beyond appearance.
Structural and Weight Distribution Challenges
Unlike static models that need only look correct, flying aircraft must achieve proper center of gravity (CG) balance. An incorrectly balanced model exhibits poor flight characteristics or proves completely unflyable. This typically requires strategic placement of batteries, receivers, and ballast weight. Installing electronics cleanly—routing wires inside the fuselage, securing servos properly, concealing antennas—separates amateurish builds from refined ones that maintain scale appearance even in flight.
Kit Versus ARF Considerations
Flying models arrive as complete kits requiring full construction or as ARF (Almost Ready to Fly) variants needing only electronics installation and final assembly. Kits offer customization opportunities and deeper understanding of the aircraft’s structure, while ARF models accelerate the path to flight. First-time builders often underestimate the complexity of radio installation and setup. Regardless of approach, understanding battery fire risks—particularly with lithium polymer cells—and implementing a thorough pre-flight checking sequence proves essential for safety and longevity.
Military Aviation: Weapons and Tactical Loads
Military aircraft models gain tremendous visual interest through accurate weapons loadouts. However, this aspect involves numerous technical considerations often overlooked by newcomers.
Hardpoint Limits and Era-Specific Weaponry
Real aircraft have specific hardpoint limits—structural attachment points that constrain what weapons can be carried, in what combinations, and at what weights. A Vietnam-era F-4 Phantom couldn’t carry weapons that didn’t yet exist, while a modern F-16 can’t mount early 1960s munitions lacking compatible interfaces. Researching era-specific weaponry prevents anachronistic combinations that undermine otherwise accurate models. Additionally, understanding whether ordnance represents live versus inert rounds—training weapons often featured distinctive blue markings—adds another layer of authenticity.
Asymmetry and Detail Considerations
Asymmetric loadouts create visual interest and historical accuracy—combat missions rarely featured perfectly balanced weapon arrangements. However, asymmetry introduces challenges in model display, as the aircraft may list to one side unless properly supported. When detailing weapons, focus on visible features like seeker heads on missiles, fin configurations, and suspension hardware. These relatively simple additions dramatically enhance realism without requiring extensive scratch-building skills.
Experimental and Prototype Aircraft
Unique and experimental subjects offer opportunities to model aircraft that existed in limited numbers or represented technological dead-ends. These projects present distinct challenges and freedoms.
Research and Documentation Challenges
Prototype aircraft often had brief service lives with limited photographic documentation. Configuration changes occurred rapidly as test programs evolved, meaning a single airframe might appear dramatically different across various photos. Identifying specific modification phases requires careful analysis of available imagery. Some modelers are drawn to experimental subjects precisely because references are scarce, allowing creative interpretation. However, distinguish between informed speculation based on engineering logic and pure “what if” fantasies—the latter representing an entirely separate modeling genre.
Handling Distinctive Features
Experimental aircraft frequently featured bright colors—high-visibility orange, yellow, or international orange—for flight safety during testing. These colors present painting challenges, as they often require multiple coats over perfectly prepared surfaces to achieve even coverage. Test probes, sensor booms, and instrumentation fairings often need scratch-building, as commercial kits rarely include these mission-specific details. Sourcing unique decals for one-off prototypes may require custom printing or careful hand-painting of registration numbers and test markings.
Decals, Markings, and Nose Art
Aircraft markings transform generic airframes into specific historical subjects or personalized examples. Mastering decal application and custom marking creation expands your creative possibilities enormously.
Application Techniques for Complex Surfaces
Modern decals settle beautifully over panel lines and rivets when properly applied, but complex curves—like engine cowlings or fuselage contours—challenge even experienced modelers. The solution involves decal-setting solutions that soften the film, allowing it to conform to surface irregularities. For extreme curves, cutting relief slits prevents wrinkling. Hand-painting techniques provide alternatives for small markings, stencils, or situations where decals prove problematic. Developing basic hand-painting skills with fine brushes and thinned paint allows you to replicate stencil data that decal sheets omit.
Creating Custom Markings
Commercial decal sheets cover popular subjects extensively, but unusual markings, personal aircraft, or specific squadron insignia may require creating custom home decals. Inkjet decal paper allows printing custom designs, though achieving color accuracy and opacity requires experimentation. For personalized nose art—the artistic markings applied to many military aircraft—you can combine decal printing for complex artwork with hand-painted outlines and touch-ups. Be aware that certain historical markings involve censorship considerations; some historically accurate insignia may be prohibited in certain contexts or jurisdictions.
Finishing Techniques: From Pristine Airliners to Weathered Warriors
Finishing techniques dramatically affect your model’s final appearance. The approach varies radically between civil aviation’s pristine presentation and military aircraft’s operational wear.
Mastering Civil Aviation Finishes
Modern airliners present unique challenges. White paint coverage requires patience—white pigments often appear translucent, necessitating multiple thin coats over perfectly smooth, pre-shaded primers. Window filling techniques eliminate the gap between clear parts and fuselage, creating seamless glazing. Achieving mirror-like polishing gloss coats involves careful wet-sanding with ultra-fine abrasives followed by polishing compounds. However, glossy white finishes reveal every flaw ruthlessly, demanding meticulous surface preparation. Additionally, white paint and clear parts risk yellowing over time from UV exposure, requiring display consideration or protective clear coats with UV inhibitors. Details like Corogard panels—protective sheets around cabin doors—add authenticity to airliner models.
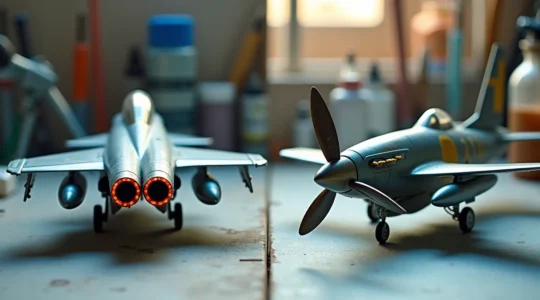
Weathering for Military Subjects
Military aircraft offer forgiveness through camouflage—multi-tone schemes naturally hide minor imperfections while providing opportunities for weathering effects. Jet exhaust staining creates dramatic visual interest around engine nozzles and exhaust ports. Propeller wear patterns—chipped paint on leading edges, oil staining behind spinners—tell stories of operational use. Paint fading, panel discoloration, and carefully applied dirt accumulation transform pristine models into convincing replicas of working aircraft. The risk lies in excessive weathering that crosses into unrealistic griminess. Real aircraft underwent regular maintenance; even combat veterans weren’t universally filthy. The challenge involves choosing subjects based on weathering potential—desert operations produce different wear patterns than carrier-based naval aviation or European theatre operations.
Subject Popularity and Personal Choice
While certain subjects dominate modeling—Spitfires, Mustangs, and Messerschmitts appear frequently—don’t let popularity dictate your choices. Lesser-known aircraft offer opportunities to create something distinctive. However, popular subjects benefit from extensive aftermarket support, multiple decal options, and abundant reference material. There’s wisdom in building a few popular subjects to develop skills before tackling obscure aircraft with limited resources. The risk of monotone greys—particularly for modern jets—can be offset through careful pre-shading, post-shading, and subtle weathering that reveals panel variations and service wear.
Aircraft modeling encompasses extraordinary breadth, from simple weekend projects to years-long masterpieces involving extensive research and scratch-building. The techniques and considerations outlined here provide a foundation for informed decision-making at every stage of your modeling journey. Whether you’re drawn to historical accuracy, artistic weathering, flying models, or pristine display pieces, understanding these fundamental concepts allows you to pursue your specific interests with confidence and realistic expectations.
Jet Age vs Propellers: Which Era Is Best for Learning to Weather Models?
The secret to your first successful weathering project isn’t mastering complex techniques, but choosing an aircraft that’s designed to hide mistakes. Propeller-era aircraft with multi-color camouflage offer high “weathering forgiveness,” effectively masking minor construction and painting flaws. Modern jets, with…
Read more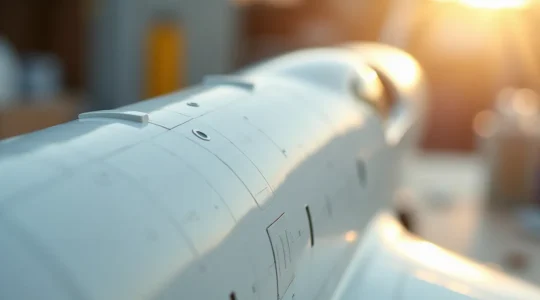
Achieving a Flawless White Airliner Finish: A Masterclass in Dust-Free Painting
The pursuit of a perfect, gloss white finish on an airliner model is often ruined by a single speck of dust, negating countless hours of work. The solution is not merely a cleaner workspace, but adopting the clinical mindset of…
Read more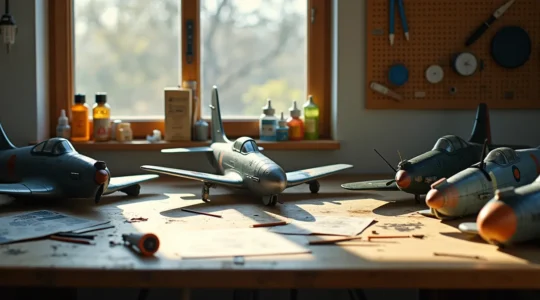
Replicating Hand-Painted Nose Art: The Artist’s Choice Between Decals and Brush
The choice between decals and hand-painting for aircraft nose art isn’t about ease, but about the story you want your model to tell. Hand-painting excels at creating a “field-applied” aesthetic, capturing the raw, unofficial nature of real wartime art. Custom…
Read more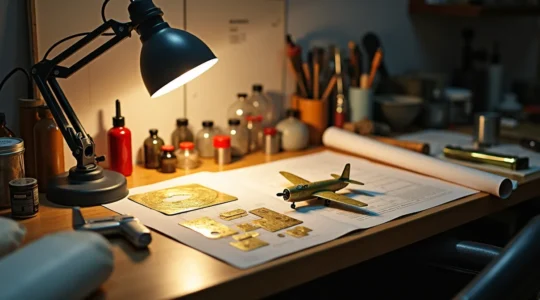
Why Modeling Prototype Aircraft Requires More Research Than Production Variants
Building a model of a prototype aircraft presents a unique challenge that goes far beyond standard assembly. Unlike mass-produced subjects with abundant documentation, experimental airframes require a forensic engineering mindset. Success hinges not on the quality of the kit, but…
Read more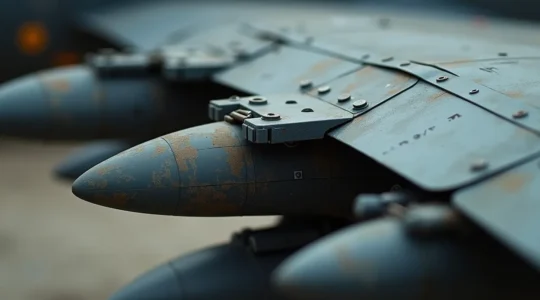
Avoiding the “Impossible Loadout” Error on Modern Jet Fighters
In summary: Building a realistic model jet is not about loading the most weapons, but the correct ones. Loadouts are dictated by mission profiles, the laws of physics, and the specific historical era. Understanding the “why” behind weapon placement and…
Read moreHow to Transition from Static Modeling to RC Flying Without Crashing Your First Build?
The fear of crashing a model you’ve spent hundreds of hours building is the biggest barrier for static modelers wanting to fly. The solution isn’t just practice, but a fundamental mindset shift: stop thinking of your plane as a fragile…
Read more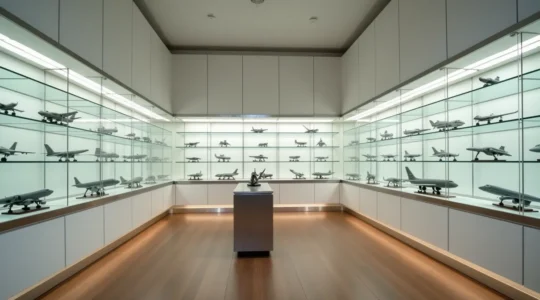
Why Die-Cast Metal Models Are Outperforming Plastic in Investment Portfolios?
Die-cast metal models represent a more stable and defensible tangible asset class due to their superior material integrity and verifiable scarcity. Material science, not just aesthetics, dictates long-term value preservation by mitigating risks like zinc pest and physical degradation. Value…
Read more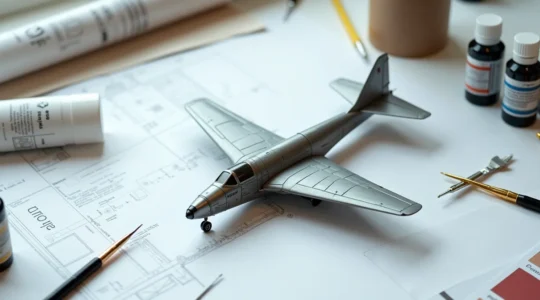
What Defines a High-Fidelity Replica for Serious Aviation Collectors?
A high-fidelity replica is not a shrunken aircraft; it is a meticulously engineered illusion that convinces the eye of its reality through the mastery of scale physics and material history. Authenticity is achieved by manipulating color to simulate atmospheric effects…
Read more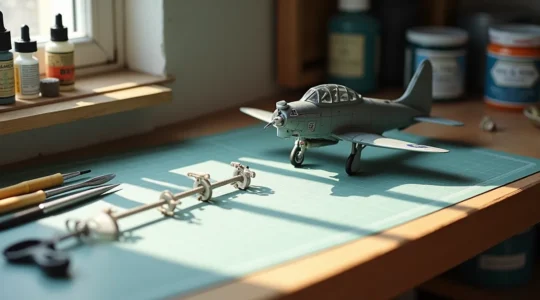
How to Start Building Aircraft Models: Your Complete Roadmap for Under $100
In summary: You can build a high-quality beginner toolkit for under $30 by focusing on essentials like good nippers and cement. Avoid frustration by starting with modern, “new tool” kits (Level 1-2) with fewer than 50 parts. Prevent common mistakes…
Read more