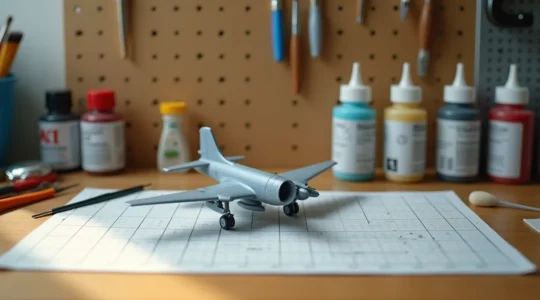
Accessories & Equipment
Building a model aircraft from the box is just the beginning of what’s possible in this rewarding hobby. The difference between a standard build and a truly exceptional model often lies not in the base kit itself, but in the accessories and equipment you choose to enhance it. From microscopic brass photo-etched parts that add breathtaking detail to cockpits, to specialized tools that allow you to work with surgical precision, these additions transform plastic and resin into miniature works of art.
Understanding the landscape of available accessories—and knowing which tools deserve a place on your workbench—can feel overwhelming at first. This comprehensive resource introduces the essential categories of accessories and equipment that elevate aircraft modeling, explaining what each brings to your projects and how they work together to produce museum-quality results. Whether you’re considering your first aftermarket upgrade or seeking to refine your display techniques, the knowledge here will help you make informed decisions that match your skill level and modeling goals.
Photo-Etched and Brass Detailing: Precision at Microscopic Scale
Photo-etched brass parts represent one of the most transformative categories of aftermarket accessories. These chemically etched metal sheets contain intricate details—seat belts, instrument panels, structural elements—at a scale impossible to mold in plastic. Working with them, however, requires a fundamental shift in technique and mindset.
Manipulating Microscopic Metal Components
The mechanical manipulation of photo-etched parts demands specialized tools and patience. Unlike plastic, brass doesn’t forgive rough handling. A dedicated photoetch bending tool allows you to create crisp, accurate folds along scored lines, while fine-tipped tweezers with smooth jaws prevent marring delicate surfaces. Sharp photoetch scissors or a fresh hobby knife blade are essential for clean separation from the fret.
Understanding the physics of folding metal at this scale is crucial. Brass work-hardens as you bend it, becoming brittle if overworked. The technique of annealing—heating brass parts until they glow slightly, then allowing them to cool—restores flexibility and prevents catastrophic breaks during complex folds. This process is particularly valuable when creating multi-bend components like engine grilles or landing gear details.
Pre-Painted Versus Bare Brass
Modern photo-etched sets come in two varieties: pre-painted and bare metal. Pre-painted parts offer convenience, arriving with factory-applied color that eliminates painting delicate details. However, they sacrifice flexibility—you’re locked into the manufacturer’s color choices. Bare brass gives you complete control over finishing but requires additional steps. The choice often depends on your specific application and whether the part will be prominently visible.
Common Pitfalls and Solutions
The most frequent challenge newcomers face is oversized dimensions after assembly. Photo-etched parts occupy physical space, and multiple layers can create thickness issues where none existed in the plastic kit. Test-fit assemblies before gluing, and be prepared to thin adjacent plastic parts to accommodate metal additions. Similarly, clogged detail can occur when paint or adhesive fills the tiny relief features that make photoetch valuable—use minimal amounts of both, applied with precision tools.
Resin Detailing and Aftermarket Upgrades
Resin accessories provide dimensional accuracy and surface detail that injection-molded plastic rarely matches. From replacement cockpits to complete engine assemblies, resin parts can address kit shortcomings or add detail levels the original manufacturer never intended.
Material Properties and Handling
Resin behaves fundamentally differently than plastic. It’s more brittle, requiring careful handling to prevent breakage. The dust created during sanding or drilling resin parts can be toxic—always work in a well-ventilated area and wear an appropriate respirator rated for fine particulates. This isn’t optional; resin dust exposure carries genuine health risks that proper equipment eliminates.
Surface preparation is critical for resin parts. Most arrive with a release agent residue that prevents paint and glue adhesion. Washing parts in warm, soapy water with a soft brush removes these contaminants. After drying, a light scuff with fine sandpaper creates tooth for adhesives and primers.
Bonding Dissimilar Materials
Resin-to-plastic joints require specialized adhesives. Standard plastic cement won’t work—it relies on melting plastic surfaces together, and resin doesn’t melt. Cyanoacrylate (CA glue) or two-part epoxy provide reliable bonds between different materials. Each has advantages: CA glue sets quickly but can be brittle, while epoxy offers superior strength with longer working time for complex alignments.
Correcting Manufacturing Irregularities
Resin parts occasionally exhibit warping or deformation from casting stresses. Fortunately, resin responds well to heat correction. Immerse warped parts in very hot (not boiling) water for 30-60 seconds until pliable, gently reshape to the correct contour, then plunge into ice water to lock the new shape. This technique salvages parts that would otherwise be unusable.
Essential Tools: The Foundation of Quality Work
No accessory reaches its potential without proper tools to install and finish it. Certain equipment proves so fundamental that it transcends “optional upgrade” status, becoming mandatory for serious modeling work.
The Airbrush: Precision Paint Application
While spray cans and brushes have their place, the airbrush transforms finishing capabilities. This tool atomizes paint into a fine mist, delivering even coverage impossible by other methods—crucial for blending photo-etched parts, creating smooth gradients on camouflage schemes, or applying translucent weathering washes.
Understanding airbrush mechanics demystifies operation and maintenance. Paint atomization occurs when compressed air flowing through the tool creates a vacuum that draws liquid from the paint reservoir, then breaks it into microscopic droplets. Controlling air pressure and paint consistency determines pattern quality. The fundamental “Air On, Air Off” rule—starting airflow before and stopping it after releasing paint—prevents splattering and tip buildup.
Regular maintenance extends airbrush life and prevents frustrating malfunctions. Clean the nozzle thoroughly after each session using appropriate thinners and soft brushes. Never use metal objects inside precision parts—bent needles cause irregular spray patterns and expensive repairs. Periodic lubrication of moving parts with manufacturer-recommended oils ensures smooth trigger action and prevents seal deterioration.
Specialized Hand Tools
Certain tasks demand purpose-built tools. Razor saws with ultra-fine teeth cleanly separate resin parts from casting blocks without stress damage. Pin vises with collet chucks hold tiny drill bits steady for creating rivet holes or mounting points. Quality sprue cutters make flush cuts that minimize cleanup. While these tools represent investment, they repay their cost through improved results and reduced frustration across countless projects.
Display Solutions: Presenting Your Work Properly
A flawlessly built model deserves presentation that protects and showcases it effectively. Display accessories aren’t afterthoughts—they’re integral to how others experience your work and how well it survives long-term.
Engineering Secure Display Stands
Custom stands solve the fundamental challenge of displaying aircraft models: creating stable, attractive support that doesn’t detract from the subject. The balance point varies dramatically between aircraft types—a nose-heavy fighter sits very differently than a tail-dragger transport. Calculate the model’s center of gravity before designing support structures to prevent forward or aft tipping.
Material choice affects both aesthetics and functionality. Clear acrylic sheet offers near-invisibility, creating the illusion of flight without visual intrusion. Wood bases provide traditional elegance and easy customization through staining or painting. Metal stands deliver maximum strength for large or heavy models. Each material demands different fabrication techniques—acrylic requires specialized cutting and polishing, wood needs proper joinery, and metal fabrication often involves welding or brazing.
In-flight versus static configuration dramatically influences stand design. Wheels-up flying displays need robust support that distributes weight without creating stress fractures where the mount contacts the model. Landing gear-down presentations require stable bases that prevent toppling but allow viewing from all angles. Some builders integrate LED lighting into stands, illuminating cockpits or engine exhausts for dramatic effect, though this requires basic electrical skills and careful planning to conceal wiring.
Protective Display Cases
Finished models face numerous environmental threats: dust accumulation that embeds into paint, UV light damage that yellows clear parts and fades colors, physical contact that breaks delicate antennas and pitot tubes. Display cases provide comprehensive protection while maintaining visibility.
The acrylic versus glass decision involves trade-offs. Acrylic weighs less, doesn’t shatter dangerously, and machines easily for custom sizes, but scratches more readily and can develop haze over time. Glass offers superior clarity and scratch resistance but adds significant weight and breakage risk. Most modelers prefer acrylic for home displays and reserve glass for permanent museum-quality installations.
Dust seals matter more than many realize. Even small gaps allow dust infiltration that accumulates over months and years. Quality cases feature gaskets or overlapping joints that create barriers. For valuable models, consider cases with built-in humidity control—moisture fluctuations can fog clear parts or cause decal silvering over time.
Professional Presentation Elements
Nameplates and information plaques transform a model into a complete presentation, particularly for competition or museum display. Judges and viewers appreciate context: what aircraft is depicted, which squadron, what time period. Modern options range from laser-engraved metal plates that exude quality to printed laminate solutions offering color graphics and extensive text.
Typography choices communicate professionalism or undermine it. Select fonts appropriate to the historical era—Art Deco styles suit Golden Age aircraft, while clean sans-serif types work for jet subjects. Spelling errors on nameplates are permanent embarrassments; triple-check all text before committing to production. Base attachment methods should be reversible when possible, using museum putty or small magnets rather than permanent adhesives that prevent future modifications.
Specialized Techniques and Advanced Materials
Certain accessories and techniques occupy specialized niches but prove indispensable for specific applications.
Chemical Decal Softeners: Conforming to Complex Surfaces
Decals must conform perfectly to surface details—rivets, panel lines, compound curves—to avoid silvering or visible edges. Chemical softening solutions accomplish what water alone cannot, actually dissolving the decal film slightly so it snuggles into recesses.
These solutions come in various strengths. Mild formulas work for simple applications on flat surfaces, while aggressive versions tackle extreme compound curves like wheel wells or nose cowlings. Understanding the “wrinkle phase” prevents panic—strong softeners cause decals to wrinkle dramatically before settling into details. Resist the temptation to touch or adjust during this phase; the decal will smooth itself as the solution evaporates.
Layering solutions produces optimal results: apply setting solution first to adhere the decal firmly, then add softening solution to conform it to details. Multiple applications may be necessary for complex surfaces. Be cautious with acrylic paints—some aggressive softeners can damage or reactivate acrylic finishes, causing smearing or color lifting.
Metal Finishing Techniques
Aftermarket metal parts—gun barrels, antennas, landing gear—present unique finishing challenges. Non-porous metal surfaces reject paint without proper preparation. Metal primers aren’t optional; they create a chemical bond between metal and subsequent paint layers that mechanical adhesion alone cannot match.
Burnishing fluids offer an alternative to painting certain natural metal finishes. These chemical solutions darken brass to simulate steel or create tarnished effects on silver metals. The process is permanent and irreversible—test on scrap brass first to verify the desired tone.
Cleaning oxidation before priming prevents adhesion failure. Brass and white metal oxidize rapidly, forming surface layers that prevent primer bonding. A brief soak in vinegar solution or gentle scrubbing with a brass brush removes oxidation without scratching surfaces.
Engine Detailing: The Ultimate Challenge
Installing aftermarket engine assemblies represents one of modeling’s most demanding tasks. Detailed resin powerplants require precision fitting inside fuselages never designed to accommodate them. Plastic sidewalls often need careful thinning to create clearance without creating weak spots prone to cracking.
Radial engines present particular challenges. Wiring ignition harnesses from individual cylinders to the distributor requires steady hands and extreme patience. Propeller shaft alignment becomes critical when the assembly is visible—even slight misalignment screams “amateur work” to educated eyes. Nose weight considerations multiply with detailed engines; adding enough ballast to prevent tail-sitting without overloading the nose gear strut requires calculation and testing.
Painting individual cooling fins on cylinders tests brush control or airbrush masking skills. Consider applying base colors before assembly when possible, then touching up joints afterward—far easier than painting complete assemblies in situ.
Diorama Accessories: Context and Realism
Aircraft rarely existed in isolation. Contextualizing models with period-appropriate accessories and figures transforms static displays into historical narratives.
Historical Accuracy in Accessories
Ground equipment, fuel trucks, tool carts, and munitions must match the historical era of the aircraft they accompany. A Korean War F-86 Sabre paired with Gulf War-era ground equipment creates jarring anachronism that undermines authenticity. Research period photos to verify which accessories appeared together historically.
Weathering techniques differ for various materials. Wood equipment weathers through fading and grain raising, metal shows rust and chipped paint, rubber degrades through cracking and discoloration. Applying uniform weathering across dissimilar materials looks artificial—each substance ages distinctively.
Scale accuracy prevents the single most common diorama error. That perfect fuel bowser looks ridiculous if it’s 1/32 scale accompanying your 1/48 aircraft. Verify scale compatibility before purchasing, and be aware that some accessories are marketed imprecisely—measure if specifications seem questionable.
Figure Painting and Placement
Human figures provide invaluable scale reference and inject life into dioramas, but they also attract scrutiny. Poor figure work can undermine an otherwise excellent model. Flesh tone variation matters—humans aren’t uniformly colored plastic. Build up skin tones through transparent washes over a base color, adding shadows in recesses and highlights on raised areas.
The controversial “No Eyes” rule suggests leaving eyes unpainted rather than painting them poorly. At 1/48 scale and smaller, eyes occupy perhaps a square millimeter—attempting detailed iris painting often results in zombie-like stares that draw negative attention. A shadow wash across the eye area suggests depth without risking cartoonish results.
Posture and placement logic separates convincing scenes from awkward ones. Figures need purposeful poses—turning a wrench, looking at something specific, gesturing toward a colleague. The “floating feet” phenomenon occurs when figures don’t quite contact the ground plane convincingly; ensuring proper contact points and sometimes adding small cast shadows enhances realism dramatically.
Making Smart Investment Decisions
Aftermarket accessories range from five-dollar detail sets to hundred-dollar complete replacement assemblies. Evaluating the cost-to-benefit ratio prevents wasted resources and ensures money flows toward truly impactful upgrades.
Not all accessories deliver equal visual impact. Replacement seats often provide dramatic improvement over kit parts—they’re prominently visible through clear canopies and typically molded in simplified form in base kits. Aftermarket seats with photo-etched harnesses immediately elevate cockpit appearance. Conversely, replacement wheels usually offer marginal improvement unless the kit wheels are egregiously bad—they’re small, partially hidden, and typically molded quite well even in budget kits.
Vacuum-formed replacement canopies address one of injection molding’s persistent weaknesses: thick, distorted transparencies. Aftermarket canopies often provide crystal-clear optics that showcase detailed cockpits properly. However, they require careful trimming and fitting—assess whether your skills match the task before investing.
Metal gun barrels and antennas prevent one of modeling’s most common damage points: broken plastic barrels from handling. The investment is modest, installation straightforward, and durability improvement substantial. These accessories typically offer excellent value.
Consider fit compatibility before purchasing. Some aftermarket parts require significant modification for installation, effectively demanding advanced skills despite being marketed to general audiences. Manufacturer reputations vary—research reviews and ask experienced modelers about specific products before committing to expensive upgrades.
The path from box-stock builder to detail-oriented craftsperson winds through judicious accessory selection and tool investment. Start with accessories addressing your model’s most visible weaknesses, build skills gradually, and expand your equipment collection as techniques demand. The accessories and equipment covered here represent the full spectrum of what’s possible—but remember that even the finest aftermarket parts serve the fundamental goal of telling a compelling story through your model. Choose additions that enhance your narrative and match your current skill level, and you’ll find that each project pushes your capabilities further into this endlessly rewarding hobby.
A Modeler’s Guide to Lifelike Diorama Figures
Lifelike figures are not achieved by painting tiny details, but by creating the *impression* of detail with light and shadow. Stop painting pupils; use a dark wash to create natural eye sockets and shadows that the brain interprets as eyes….
Read more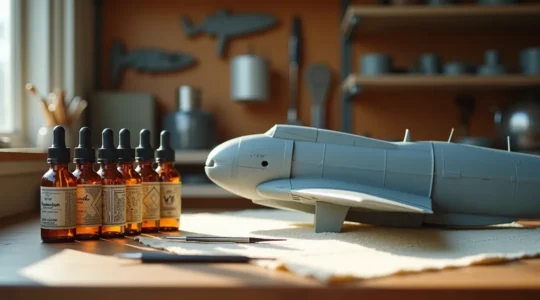
Micro Sol vs Mr. Mark Softer: Which Solvent Won’t Melt Your Decals?
The terrifying wrinkling of a decal under solvent is not a sign of failure, but a necessary chemical reaction you can master. Solvent “heat” is determined by its chemical base (mild acetic acid vs. aggressive alcohols), not magic. Wrinkling is…
Read more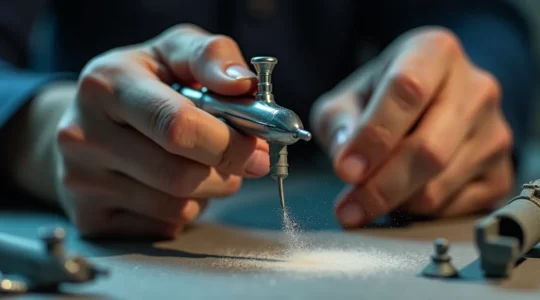
Mastering Trigger Control: Why Your Double-Action Airbrush Spits Paint?
In summary: Paint spitting is rarely random; it’s a predictable failure in the air-paint sequence, not a faulty tool. Mastering the “Air-On, Paint-On, Paint-Off, Air-Off” sequence is the single most important skill to prevent splattering. The quality of your paint…
Read more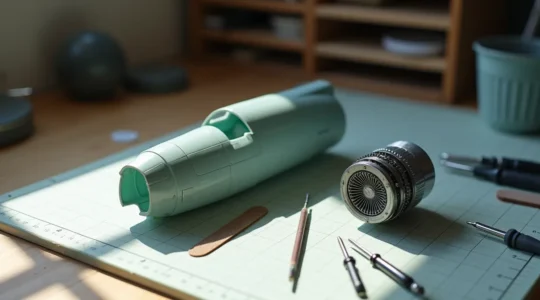
Surgical Procedure: How to Install Resin Engines Without Destroying Plastic Cowlings
The primary cause of failure when installing a resin engine is treating it as a simple assembly job, not the micro-engineering procedure it is. Success requires precise material removal to manage heat and stress, not just brute-force sanding. Engine alignment…
Read more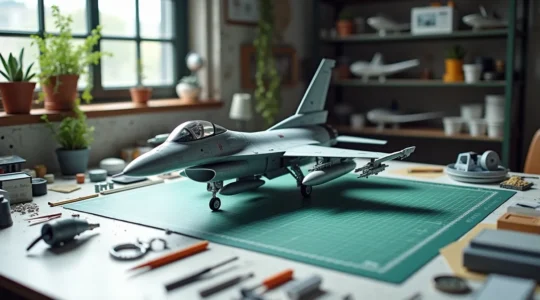
Aftermarket Upgrades: A Guide to the Best Visual ROI for Your Model Kit
The best aftermarket upgrades are not the most detailed, but those that fix a kit’s most visible flaws or dominate the viewer’s eye. Focus spending on high-visibility areas like landing gear, canopies, and prominent weapon systems. Factor in the “skill…
Read more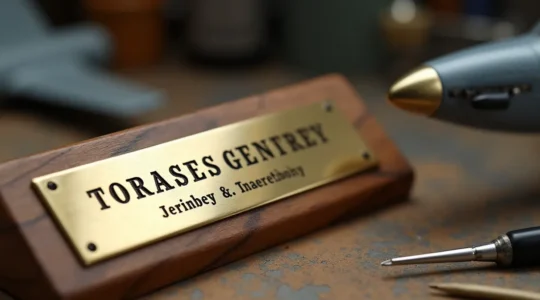
What Information Should You Include on Engraved Nameplates for Competition Entries?
A competition nameplate is not a decorative label; it is the primary piece of evidence a judge uses to assess your research and historical accuracy before even touching the model. Incomplete or inaccurate nameplates are a leading cause for elimination…
Read more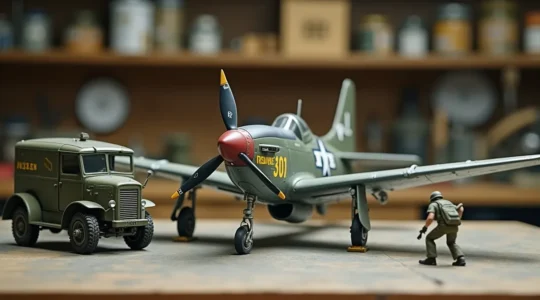
How to Pair Ground Support Equipment with Specific Aircraft Eras: A Historian’s Guide
The realism of an aircraft diorama is decided on the ground, not in the air. An aircraft model, no matter how perfectly built, looks like a toy if its support equipment is historically inaccurate in type, color, or condition. Authenticity…
Read more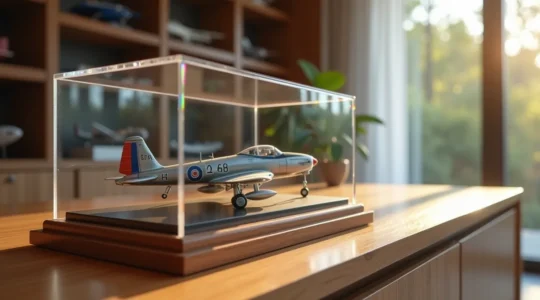
How to Select an Archival-Grade Acrylic Case to Prevent UV-Induced Yellowing on Your Models
The long-term preservation of your model aircraft hinges on selecting a case not as a mere dust cover, but as a scientific conservation tool against irreversible UV damage. UV radiation causes photo-oxidation, a chemical reaction that breaks down plastic polymers,…
Read more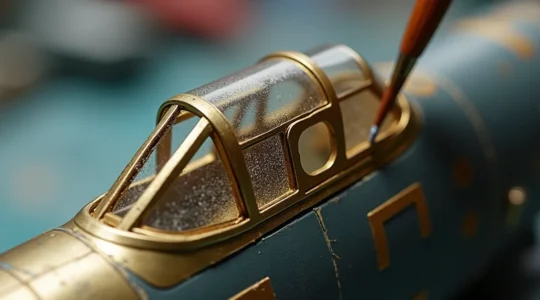
How to Paint Photo-Etched Brass So It Never Flakes Off
Paint flaking off photo-etched brass is not a paint problem; it is a fundamental surface adhesion failure. Brass is a non-porous metal with low surface energy that requires chemical and mechanical etching, not just cleaning, for paint to bond. Standard…
Read more
How to Engineer a Custom Display Stand: Secure and Aesthetic Support for Heavy Aircraft Models
Your heavy, detailed aircraft model deserves better than a wobbly plastic stand that risks long-term damage. This guide shifts the perspective from simple support to structural engineering, showing you how to design and build a custom stand that not only…
Read more