Achieving true historical accuracy for a specific aircraft requires abandoning the search for a single ‘truth’ and instead adopting the methodology of an archival detective.
- Discrepancies between official records and pilot logs are not errors to be dismissed, but clues to be investigated.
- Black and white photos are forensic documents; their secrets can be unlocked by understanding the properties of the film used to capture them.
Recommendation: The most authentic model is an evidence-based interpretation built by triangulating multiple, often contradictory, primary sources to tell the story of a specific airframe at a specific moment in time.
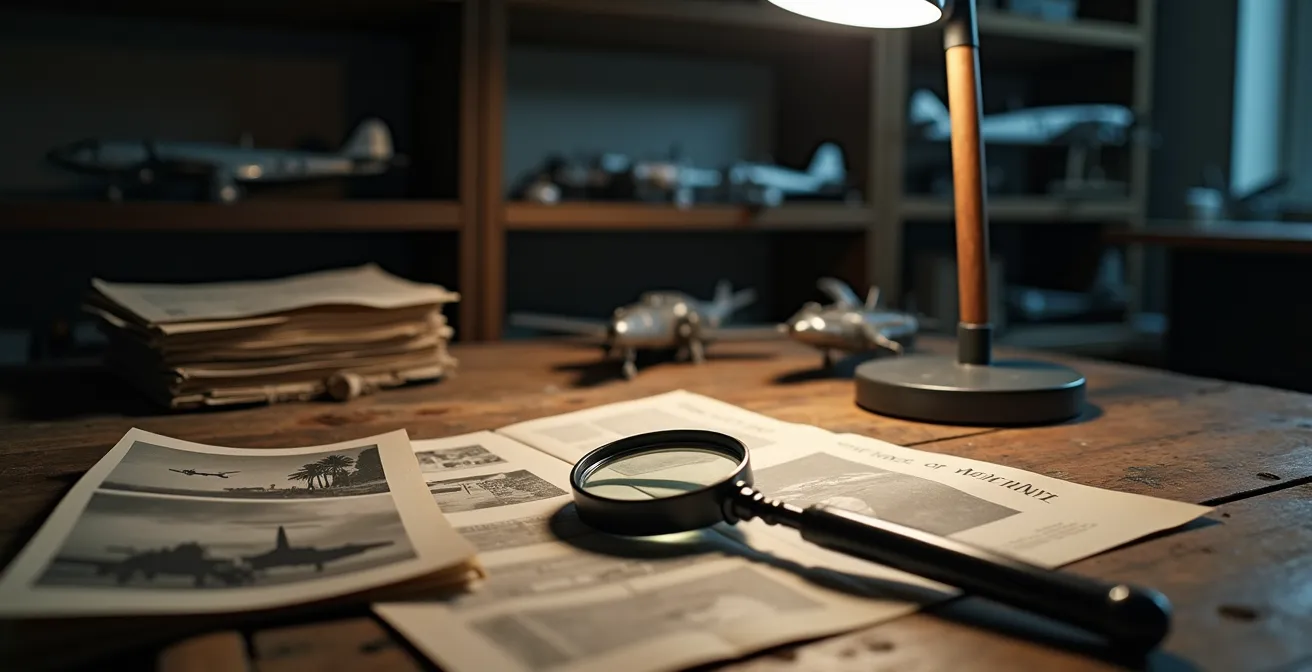
For the dedicated historian builder, the ultimate pursuit is not merely assembling a plastic kit, but recreating a tangible piece of history. The challenge escalates exponentially when the subject is not a famous ace, but a lesser-known pilot whose machine is poorly documented. You seek to model the exact P-47 flown by a specific pilot on a specific day, only to find that official records are silent, incomplete, or worse, contradictory. The squadron records show one serial number, but a blurry photograph hints at another. The available decals are generic, and the true color of the nose art is lost to the monochromatic haze of the past.
The common approach of relying on kit instructions, box art, or readily available aftermarket decals fails here. Many builders hit a wall, either compromising on accuracy or abandoning the project. This frustration stems from a flawed premise: that a single, perfect source of truth exists. It rarely does. The key is not to be a simple assembler of facts, but to become an archival detective, skilled in the art of source triangulation and interpretation.
This shift in mindset is crucial. It means treating every piece of information—from a pilot’s logbook entry to the grain of a photograph—as a clue, not a conclusion. It involves understanding the limitations of historical records and using those limitations to your advantage. This guide is not a simple list of websites; it is a methodology for historical investigation. It outlines how to deconstruct evidence, resolve conflicts, and build a compelling, evidence-based argument for the choices you make on your model.
We will explore the forensic process required to move past the dead ends of missing records. This article delves into the techniques for navigating conflicting documentation, interpreting the deceptions of period photography, and creating accurate markings from scratch, transforming your workbench into an investigative bureau.
Summary: Investigating an Aircraft’s History Beyond the Obvious
- Why pilot logbooks often contradict official squadron records?
- Orthochromatic film deception: is that nose spinner red, yellow, or black?
- How to Research Historical Liveries When Archival Photos Are Black and White?
- Why you should never trust color profile drawings without photographic proof?
- Why Modeling Prototype Aircraft Requires More Research Than Production Variants?
- How to combine generic decal sheets to create specific serial numbers?
- Inkjet vs Laser: which home printer works best for custom squadron codes?
- Replicating Hand-Painted Nose Art: Decals or Paint Brush?
Why pilot logbooks often contradict official squadron records?
The first major hurdle in niche aircraft research is the discovery of conflicting data between two seemingly authoritative sources: a pilot’s personal logbook and the official squadron or group records. A pilot might log flying aircraft “A” on a mission, while the unit’s operational record book states he flew aircraft “B”. The common reaction is to dismiss one as an error. An investigative archivist, however, sees this not as a problem, but as the starting point of a deeper inquiry. These discrepancies are rarely simple mistakes; they are symptoms of the complex realities of wartime operations.
Several factors contribute to these conflicts. Last-minute aircraft swaps due to mechanical issues were frequent, and a pilot might fill out his logbook from memory hours or days later, recalling his intended mount rather than the replacement. Clerical errors in official records, hastily compiled under stressful conditions, are also common. Furthermore, the “aircraft” itself could be a composite entity. An airframe might have its engine, wings, or tail replaced, leading to a situation where the identity and serial number on the fuselage do not match the maintenance history of its components. The official record might track the fuselage serial, while the pilot’s log might refer to the aircraft by a familiar name or a different number associated with its engine.
The key is to practice source triangulation. No single document holds the absolute truth. The goal is to collect multiple, varied data points to build a more resilient hypothesis. For instance, maintenance logs can corroborate an unrecorded engine swap, and personal diaries or letters from ground crew can provide context that official documents lack. As demonstrated in aeronautical engineering, cross-referencing multiple sources is standard practice. A comprehensive NASA study highlights how dynamic model tests are correlated with flight-testing results to validate predictions, a principle directly applicable to historical research. By gathering more evidence, you are not seeking a single “correct” answer, but the most plausible explanation that accounts for all the available clues.
Action plan: Resolving logbook and record conflicts
- Document the discrepancy with specific dates and serial numbers from both the logbook and the official records.
- Check maintenance logs for the specific period to identify any repairs, engine swaps, or major part replacements that could explain the conflict.
- Search for ground crew diaries or personal letters from the squadron that might mention informal details or explain the discrepancy.
- Compare the records with those of sister ships from the same squadron and time period to identify patterns or squadron-wide reporting habits.
- Consult any available photographic evidence from the specific dates in question to visually verify which aircraft was actually flown or its configuration.
Orthochromatic film deception: is that nose spinner red, yellow, or black?
Once you have a photograph, the investigation has only just begun. A black and white photo is not a perfect representation of reality; it is an interpretation shaped by the chemical properties of the film. For subjects from the 1920s through the mid-1940s, the most common film type was orthochromatic. Understanding its behavior is a critical act of photographic forensics. Unlike modern panchromatic film which is sensitive to all colors of the visible spectrum, orthochromatic film has a significant blind spot: it is largely insensitive to red and yellow light, while being highly sensitive to blue and violet light.
This chemical quirk has dramatic consequences for the historical researcher. On an orthochromatic print, a bright red object will render as nearly black. A vibrant yellow will appear as a very dark grey. Conversely, a sky blue will appear as a very light, almost white-washed grey. This is why, in many pre-1945 photos, American national insignia appear to have a dark, almost black circle instead of a red one, and the sky often looks pale and featureless. A modeler who mistakes a dark spinner on an orthochromatic photo for black could be completely wrong; it is just as likely to have been bright red. The only way to hypothesize correctly is to understand the medium.
Comparing the tonal values of known colors within the same photograph is the key. For example, if the red of a national insignia appears as the same shade of dark grey as the aircraft’s spinner, you can build a strong case that the spinner was also red. If the blue of the insignia appears very light, you have a strong indicator that the film was orthochromatic. This forensic analysis transforms a simple photo into a rich data set, allowing you to deduce colors that are otherwise lost to time.
The table below breaks down the critical differences between film types, providing a foundational tool for any serious researcher attempting to interpret historical photographs. It is essential for avoiding common misinterpretations of camouflage and markings.
This table demonstrates the critical differences in color rendering based on the film type used. Understanding these properties is essential for any researcher looking to accurately interpret historical photographs.
| Film Type | Red Sensitivity | Blue Sensitivity | Typical Use Period | Color Interpretation Notes |
|---|---|---|---|---|
| Orthochromatic | Very Low | High | 1920s-1940s | Red appears black, blue appears light gray |
| Panchromatic | Normal | Normal | 1940s-present | More accurate tonal representation |
| Infrared | Very High | Low | Special use | Vegetation appears white, sky appears black |
How to Research Historical Liveries When Archival Photos Are Black and White?
When photographic evidence is ambiguous or entirely monochrome, the archival detective must broaden their search to non-photographic primary sources. These documents, while less immediate, often contain the explicit color information that photos lack. The key is to think about the entire operational ecosystem of the aircraft. A plane is not just flown; it is maintained, repaired, supplied, and commanded. Each of these activities generates a paper trail that may hold the clues you need.
The most fruitful non-photographic sources include:
- Maintenance Logs: A log entry for “repainted starboard wing per T.O. 07-1-1” is a goldmine. It not only confirms a repaint but points you to the specific technical order that dictated the camouflage pattern and paint colors to be used.
- Official Directives: Air forces issued specific camouflage and markings directives for different theaters of operation and time periods. Cross-referencing an aircraft’s deployment date and location with the relevant official painting instructions can narrow down the possibilities significantly.
- Supply Chain Records: Knowing which paint colors were available at a specific base at a specific time is a powerful clue. If records show a base in the Pacific only received shipments of Olive Drab and Neutral Gray, it’s highly unlikely an aircraft there would be painted in RAF Dark Earth.
- Personal Accounts: Pilot logbooks, ground crew diaries, and personal letters can contain invaluable, informal notes. A pilot might mention “the new bird with the wasp nose art,” or a ground crewman might write home about “spending all day painting invasion stripes.”
Another powerful technique is the sister ship analysis. Squadrons often received aircraft in batches and applied unofficial markings or paint schemes with a degree of consistency. If you can find a clear, color photo of an aircraft with a serial number close to your subject, from the same squadron and time period, you can make a well-supported inference that your aircraft was marked similarly. This method is a core part of the meticulous research that defines the hobby, contributing to the preservation of aviation history. As highlighted by modeling communities, this extensive research to ensure historical accuracy is a valuable skill developed through scale modeling.
Why you should never trust color profile drawings without photographic proof?
In the world of modeling, the color profile—a side-view illustration of an aircraft’s paint scheme and markings—is a ubiquitous and seductive resource. It presents a clean, definitive, and easy-to-understand depiction. However, for the serious researcher, these profiles must be treated with extreme caution. They are not primary sources; they are, at best, secondary interpretations and, at worst, artistic fabrications.
The creation of a color profile is often a multi-layered process of interpretation. As the editorial team at a leading publication points out, the chain of information can be tenuous. As the Scale Aircraft Modelling team notes, “Most profiles are not primary sources. They are often an artist’s interpretation of a historian’s written description, which itself is an interpretation of a blurry B&W photo.” Each step in this chain—from photo to description, from description to illustration—introduces the potential for error, misinterpretation, or artistic license. An artist might guess at the color of a spinner, simplify a complex nose art, or apply a standard marking that wasn’t actually present on that specific airframe.
Furthermore, color profiles often fail to capture the concept of temporal specificity. An aircraft’s appearance is not static. A livery can change subtly or dramatically over time, a fact often lost in a single, static drawing. The following case study illustrates this point perfectly.
Case Study: The Evolution of the Pan Am Livery
A detailed analysis of Pan American World Airways’ livery evolution is a powerful lesson in the importance of dating reference materials. The famous “Billboard” livery did not appear in a single, final form. An in-depth study of the Pan Am livery shows it went through multiple versions. An early version featured the large titles but retained an exposed polished aluminum belly. A subsequent version modified the nosecone area, and the final, most recognized version was an all-white fuselage. A single profile drawing might depict any one of these versions, but without a date or photographic corroboration, a modeler could easily apply the wrong scheme to an aircraft from a specific year.
A color profile should be used as a potential roadmap, not as the destination itself. Use it to guide your search for photographic evidence. If a profile suggests a unique marking, your mission is to find the photo that proves or disproves its existence. The profile is a hypothesis to be tested, not a fact to be copied.
Why Modeling Prototype Aircraft Requires More Research Than Production Variants?
Modeling a prototype or test aircraft is one of the most demanding challenges a historian builder can undertake. It requires a level of research far exceeding that for a standard production variant because a prototype is, by its very nature, a constantly evolving entity. Unlike a production aircraft that rolls off the assembly line in a standardized configuration, a prototype is a fluid collection of ideas being tested, modified, and often discarded in rapid succession.
The core of the challenge is extreme temporal specificity. You are not modeling “the” XF-91 Thunderceptor; you are modeling the Thunderceptor as it appeared on a specific date, during a specific test flight. As contributors to advanced modeling forums often note, this is a critical distinction: “Prototypes are not static. The airframe you want to model from a May photo could have a different tail, canopy, and engine cowling in a photo from June.” An undocumented modification made overnight between two test flights could render a previously accurate model incorrect.
This constant state of flux means that standard documentation is often insufficient. Your research must track the aircraft’s configuration chronologically, cross-referencing test pilot reports, engineering change orders, and dated photographs. The research process mirrors the engineering process itself, where every modification is documented. For instance, extensive documentation from NASA on dynamic testing shows that free-flight models are used to validate theoretical analyses, and the characteristics of these models must correspond precisely to the full-scale aircraft’s configuration at the time of a given test. This level of detail is precisely what the prototype modeler must replicate.
For a prototype, every part is a potential variable: engine cowlings are swapped, wingtips are modified, sensor probes are added and removed, and control surfaces are re-profiled. The paint scheme itself can be a patchwork of primer, natural metal, and temporary markings. The modeler’s task is to freeze a single moment in this chaotic evolution and document every feature present at that exact time. This makes modeling a prototype the ultimate test of an archival detective’s skills.
How to combine generic decal sheets to create specific serial numbers?
After painstaking research, you have identified the correct serial number for your subject aircraft. The problem? No decal manufacturer produces it. This is a common dead-end for many, but for the archival detective, it is a practical challenge with a methodical solution: creating custom serials by “splicing” characters from generic decal sheets.
This technique, often called “decal surgery,” requires precision and a good eye for typography. The first step is to correctly identify the font style used by the specific air force during that period. The blocky, stenciled characters used by the USAAF are vastly different from the rounded, continuous-line style of the RAF. You must acquire generic decal sheets of numbers and letters (often called “alphabet sheets”) that match this specific font style. Focus on sheets that provide a good variety of numbers, as some digits are more useful for splicing than others.
The process of creating a specific number from parts of others requires careful planning. Here is a proven workflow:
- Digital Planning: Scan or photograph your generic decal sheet at high resolution. In a simple image editing program, you can “cut” and “paste” the digital numbers to form your target serial. This allows you to plan all your cuts and splices without touching the actual decals.
- Surgical Splicing: Using a brand-new hobby knife blade and a glass cutting surface for maximum sharpness and control, carefully cut the individual digits or parts of digits you need. For example, a “2” can often be created by combining the top half of a “3” with the bottom line of a “5.” A “6” can become a “9” when flipped.
- Wet Palette Management: As you cut the tiny decal pieces, keep them on a “wet palette”—a damp sponge covered with a piece of parchment paper. This keeps the decals from drying out or curling while you work, giving you ample time to assemble your custom serial number on the model’s surface.
This process transforms you from a consumer of aftermarket products to a creator of bespoke markings. It is the final step in translating your historical research into a physical, accurate detail. It is the tangible result of your investigation, ensuring that your model carries the precise identity you worked so hard to uncover.
Inkjet vs Laser: which home printer works best for custom squadron codes?
Creating your own squadron codes, nose art, or other unique markings requires printing custom decals. The two primary home printing technologies, inkjet and laser, each present a distinct set of advantages and disadvantages for this highly specialized task. The choice is not about which is “better” overall, but which is the best fit for your specific needs, budget, and desired outcome.
An inkjet printer is often the entry point for many modelers due to its low initial cost and exceptional color accuracy. Inkjets excel at blending colors and producing photographic-quality images, which is ideal for complex, multi-hued nose art. A significant advantage is their ability to print on white decal paper, which is essential for creating opaque markings that will be placed over dark camouflage colors. However, inkjet decals are not waterproof out of the printer. They absolutely require a clear sealant (like a decal bonder or a clear acrylic spray) to be applied over the printed sheet to protect the ink from dissolving in water during application.
A laser printer, while having a higher initial cost, offers superior convenience and durability. Because laser printers use toner that is fused to the paper with heat, the resulting print is waterproof and scratch-resistant immediately. This eliminates the need for a separate sealing step, streamlining the workflow. Lasers also produce exceptionally sharp, crisp lines, making them the superior choice for printing fine text, data stencils, and small serial numbers. The primary drawback is that most affordable laser printers cannot handle white toner, meaning they can only print on clear decal paper. This makes them unsuitable for creating light-colored or white markings for dark surfaces.
The following table provides a direct comparison to aid in your decision-making process, balancing the trade-offs between cost, quality, and convenience.
| Feature | Inkjet | Laser | Best For |
|---|---|---|---|
| Initial Cost | Low ($50-200) | Medium ($200-500) | Budget considerations |
| Decal Paper Options | Clear and White | Clear only | Inkjet for dark surfaces |
| Sealant Required | Yes (essential) | No | Laser for convenience |
| Fine Line Quality | Good with vector graphics | Excellent | Laser for small text |
| Color Accuracy | Excellent with calibration | Good | Inkjet for precise colors |
Key takeaways
- Historical accuracy is not about finding a single truth, but about building an evidence-based interpretation from multiple, sometimes conflicting, sources.
- Understanding the technical limitations of primary sources, such as the color sensitivity of orthochromatic film, is a critical research skill.
- Secondary sources like color profiles are hypotheses to be tested with primary evidence, not facts to be copied without question.
Replicating Hand-Painted Nose Art: Decals or Paint Brush?
Replicating unique, hand-painted nose art is often the final and most personal touch on a historical model. These markings, ranging from simple cartoons to elaborate pin-ups, were the folk art of the air war, and their authenticity lies in their hand-made character. The modeler faces a critical choice: replicate this art with the clean precision of a custom decal or embrace the challenge of hand-painting it with a brush.
Using a custom decal is the most accessible method, especially for complex, professional-looking artwork. By finding a high-resolution image of the original art, you can clean it up in image-editing software, scale it, and print it. This approach guarantees a high-fidelity reproduction of the source image. Its main drawback is that it can sometimes look too perfect, lacking the subtle imperfections and brush strokes of the original hand-painted piece. An intermediate technique is to apply the decal and then use weathering techniques or a light touch of paint to “chip” it or blend it into the surrounding surface, breaking up its perfect finish.
Hand-painting the nose art is the most challenging but potentially most rewarding method. It is best suited for replicating simpler, more “amateur” art where the original was clearly painted by a non-professional. This approach allows you to replicate the authentic texture, brush strokes, and slight inconsistencies of the original. The key is to create a precise template. Print a scaled-down version of the art on regular paper, and use it as a reference or even as a pounce-pattern to transfer the basic outlines to the model. This method requires significant artistic skill and patience but yields a result with unparalleled authenticity.
Ultimately, a hybrid approach often yields the best results. A complex design might be started with a basic decal for the main colors and shapes, with the fine details, outlines, and weathering effects then hand-painted over the top. The table below compares these techniques to help guide your decision based on the art’s complexity and your own skill level.
As this table from a modeling authority shows, there are trade-offs for each technique in terms of skill, time, and authenticity.
| Technique | Skill Level Required | Time Investment | Best For | Authenticity Level |
|---|---|---|---|---|
| Custom Decal Only | Beginner | Low (2-3 hours) | Complex professional art | Good |
| Hand-Painted Only | Advanced | High (10+ hours) | Simple amateur art | Excellent |
| Hybrid (Decal + Paint) | Intermediate | Medium (5-6 hours) | All types | Outstanding |
| Weathered Decal | Intermediate | Low (3-4 hours) | Battle-worn appearance | Very Good |
Your finished model is more than a replica; it is a meticulously researched historical document in three dimensions. Every decal you placed, every color you chose, and every detail you included is a statement backed by evidence. By embracing the role of the archival detective, you have not just built a model; you have resurrected a story.