The fear of crashing a model you’ve spent hundreds of hours building is the biggest barrier for static modelers wanting to fly. The solution isn’t just practice, but a fundamental mindset shift: stop thinking of your plane as a fragile display piece and start engineering it as a resilient flying system. This guide reframes core RC principles through a craftsman’s lens, teaching you to build for flight, manage risks systematically, and turn your precision skills into an advantage in the air.
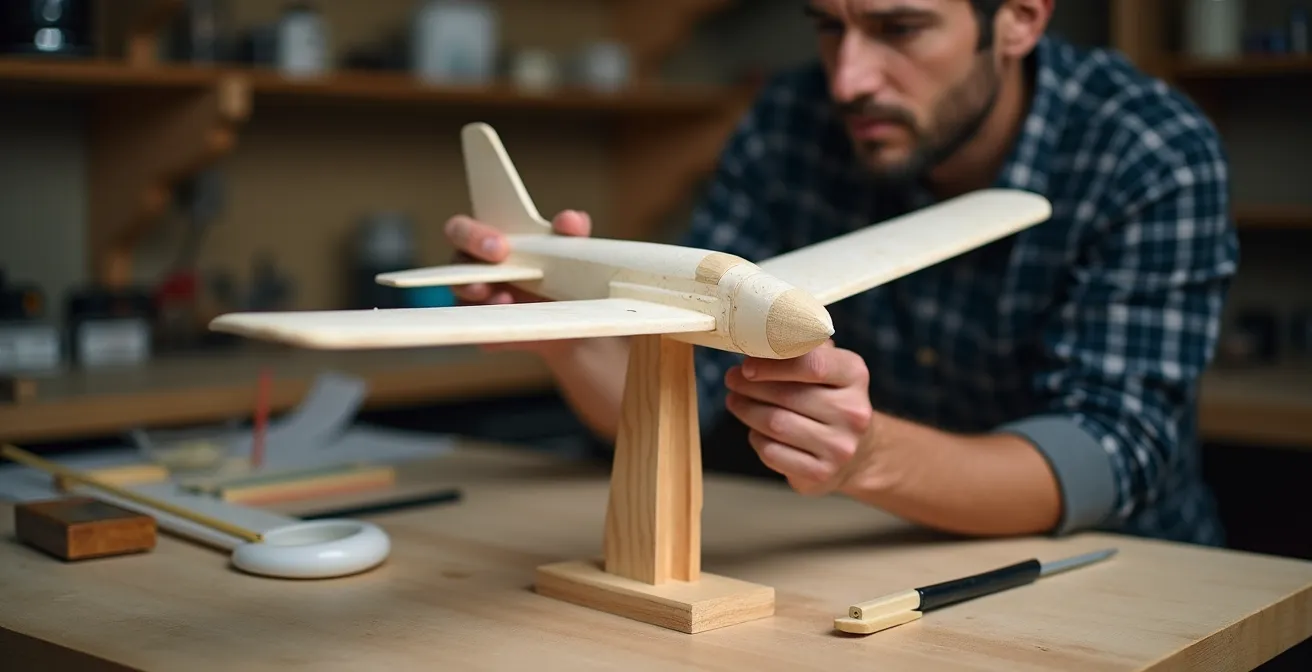
As a static modeler, your hands know the language of patience and precision. You can replicate every rivet on a 1:48 scale P-51 Mustang and weather a cockpit to perfection. But the thought of launching that masterpiece into the sky, where gravity is unforgiving, can be paralyzing. The joy of creation is suddenly overshadowed by the fear of instant destruction. You’ve heard the advice: get a simulator, join a club, buy a cheap foam plane. While sound, this advice often misses the core emotional hurdle—the deep connection you have to the thing you’ve built.
What if the skills you already possess are the very foundation for becoming a confident RC pilot? The transition from static to flight is less about learning a new hobby from scratch and more about extending your existing craft. It’s about applying your meticulous attention to detail not just to the surface finish, but to the invisible forces of aerodynamics and the vital electronic systems within. Your ability to work cleanly and methodically is a massive advantage.
This guide offers a different perspective. Instead of focusing on what you might lose, we’ll focus on how to build for resilience and fly with intelligence. We will deconstruct the process, turning fear into a structured plan. We’ll explore why a “nose-heavy plane flies forever,” how to manage your internal components with the same care you give to a canopy, and why your first flying model should probably be one you *didn’t* build yourself.
This article will walk you through a clear, step-by-step progression. We will cover the foundational principles of aerodynamics, system reliability, risk management, and pre-flight rituals, all framed for someone who values craftsmanship above all else. Prepare to see your hobby in a whole new dimension.
Summary: Your Flightpath from Static Builder to RC Pilot
- Why a tail-heavy plane flies once, but a nose-heavy plane flies forever?
- How to route servo wires so they don’t interfere with control rods?
- Build or Buy: is it better to learn flying on a model you didn’t build?
- LiPo Safety: the storage mistake that burns down workshops
- The 5 control surface checks to perform before every takeoff
- Balsa Wood Selection: How to Choose the Right Density for Flying Model Components?
- How to Build Custom Display Stands That Support Heavy 1:How to Start Building Static Aircraft Models Without Spending Over $100?
- How to Strengthen Plastic Landing Gear Legs for Heavy Resin Conversions?
Why a tail-heavy plane flies once, but a nose-heavy plane flies forever?
This old adage is the single most important piece of wisdom in RC aviation, and it’s rooted in the physics of stability. The Center of Gravity (CG) is the balance point of your aircraft. For an airplane to be stable, this point must be ahead of the Center of Lift (the point where the wing generates its lift). Think of it like a weather vane: the heavy arrowhead (the nose of your plane) always points into the wind, keeping it stable. If the tail is too heavy (a tail-heavy CG), the plane becomes inherently unstable. It will want to swap ends in the air, leading to a violent, unrecoverable stall and the dreaded one-way flight.
A slightly nose-heavy plane, on the other hand, is forgiving. It will have a natural tendency to lower its nose and pick up speed, preventing a stall. For a new pilot, this is a lifesaver. You have time to correct, and the plane actively helps you maintain flying speed. The recommended Center of Gravity position typically falls within 25-33% of the wing chord from the leading edge. For your first flights, always aim for the forward end of that range. You can always adjust it later for more aerobatic performance once you are comfortable.
As a static modeler, you have an eye for precision. Apply it here. Don’t guess. Your model’s plans will specify the correct CG. Before you even think about taking off, support the model at those points with your fingertips or a balancing jig. If the tail drops, it’s dangerously tail-heavy. Add weight to the nose or shift components like the battery forward. If the nose drops slightly, you’re in the safe zone. This isn’t just a suggestion; it’s the fundamental law of a repeatable flight.
How to route servo wires so they don’t interfere with control rods?
Your skill in creating clean, detailed cockpits translates directly to building a reliable RC aircraft. The inside of your fuselage should be treated with the same care as the outside. A “rat’s nest” of wiring is not just messy; it’s a primary cause of in-flight failure. Wires can snag on servo arms, jam control rods, or create radio interference that causes a complete loss of control. A tidy interior is a safe interior.
The core principle is separation and security. Keep high-current wires (from the battery to the ESC) separate from signal wires (from the receiver to the servos) to prevent electronic “noise.” Route all wiring away from moving parts. Use channels, guides, or simply dabs of hot glue or small zip ties to secure wires to the fuselage walls. Imagine the g-forces in a tight turn; a loose wire will not stay where you left it. When routing wires through fuselage formers, protect them from chafing against the sharp balsa or plywood edges with a piece of tubing or a grommet.
This is where your craftsman’s mindset gives you an edge. Plan your wiring layout before you install the components. Think about serviceability: leave a small “service loop” of extra wire near each component. This makes it dramatically easier to replace a servo or receiver without having to rip out your entire installation. Your goal is to create a system that is not only functional but also clean, logical, and easy to inspect. A well-organized fuselage is a clear sign of an experienced builder.

As you can see in a professionally built model, every wire has a purpose and a place. Braided sleeves can bundle wires running long distances, and clear heat shrink can protect solder joints. This isn’t just for looks; it’s about building a resilient system engineered for flight. A snagged control rod is a guaranteed crash, but it’s one that is 100% preventable on the workbench.
Build or Buy: is it better to learn flying on a model you didn’t build?
This is the most critical strategic decision you will make, and as a flight instructor, my advice is unequivocal: do not learn to fly on a plane you built from scratch. The emotional investment is simply too high. Crashing is an inevitable part of learning, and the pain of watching months of your hard work shatter in seconds can be enough to make you quit the hobby forever. You need to separate the skill of building from the skill of flying, at least initially.
The solution is the “Three-Plane Philosophy,” a structured progression that manages both technical and emotional risk.
- The Sacrificial Trainer (RTF): Your first plane should be a “Ready-to-Fly” (RTF) foam trainer. These are inexpensive, incredibly durable, and designed to be stable and self-correcting. You can, and will, crash it. And when you do, you’ll fix it with some glue and be back in the air in an hour. This plane’s sole purpose is to teach you muscle memory, orientation (which way to move the sticks when the plane is flying towards you is famously tricky), and the basics of flight without fear.
- The Bridge (ARF): Once you are a competent pilot, your second plane should be an “Almost-Ready-to-Fly” (ARF) balsa model. Here, you’ll install the motor, servos, and receiver yourself. This bridges your building skills with your new flying skills. It will fly more like your scratch-built masterpiece but still won’t carry the same emotional weight if something goes wrong.
- The Masterpiece (Your Scratch-Build): Only after you can confidently fly and land the ARF model should you commit your beautiful, scratch-built creation to the skies. By then, flying will be second nature, and you can focus on enjoying the magnificent result of your craftsmanship.
This deliberate approach removes the fear and allows you to focus on one skill at a time. The comparison is clear: buying a trainer gets you in the air faster and with far less at stake, which is the perfect environment for learning. A review of options in resources for new pilots often highlights this distinction.
| Aspect | Buy RTF/ARF Trainer | Build From Scratch |
|---|---|---|
| Learning Curve | RTF packages include installed radio system and transmitter | Must learn construction before flying |
| Time to First Flight | Same day to 1 week | Several weeks to months |
| Emotional Investment | Low – easier to accept crashes | High – painful to crash your creation |
| Cost of Mistakes | $100-200 for replacement | 100+ hours of work lost |
| Repair Skills | Learned after flying basics | Learned during building |
| Flight Focus | 100% on learning controls | Split between build quality concerns and flying |
LiPo Safety: the storage mistake that burns down workshops
As a craftsman, you respect your tools. In the world of electric RC flight, the Lithium Polymer (LiPo) battery is your most powerful and most dangerous tool. It holds an immense amount of energy in a small package, and disrespecting its chemistry can lead to catastrophic fire. The single biggest mistake builders make is storing batteries fully charged. A full LiPo is like a compressed spring, full of potential energy and chemically volatile. Storing it this way for more than a day or two causes internal degradation, swelling (puffing), and dramatically increases the risk of a spontaneous fire.
The rule is simple: always store your LiPo batteries at a storage charge. This is a state of equilibrium for the battery’s chemistry, making it far more stable. Most modern RC battery chargers have a dedicated “storage” function that will automatically charge or discharge the battery to the correct level. The ideal voltage is 3.8V per cell (within a 3.7-3.85V range). Never store batteries fully charged (4.2V/cell) or fully empty (below 3.0V/cell). This discipline is as crucial as any building technique you’ve learned.
Furthermore, physical storage location is critical. Never keep your batteries in your model or just lying on a wooden workbench. They should be stored in a fire-resistant container in a well-ventilated area away from flammable materials. Military surplus ammo cans are a popular and effective choice, but they require a critical modification: drilling small vent holes in the lid to prevent a pressure explosion in the event of a battery failure. Your primary line of defense, however, is a simple LiPo safety bag for both charging and storage.
Your LiPo Fire Prevention Checklist
- Voltage Check: Keep battery voltage between 3.7V and 3.85V for storage. Never store a fully charged or over-discharged battery.
- Safe Location: Store batteries in a well-ventilated area, away from any flammable materials like balsa wood, paint, or thinners.
- Containment: Use a dedicated LiPo battery safety bag or a modified ammo can for both charging and long-term storage.
- Physical Inspection: Before every charge, inspect each battery for any signs of swelling, physical damage, or loose connectors. If you see any, safely discharge and dispose of the battery.
- Voltage Limits: During use, never let a cell’s voltage drop below 3.0V under load, and never charge it beyond 4.2V.
The 5 control surface checks to perform before every takeoff
Your beautiful model is on the runway, the motor is humming, and your heart is pounding. This is the moment of truth. But before you advance the throttle, you must perform one last ritual. As a builder, you can think of the pre-flight check as the final quality inspection. It’s the methodical process that ensures the systems you built on the bench will work as intended in the air. Skipping this can turn a masterpiece into a pile of splinters before it even leaves the ground.
This isn’t a casual glance; it’s a deliberate, five-point check of your control systems.
- Control Direction Test: This is the most vital check. With the transmitter on and the plane powered up, move the control sticks and watch the surfaces. Right aileron stick should make the right aileron go up and the left go down. Pulling the elevator stick back should make the elevator go up. Left rudder stick should make the rudder move left. It is shockingly easy to reverse a channel in your transmitter setup. A reversed control surface will cause an immediate, uncontrollable crash on takeoff. Verify this every single time.
- Throw & Expo Check: Ensure your control rates are set correctly. For a first flight, you should always be on “low rates,” which reduces the maximum travel of the control surfaces. This makes the plane less sensitive and easier to control. Also, confirm that you have “exponential” (expo) programmed in, which softens the stick response around the center, preventing you from over-controlling the plane with small, nervous thumb movements.
- CG Re-Check: You balanced the plane perfectly on the bench, but did you use the exact battery you’re flying with, placed in the exact right spot? Pick the plane up by your marked CG points one last time. It takes five seconds and can save your airplane. Many builders mark the correct battery position inside the fuselage with a silver pen for consistent placement every time.
- Failsafe Test: What happens if your transmitter dies or you fly out of range? The failsafe setting on your receiver dictates the controls’ positions. Test it on the ground. With the propeller removed for safety, power everything up, advance the throttle slightly, and then turn your transmitter off. The motor must cut immediately, and the control surfaces should move to a pre-set neutral or slight glide position.
- Security Check: Do a final physical check. Are the wings securely attached? Is the battery hatch latched? Are all control linkages (clevises) properly secured? Give the propeller a gentle tug to ensure it’s tight on the motor shaft.
Balsa Wood Selection: How to Choose the Right Density for Flying Model Components?
As a static modeler, you have an intimate relationship with wood. You understand its grain, its flexibility, and how to shape it. This knowledge is a huge advantage, because in a flying model, not all balsa is created equal. Using the wrong density of balsa in the wrong place is a classic beginner mistake. A tail built from heavy, hard balsa will create a tail-heavy nightmare, while a wing spar made from overly light, soft balsa will snap under the first high-G turn. Building for flight is a constant negotiation between strength and weight.
Your goal is to build a structure that is strong where it needs to be and light everywhere else. The tail, for example, is a long way from the CG, so every gram saved there is worth five grams saved at the nose. Therefore, tail surfaces like the vertical and horizontal stabilizers should be built from the lightest, “contest grade” balsa you can find. Conversely, high-stress components like main wing spars, landing gear mounts, and firewalls require the hardest, densest balsa, or even a stronger material like basswood or spruce.
Get into the habit of sorting your balsa by density. You don’t need expensive tools; a simple gram scale and your own hands are enough. When you buy a stack of balsa sheets, weigh each one. The lighter sheets are your gold for non-structural parts like fuselage stringers, wing ribs, and tail surfaces. The heavier, stiffer sheets are reserved for load-bearing structures. Perform a gentle flex test with your fingers; you will quickly develop a feel for the difference between a stiff sheet suitable for a leading edge and a softer one perfect for fuselage sheeting. This tactile selection process is a skill you can master.
This table serves as a general guide. As you build, you’ll develop an intuitive sense for matching the right piece of wood to the right job, ensuring your aircraft is both light and robust.
| Component | Density Range | Wood Type | Alternative Materials |
|---|---|---|---|
| Wing Sheeting/Ribs | 6-10 lb/ft³ | Contest Grade (Light) | Foam sheets |
| Fuselage Formers | 10-14 lb/ft³ | Medium Balsa | Plywood |
| Leading Edges | 10-14 lb/ft³ | Medium Balsa | Hardwood dowels |
| Spars/Landing Gear Mounts | 14+ lb/ft³ | Hard/Dense Balsa | Basswood, Spruce, Carbon fiber |
| Tail Surfaces | 6-10 lb/ft³ | Contest Grade (Light) | Depron foam |
How to Build Custom Display Stands That Support Heavy 1:How to Start Building Static Aircraft Models Without Spending Over $100?
Your experience building custom display stands and jigs for your static models is more valuable than you think. You already possess the precision skills needed to create essential flightline equipment that many beginners overlook. A well-built model needs to be handled and supported correctly on the workbench and at the field, and your building skills can be leveraged to create gear that is far superior to simply balancing a model on a cardboard box.
Think beyond a simple display stand. Your first critical project should be a CG balancing rig. While fingertips work, a dedicated stand is far more accurate and repeatable, especially for larger or unconventionally shaped models. You can build a simple pivot-point rig from wood scraps that will allow you to balance your model with scientific precision. This tool turns the critical task of finding the CG from a guessing game into a reliable measurement.
Next, consider building a foam or wood cradle that holds your model securely upside down on your workbench. Installing electronics, routing wires, and connecting control linkages is infinitely easier when the model isn’t rocking or threatening to fall over. This is a simple project, but it protects your model from hangar rash (damage that occurs on the ground) and makes the building process more enjoyable. Some of the most innovative RC tools, like digital weight and balance meters, were born from builders applying their engineering skills to solve these practical problems, as noted by resources like Model Aviation.
Finally, a portable field stand is invaluable. It keeps your beautiful model off of wet grass or abrasive pavement during pre-flight checks and battery changes. You can design one that is lightweight, collapsible, and perfectly tailored to your aircraft’s fuselage. By using your existing skills to build this support equipment, you are not only making the hobby easier and safer, but you are also reinforcing the mindset of a systems-oriented builder—someone who thinks about the entire lifecycle of the model, not just its appearance on a shelf.
Key Takeaways
- Your fear is valid; do not learn to fly on a plane you have a deep emotional attachment to. Use a disposable foam trainer first.
- The Center of Gravity (CG) is not a suggestion; it is the most critical factor for a stable first flight. A nose-heavy plane is flyable; a tail-heavy plane is not.
- Apply your craftsman’s precision to the “invisible” parts: clean wire routing, secure electronics, and rigorous LiPo battery safety are non-negotiable.
How to Strengthen Plastic Landing Gear Legs for Heavy Resin Conversions?
As a static modeler, you might be used to detailed but fragile landing gear that only needs to support the model’s weight on a shelf. In RC, the landing gear must survive repeated landings, which can impart forces many times the aircraft’s static weight. A common failure point on many ARF (Almost-Ready-to-Fly) kits is the plastic landing gear, which is often too flexible or brittle to handle anything but the gentlest of touchdowns. This is another area where your builder’s instinct to improve and reinforce is a major asset.
There are several proven methods for strengthening stock landing gear or preparing a model for the increased weight of a larger battery or other modifications—much like a heavy resin conversion in the static world. The most common technique is to embed a metal rod. You can drill through the core of a plastic strut and epoxy a length of music wire or a carbon fiber rod inside. This creates a strong internal spine that resists bending and can prevent the gear from snapping off on a hard landing.
Another clever technique is to use nylon bolts to attach the landing gear assembly to the fuselage. These bolts are designed to be a mechanical fuse. In a bad landing that would normally rip the gear mount out of the wing or fuselage (causing major structural damage), the nylon bolts will shear off cleanly. This sacrifices the bolts but saves the airframe. Replacing a few cheap bolts is far easier than rebuilding a wing’s center section. For the attachment points themselves, you can significantly increase their strength by reinforcing the area inside the fuselage with a small patch of fiberglass cloth and epoxy, spreading the load over a larger area.
Ultimately, for very heavy or high-performance models, the best solution is often to upgrade to an aftermarket landing gear made from aluminum or carbon fiber. However, by starting with reinforcement techniques, you are adopting the crucial RC mindset of anticipating failure points and engineering solutions. You are not just building a model; you are building a robust machine designed to withstand the rigors of its operational environment.
By shifting your perspective from creating a perfect static object to engineering a resilient flying system, you transform fear into a controllable challenge. The journey is incremental, but your existing skills as a craftsman are your greatest advantage. Start with a trainer, master the fundamentals, and soon you will experience the unmatched thrill of watching your own masterpiece take to the skies. Evaluate the options and begin your journey to becoming an RC pilot today.