Technology & Innovation
The world of aircraft model building has undergone a remarkable transformation. What was once a craft limited by hand-cut balsa wood and basic plastic kits has evolved into a sophisticated hobby leveraging cutting-edge manufacturing techniques, advanced materials science, and digital fabrication technologies. Understanding these innovations isn’t just about keeping up with trends—it’s about making informed choices that directly impact the quality, accuracy, and enjoyment of your projects.
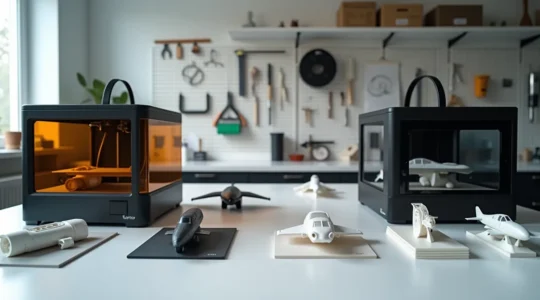
Whether you’re examining the microscopic precision of modern injection molds, integrating LED lighting into a 1:72 cockpit, or designing custom components on your computer, technology now touches every aspect of scale aviation modeling. This comprehensive overview explores how manufacturing advancements, material innovations, and digital tools have democratized quality while opening new creative possibilities. From the chemistry of plastic sprues to the workflow of resin printing, these insights will help you navigate the technical landscape with confidence and select the right approaches for your skill level.
How Modern Manufacturing Transformed Kit Quality
The evolution of injection molding technology represents perhaps the most significant leap forward in aircraft model kits. Early molds were simple two-part affairs that limited detail and required extensive cleanup. Today’s multi-axis molds with slide-mold technology allow manufacturers to capture undercuts, panel lines, and surface details that would have been impossible just a few decades ago.
Think of slide-mold technology like a sophisticated puzzle: instead of two halves simply coming together, additional mold pieces slide in from perpendicular angles before the plastic is injected. This enables the creation of wheel wells with visible structure, open cockpit frames, and complex engine details—all molded as single pieces. When examining kits, you can identify slide-molded components by looking for mold lines in unexpected places or the absence of separate detail parts for complex shapes.
Understanding manufacturing quality helps you choose the right foundation for any project. Production codes stamped on sprues reveal when and where components were manufactured, which matters because mold degradation occurs gradually over thousands of cycles. Earlier production runs typically show crisper detail, while later runs from worn molds may require more extensive cleanup of flash and softened panel lines. This knowledge becomes particularly valuable when selecting from older kit releases or choosing between reissues and original tooling.
Understanding Plastic Materials and Their Properties
Not all model kit plastic is created equal. The chemical composition determines everything from how parts respond to glue to their long-term stability. Most kits use polystyrene variants, but the specific formulation—including plasticizers, colorants, and stabilizers—affects workability in ways that directly impact your building experience.
Plastic softness varies significantly between manufacturers and even between different colored sprues in the same kit. Softer plastics are more forgiving when removing parts from sprues and less prone to stress marks, but they can also be more challenging to sand cleanly without creating fuzzy edges. Harder plastics hold crisp detail better and sand to smooth finishes, but they’re more brittle and susceptible to white stress marks when bent.
This is where understanding solvent welding becomes crucial. Unlike household glues that simply stick surfaces together, modeling cement actually dissolves a thin layer of plastic, allowing the molecules to intermingle before re-hardening into a single piece. The chemical compatibility between your cement and the kit’s plastic formulation determines bond strength. Some key considerations include:
- Grey plastic typically contains fewer additives and responds more predictably to standard polystyrene cements
- Colored plastics may include pigments or release agents that can interfere with solvent action
- Transparent parts often require specialized cements that dry clear and don’t fog the plastic
- Mixing incompatible plastics (like styrene and ABS) can result in weak joints or chemical reactions
The environmental consciousness of modern modelers has also sparked interest in recycling sprue waste. While municipal recycling programs rarely accept mixed small plastics, some manufacturers and hobby shops now collect sprues for industrial recycling into non-model applications.
Wood Components in Scale Aviation Models
Despite the dominance of plastic, wood remains essential for certain applications—particularly in flying scale models and vintage aircraft reproductions where weight optimization and structural flexibility matter. Balsa and basswood each offer distinct properties that serve different purposes in model construction.
Wood density selection parallels choosing the right plastic formulation. Lighter balsa (6-8 pounds per cubic foot) provides maximum lift for flying models but requires careful handling. Medium-density wood (10-12 pounds per cubic foot) offers the sweet spot for most structural applications, while denser selections provide strength for high-stress areas like landing gear mounting blocks.
Understanding grain direction is like reading the wood’s internal blueprint. Cutting across the grain provides maximum strength but risks splitting, while cutting with the grain is easier but produces weaker structures. Modern modelers benefit from two precision cutting technologies:
- Laser-cut components offer exceptional precision with sealed edges that resist moisture absorption, ideal for complex structural formers and ribs
- Die-cut parts provide economical production for simpler shapes, though they may require light sanding to remove compression marks from the cutting process
The risk of splitting during assembly can be mitigated by pre-drilling holes smaller than your pin diameter and using sharp blades to minimize fiber crushing. When aerodynamic performance matters, every gram counts—careful wood selection can reduce weight by 20-30% compared to using uniform density throughout a model.
Electronics Integration for Realistic Lighting Effects
One of the most visually dramatic technological advances involves integrating electronics into miniature spaces. Modern LEDs measuring just 0.5mm across can recreate navigation lights, instrument panels, and engine exhaust glow in scales as small as 1:144, bringing static models to life with authentic lighting effects.
The challenge resembles installing full electrical systems in dollhouse rooms—everything must be scaled down and carefully planned. Managing heat generation becomes critical in enclosed fuselages where even tiny LEDs can build up enough warmth to soften plastic or fog clear canopies. Current-limiting resistors aren’t just electrical components; they’re thermal management tools that prevent damage while extending LED lifespan.
The practical workflow involves several sequential considerations:
- Plan wire routing before assembly—retrofitting wiring into completed models often proves impossible
- Drill microscopic holes (0.3-0.5mm) for LED placement using pin vises and sharp bits designed for plastics
- Choose between battery power (cleaner aesthetics, portability) and mains power (unlimited runtime, display reliability)
- Sequence soldering tasks from smallest to largest components to avoid damaging delicate connections
- Address light bleed with internal baffles and flat black paint in non-visible areas
The risk of light bleed—unwanted illumination showing through plastic—can ruin the effect of carefully placed cockpit lighting. Professional modelers combat this by painting interior surfaces with multiple coats of flat black or dark grey, and installing physical barriers between light sources and thin plastic sections.
Digital Design Tools for Custom Components
Computer-aided design has democratized custom part creation, allowing modelers to design replacement pieces, detail upgrades, and scratchbuilt components with precision once reserved for professional toolmakers. This digital design revolution means you’re no longer limited to what manufacturers provide—if a part is missing, incorrect, or simply not detailed enough, you can create your own.
Selecting the right software depends on your experience level and specific needs. Entry-level programs offer intuitive interfaces perfect for simple geometric shapes like access panels or mounting brackets. More advanced parametric modeling software allows you to define parts by their dimensions and relationships, making it easy to adjust entire assemblies when scaling changes. Think of it as the difference between drawing a fixed picture and creating a smart template that automatically adjusts.
The critical technical skills include:
- Measuring for fit using digital calipers accurate to 0.01mm—physical measurements must account for plastic shrinkage and assembly tolerances
- Designing for scale by understanding minimum printable wall thicknesses and how visual weight changes at different sizes
- Avoiding boolean errors (mathematical conflicts when combining shapes) through proper modeling sequences and geometry validation
- Considering sharing and licensing when distributing designs—respect for intellectual property protects both creators and the community
The beauty of digital files is their infinite reproducibility. Once you’ve perfected a design for custom exhaust stacks or a specific antenna array, you can scale it for different kits, share it with fellow modelers, or keep it as a personal library of solutions.
Additive Manufacturing in the Modeling Workflow
Three-dimensional printing has moved from industrial curiosity to accessible reality, with resin printers now capable of producing detail rivaling injection-molded parts. The technology works like creating a sculpture one incredibly thin layer at a time—typically 0.025-0.05mm per layer—building up from a liquid photopolymer bath that hardens when exposed to UV light.
Understanding layer lines is essential for achieving professional results. These visible boundaries between layers can be minimized through careful orientation during printing—imagine how wood grain appearance changes depending on how you slice the board. Printing a wing vertically produces different layer line patterns than printing it horizontally, affecting both surface finish and structural strength along different axes.
The workflow requires careful attention to safety and post-processing:
- Handle uncured resin with appropriate protection—resin toxicity demands gloves, ventilation, and proper disposal
- Orient parts to minimize supports and optimize surface finish on visible faces
- Wash prints in isopropyl alcohol to remove uncured resin residue
- Cure under UV light to achieve final hardness and chemical stability
- Monitor for curing warp, especially on thin parts that can distort during final polymerization
The risk of curing warp increases with part size and wall thickness variations. Professional results come from understanding that the curing process generates internal stresses—larger flat parts may need weighted curing or strategic support during UV exposure to maintain dimensional accuracy.
Integrating additive manufacturing into your modeling workflow doesn’t mean replacing traditional techniques. Instead, it’s about having one more powerful tool available—using 3D printing for custom details while building the main kit conventionally, or producing replacement parts for vintage kits where original sprues are damaged or incomplete.
The technological landscape of aircraft modeling continues to evolve, but the fundamental goal remains unchanged: creating accurate, beautiful miniature aircraft. These modern tools and materials don’t replace skill and patience—they amplify them, allowing you to achieve results that honor both the craft’s heritage and its innovative future. Whether you’re choosing between kit manufacturers based on mold technology, planning an electronics installation, or designing your first 3D-printed component, understanding the technology empowers better decisions and more satisfying builds.
SLA vs. FDM: Choosing the Right 3D Printer for Aircraft Modeling Details
For aircraft modeling, the choice between SLA and FDM is not about cost but about achieving the minimum resolution threshold required for realistic details. SLA (Resin) is the only technology capable of reproducing sub-millimeter details like 1/72 scale rivets and…
Read more
How to Design Simple Model Parts in CAD Without an Engineering Degree?
Frustrated by missing or inaccurate model kit parts? This guide shows you how to take control by designing your own pieces in CAD. It’s not about becoming an engineer; it’s about adopting a ‘digital craftsman’s’ mindset, using simple tools to…
Read more
Why Are Slide-Molded Gun Barrels Superior to Traditional Two-Part Assemblies?
The superiority of slide-molding isn’t just about creating a hollow barrel; it’s an engineering philosophy that trades higher upfront tooling costs for near-perfect part integrity out of the box. This technology uses lateral-moving pins (‘slides’) to form complex internal shapes…
Read more
Advanced Lighting for Aircraft Models: A Micro-Electronics Guide
Achieving realistic lighting in scale models is less about artistry and more about micro-engineering precision. Electrical safety is paramount: Always use a resistor calculated for your specific LED and power source to prevent melt-downs and ensure longevity. Light control is…
Read more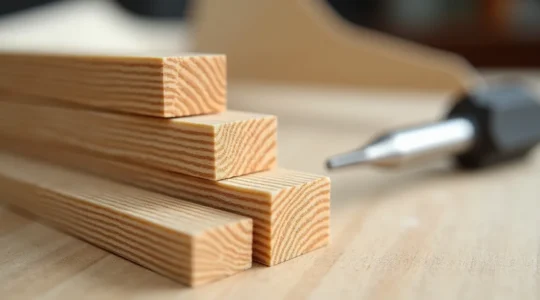
Balsa Wood Selection: How to Choose the Right Density for Flying Model Components?
Balsa selection is a science of material properties, not an art of guessing; mastering its anisotropic nature is the key to a lighter, stronger, and better-flying model. Grain orientation (A, B, or C-grain) has a greater impact on stiffness and…
Read more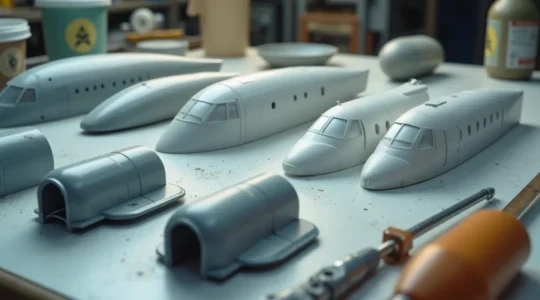
Understanding Polystyrene Grades: Why Some Kits React Poorly to Lacquer Thinners?
The common belief is that “hot” thinners are solely to blame for melting a model’s surface. The reality is more complex: the plastic itself is a reactive chemical compound. The specific grade of polystyrene—its purity and the presence of additives—determines…
Read more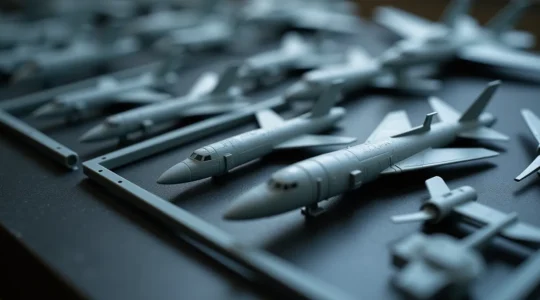
How to Identify Quality Injection-Molded Kits Before Opening the Box
The true quality of a model kit is revealed not by its box art, but by its manufacturing DNA visible on the sprues. Tooling age, not box copyright, dictates detail clarity and the presence of flash. Plastic composition (e.g., Japanese…
Read more