Lifelike figures are not achieved by painting tiny details, but by creating the *impression* of detail with light and shadow.
- Stop painting pupils; use a dark wash to create natural eye sockets and shadows that the brain interprets as eyes.
- Vary your paint finishes—ultra-matte for uniforms, satin for leather—to create essential textural contrast that mimics real materials.
Recommendation: Focus on the overall composition and implied narrative. A believable human story is more important than microscopic accuracy.
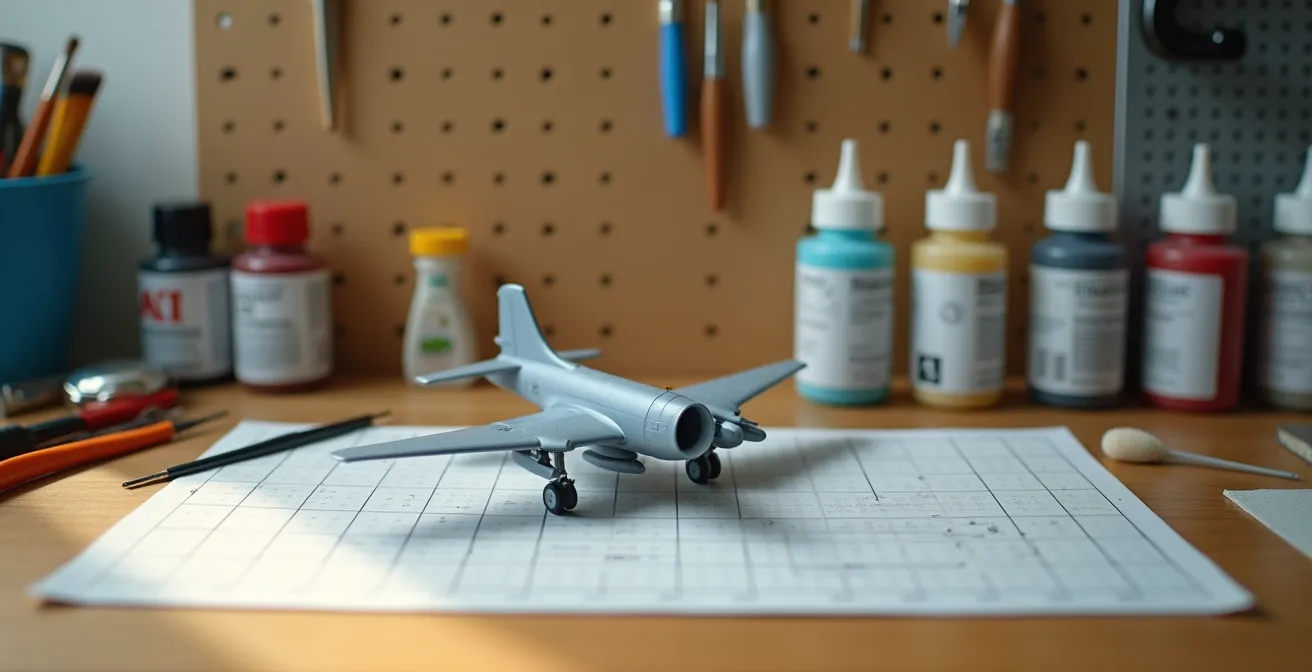
For many aircraft diorama builders, the final frontier is the human element. You can craft a perfectly weathered F-16, but if the pilot figure standing beside it has cartoonish, googly eyes, the entire illusion shatters. The common advice—use a smaller brush, hold your breath—is a trap. It pushes modelers toward a microscopic precision that is both impossible at small scales and, more importantly, unnecessary. The fear of creating these “toy” like figures keeps many builders from adding the very element that gives a scene life and scale.
This isn’t about having the steadiest hand or the most expensive paint. The key to breaking this barrier is a fundamental shift in thinking. Instead of trying to replicate a human face in miniature, the goal is to master the art of impression. It’s about using foundational principles of light, shadow, texture, and posture to convince the viewer’s brain to fill in the details. This approach not only yields more realistic results but is also faster and more forgiving.
This guide abandons the frustrating pursuit of miniature portraiture. Instead, it provides a precise, minimalist system for creating believable figures. We will cover how to build form with a simple three-step process, how to represent eyes with shadow instead of paint, and how to use material-specific finishes to create convincing textures. Finally, we will explore how to ground your figures in the scene, making them active participants rather than static accessories.
The following sections break down these professional techniques into a clear, actionable workflow. From foundational painting to advanced weathering, this guide will equip you to add a compelling human dimension to your dioramas.
Contents: A Guide to Realistic Diorama Figures
- Base, Shadow, Highlight: The Simple 3-Step Recipe for Form
- Why You Should Use a Dark Wash for Eyes at Small Scales
- Matte vs. Satin: Keeping Fabric Looking Like Cloth
- Pinning Figures: How to Attach Crew to a Base Without Looking Weightless
- Interaction: How to Modify Limbs so Crew Actually Touch the Plane
- How to Pair Correct Ground Support Equipment with Specific Aircraft Eras
- What Defines a High-Fidelity Replica for Serious Collectors?
- Why Clean Models Look like Toys: Adding Authentic Weathering
Base, Shadow, Highlight: The Simple 3-Step Recipe for Form
Before a single drop of color is applied, a figure’s form must be established. The most effective way to do this is through zenithal priming, a technique that pre-establishes shadows and highlights. This method uses three colors of primer (black, grey, and white) to simulate light falling from directly above. This creates a three-dimensional map on the miniature, guiding your subsequent paint application and ensuring a naturalistic look. The process is simple, fast, and removes the guesswork from shading.
Start with a full coat of black primer. This establishes the deepest shadows in recesses like armpits, under belts, and deep fabric folds. Next, a 45-degree spray of grey primer from above begins to build the mid-tones on upward-facing surfaces. The final, light dusting of white primer comes directly from the top, hitting only the highest points: the top of the head, shoulders, and raised knees. The result is a figure in monochrome that already looks three-dimensional.
This pre-shading is not just a base coat; it is a guide. When you apply thin layers of your final colors, this underpainting will show through, creating instant, realistic transitions from light to dark. This is also where scale effect becomes critical. In the real world, atmospheric perspective makes distant objects appear lighter and less saturated. To replicate this in miniature, experts suggest that colors appear 20-30% lighter at 1:72 scale to look correct to the eye. Using thin coats over a zenithal prime naturally helps achieve this lightening effect on the highlights.
Why You Should Use a Dark Wash for Eyes at Small Scales
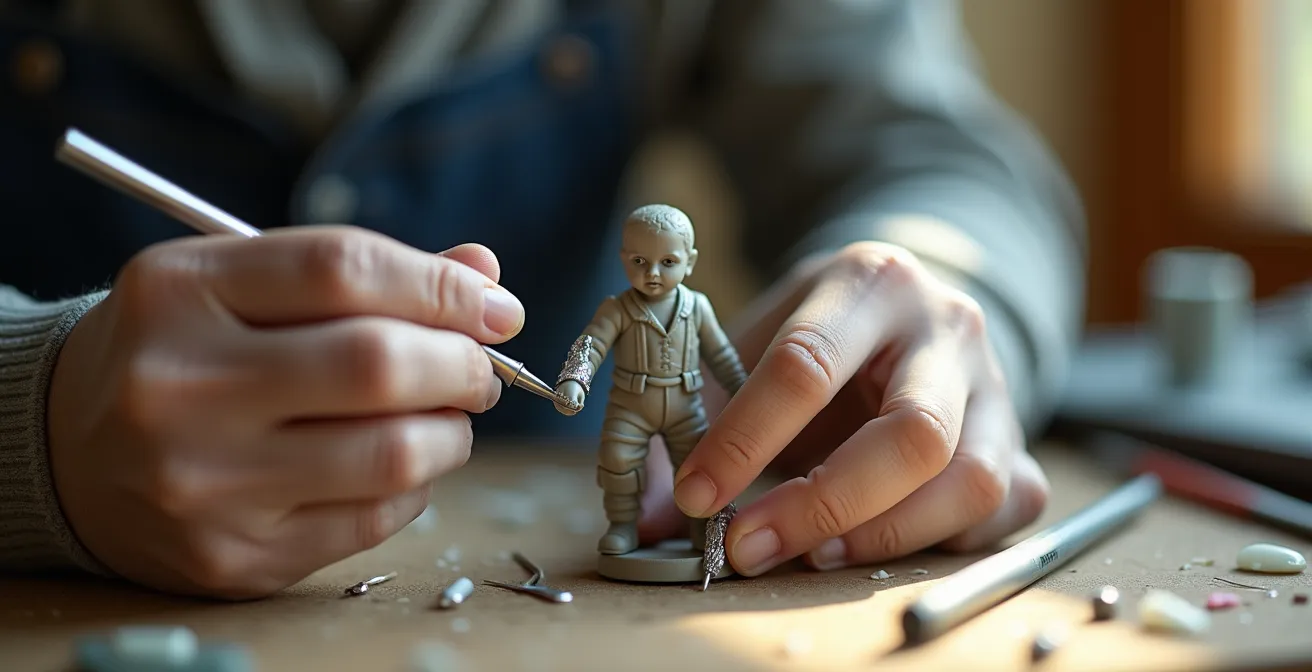
The single greatest cause of “googly eyes” on small-scale figures (1:72 or 1:48) is the attempt to paint them directly. At a normal viewing distance, you don’t see an individual’s pupil and iris; you see the shadow cast by their brow ridge and the overall shape of the eye socket. The goal is to replicate this *impression*, not the eyeball itself. A dark wash is the superior tool for this job. It uses fluid dynamics to settle pigment naturally into recesses, creating soft, realistic shadows that the brain interprets as eyes.
The technique involves applying a thinned wash of dark paint (like burnt umber oil or a dark brown acrylic wash) over the entire face. The wash flows into the sculpted eye sockets, nose, and mouth lines. After a few minutes, you use a clean, slightly damp brush or cotton swab to gently wipe the excess wash from the raised areas—the forehead, cheeks, and bridge of the nose. The pigment remains only in the recesses, defining the facial structure with natural-looking shadows. This is a subtractive method that is far more controllable than trying to add a microscopic white dot with a brush.
For an added touch of life, a micro-dot of gloss varnish can be placed in the shaded socket. This doesn’t represent the eye itself but catches the light, simulating the natural reflection of a moist surface. This principle of prioritizing impression over literal detail is a common professional technique. For instance, when painting 1/72 scale ship models, modelers often substitute a lighter, less accurate blue for the official dark Sea Blue because it creates a more believable visual effect at that tiny scale.
Checklist: Creating Realistic Face Shadows
- Mix a dark wash using burnt umber oil paint and turpentine (a 1:10 ratio is a good starting point).
- Apply the wash over the entire face, ensuring it flows into the eye sockets and other recesses.
- Allow the wash to settle for approximately 5 minutes to let the pigment find the details.
- Gently remove the excess wash from raised surfaces (cheeks, nose bridge, forehead) with a clean, damp cotton swab.
- Once dry, apply a tiny dot of gloss varnish in the deepest part of the eye socket to simulate a lifelike reflection.
Matte vs. Satin: Keeping Fabric Looking Like Cloth
A common mistake is to finish a figure with a single varnish, making a pilot’s cotton uniform and leather jacket have the same sheen. Realism comes from textural contrast. The surface of an aircraft is semi-gloss or satin, but the clothing worn by the crew is made of varied materials: matte wool or cotton, and semi-gloss or satin leather. Replicating these different finishes is critical to making a figure look like a person wearing clothes, not a solid plastic toy.
Most military uniforms are made of cotton or wool, which are non-reflective. They must be finished with an ultra-matte varnish. This absorbs light and gives the fabric a soft, convincing appearance. Leather gear, such as jackets, belts, and boots, has a slight sheen. A satin or semi-gloss finish is appropriate here. This subtle difference in light reflection immediately tells the viewer’s brain they are looking at two different materials. The contrast between a matte uniform and the semi-gloss fuselage of the aircraft is what sells the reality of the scene.
The application method can also enhance texture. While an airbrush is suitable for a smooth uniform finish, stippling—dabbing the paint on with a stiff, flat brush—can impart a subtle texture that mimics heavy wool or canvas. This level of detail separates a good diorama from a great one.
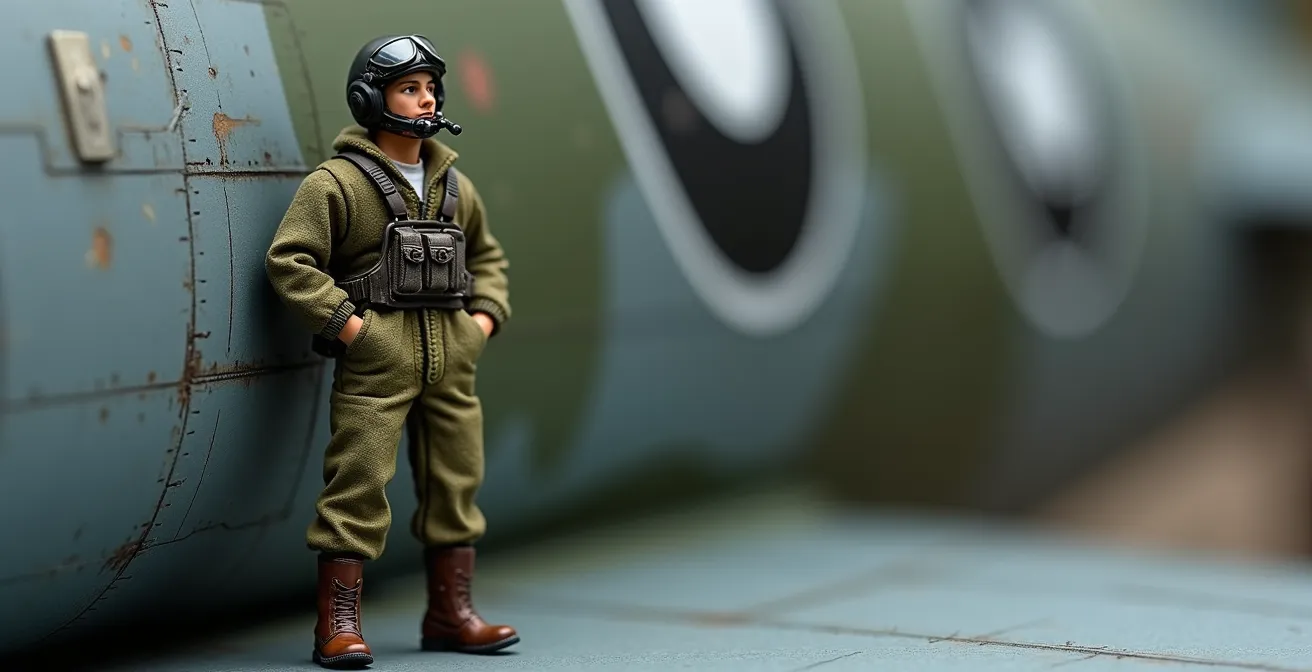
As the image above demonstrates, the visual difference between surfaces is stark. The subtle play of light on different finishes is what creates believability. To achieve this, specific paint and varnish mixtures are required, as detailed in the following guide.
The table below, based on data for achieving realistic finishes, provides a starting point for mixing varnishes. An analysis from a leading modeling resource site breaks down the ratios needed for various materials.
| Material | Finish Type | Mixing Ratio | Application |
|---|---|---|---|
| Leather Jacket | Satin | 2:1 Gloss:Flat | Airbrush thin coats |
| Wool Coat | Ultra-Matte | 1:3 Future:Flat Base | Stipple with stiff brush |
| Cotton Uniform | Matte | 1:2 Future:Flat Base | Standard airbrush |
| Worn Belt | Semi-Gloss | 1:1 Gloss:Flat | Hand brush |
Pinning Figures: How to Attach Crew to a Base Without Looking Weightless
Simply gluing a figure’s feet to the diorama base is a recipe for failure. The slightest knock can break it loose, and more importantly, it often fails to convey a sense of weight. The figure looks like it’s floating on the surface, not standing on it. The professional solution is pinning: inserting a small metal rod into the figure’s foot and the base to create a strong, invisible anchor. This technique provides physical strength and is the first step toward creating visual weight.
The process involves drilling a tiny hole (around 0.5mm) through the sole of one of the figure’s feet. A piece of brass rod or a stiff paperclip is then glued into this hole, leaving a few millimeters protruding. A corresponding hole is drilled into the diorama base where you want the figure to stand. The pin is then secured into the base with super glue or epoxy. For added realism, the hole in the foot should be drilled at a slight forward angle (10-15 degrees), which helps suggest forward momentum or a natural standing posture.
However, a mechanical connection alone is not enough. The figure must be visually integrated with the ground. This is achieved by building up ground material—textured paste, sand, or static grass—slightly over the edges of the figure’s shoes. If the scene is muddy, a small amount of mud texture applied to the base of the boots and the ground around them instantly communicates interaction with the environment. As one case study on creating realism notes, weight is effectively conveyed when figures interact with objects in their environment, such as having a foot on a crate or leaning against a piece of equipment. This physical interaction grounds the figure in the scene and gives it purpose.
Interaction: How to Modify Limbs so Crew Actually Touch the Plane
The most compelling dioramas feature figures that are not just near the aircraft, but are actively interacting with it. A pilot with a hand resting on the cockpit canopy or a mechanic leaning against a wing tells a story. Most plastic figures come in static, generic poses. To create believable interaction, you must be willing to perform minor surgery: cutting and repositioning limbs. This may seem daunting, but it’s a straightforward process that elevates a diorama from a static display to a dynamic snapshot in time.
For simple pose adjustments, making a careful cut at a joint like an elbow or shoulder with a sharp hobby knife is often enough. The limb can then be re-glued at a new angle. For more complex interactions, like a hand gripping a tool or a fuselage panel, you will need to resculpt the hand. The “hand-in-glove” method using two-part epoxy putty is ideal. First, the tool handle is wrapped in aluminum foil. The figure’s hand is then pressed into a small ball of putty that has been placed around the foil-wrapped handle. The fingers are shaped around the tool before the putty cures.
Once the putty has hardened, the tool and foil can be removed, leaving a perfectly shaped grip. The modified hand is then painted and reattached to the figure. This direct physical contact between the figure and its environment is the pinnacle of realism. It creates an implied narrative—the viewer can infer the action that is happening or is about to happen. This transforms the figure from an accessory into a character.
How to Pair Correct Ground Support Equipment with Specific Aircraft Eras
Placing a modern, computerized power cart next to a WWII-era P-51 Mustang instantly breaks the historical illusion. Ground Support Equipment (GSE) is just as era-specific as the aircraft themselves. Including accurate GSE in your diorama enriches the story, provides context, and demonstrates a high level of research and fidelity. The equipment not only adds visual interest but also offers more opportunities for figures to interact with their environment, further enhancing the scene’s realism.
The evolution of GSE follows the technological progression of aviation. WWII-era equipment was often manual and utilitarian, featuring hand cranks and simple wooden or metal construction. By the Korean and Vietnam Wars, electric and hydraulic starter carts and hydraulic test stands became commonplace, often painted in olive drab or yellow. Modern GSE is characterized by computerized diagnostics, digital displays, and adherence to specific safety color codes. Each piece of equipment tells a story about the technology and maintenance procedures of its time.
Weathering on GSE should also be era-appropriate. A WWII starter cart would show heavy use, with chipped paint, rust, and oil stains. A modern piece of equipment would be cleaner, showing less wear and tear but perhaps some minor fluid leaks or scuff marks. Incorporating these details reinforces the historical setting of your diorama.
To ensure historical accuracy, referencing a guide is essential. The following table, adapted from an overview by a publication dedicated to model aviation, outlines the typical GSE found in different periods.
| Era | Equipment Type | Key Features | Common Weathering |
|---|---|---|---|
| WWII (1940s) | Manual Starter Cart | Hand crank, wooden handles | Oil stains, rust, chipped paint |
| Korean War (1950s) | Early Electric Cart | Large batteries, basic gauges | Exhaust stains, unit markings |
| Vietnam (1960s) | Hydraulic Units | Yellow paint, stenciled warnings | Hydraulic fluid leaks, fading |
| Modern (1980s+) | Computerized Units | Digital displays, safety colors | Less weathering, cleaner appearance |
What Defines a High-Fidelity Replica for Serious Collectors?
For a serious collector or a competition judge, a high-fidelity replica is more than just an accurately assembled model. It is a convincing, three-dimensional illusion. Technical precision in the aircraft’s construction is the baseline, not the final goal. True fidelity is achieved when the diorama tells a believable human story. This is where the figures, ground equipment, and environment move beyond being mere accessories and become integral parts of a compelling narrative.
A perfectly built and painted aircraft placed on a sterile base with toy-like figures is ultimately a failure in fidelity. The human element, when done poorly, negates all the hard work put into the main subject. Conversely, a scene with compelling, realistically posed, and weathered figures can often forgive minor inaccuracies in the aircraft model itself. The viewer’s attention is captured by the story being told—a pilot briefing his crew, mechanics performing a maintenance check, or a team loading ordnance.
This philosophy is best summarized by renowned modeler David W. Aungst in his work on weathering techniques. He states:
The highest fidelity in aircraft dioramas is achieved when the human story is believable – a perfectly accurate plane with toy-like figures is a failure, while a compelling human scene can forgive minor model inaccuracies.
– David W. Aungst, Weathering Model Aircraft Techniques
Achieving this level of atmospheric storytelling requires diligent research and planning. It involves studying historical photographs to understand authentic crew postures, maintenance procedures, and the kind of casual clutter that accumulates in an operational environment. It’s about creating a moment frozen in time that feels authentic and alive.
Action Plan: Auditing Your Diorama for a Believable Human Story
- Posture & Placement: Review all figures. Do their poses reflect real-world tasks or rest positions found in historical photos?
- Interaction Points: Inventory every point of contact. Is a hand truly gripping a tool? Is a foot planted firmly on a surface, suggesting weight?
- Textural Coherence: Compare figure finishes to the aircraft. Are uniforms matte? Is leather semi-gloss? Does the contrast feel authentic?
- Environmental Storytelling: Assess the base and equipment. Do weathering patterns on figures (e.g., muddy boots) match the ground they stand on?
- Narrative Focus: Step back 3 feet. Does the scene tell a clear, immediate story, or is it just a collection of static objects? Identify and strengthen the focal point.
Key Takeaways
- True realism in figures comes from mastering light and shadow, not painting microscopic details.
- Varying paint finishes (matte, satin, gloss) to match different materials like cloth and leather is non-negotiable for believability.
- A figure’s interaction with its environment—pinning for weight, modifying limbs to touch objects—is what transforms it from a toy into a character.
Why Clean Models Look like Toys: Adding Authentic Weathering
A factory-fresh aircraft on an active airfield is a rare sight. Aircraft are tools that operate in harsh environments. They get stained with fluids, faded by the sun, and scuffed by their crews. A model without weathering lacks a history; it looks sterile and toy-like. Authentic weathering is the final step that unifies the aircraft, figures, and equipment into a cohesive scene. It’s the process of adding realistic wear and tear to tell the story of the object’s operational life.
Weathering should be a layered, progressive process. It begins after the main paint and decals are applied. The first layer might be a subtle fading of the upper surfaces using highly thinned light paint to simulate sun bleaching. This is followed by specific stains: dark, grimy washes for panel lines, and thin, streaky oil paints to represent fluid leaks from engines and hydraulic systems. Finally, pigments or pastel chalks are used to add dust, dirt, or mud, tying the aircraft and figures to the specific environment of the diorama base.
Crucially, weathering must be logical. A fighter operating from a dusty desert base will have different weathering than one from a muddy European field. Human interaction also leaves its mark. Areas frequently touched by the crew, like handholds and canopy frames, will have a different finish, often with a slight polish from greasy hands. Wing roots will show scuff marks from boots. These details make the scene feel inhabited and used. Contrary to what some believe, achieving these effects does not require a large investment; in fact, a complete weathering setup can cost under $30 using basic artist oils, pastels, and common solvents.
By applying these principles of impression, texture, and interaction, you can move past the fear of painting figures. You can transform them from static accessories into the living heart of your diorama, creating scenes with a narrative depth and realism that truly captivate the viewer. The next logical step is to apply these techniques to your own project and bring your aircraft models to life.