The frustration of tiny photo-etched brass parts flying into oblivion or folding incorrectly is a shared pain among modelers. The solution is not better dexterity, but a shift in mindset. Treating this task as a micro-engineering discipline—focused on material integrity, stress-free manipulation, and sequential precision—is the key. By using the right tools and understanding the properties of brass, you can achieve flawless, jeweler-quality folds every time.
It’s a moment every modeler knows: you’ve spent hours detailing a cockpit, and the final touch is a microscopic, pre-painted seatbelt harness made of photo-etched brass. You grip it with standard tweezers, apply a little pressure to make the fold, and *ping*. The part launches into the void, forever lost to the carpet monster. This experience leads many to believe they simply lack the delicate touch required for such work. The common advice is to “be more careful” or “get better tweezers,” but this advice misses the fundamental point.
Folding photo-etch is not a test of dexterity; it’s a discipline of micro-mechanics. The secret doesn’t lie in shaky fingers but in a systematic approach that respects the material’s properties. It’s about managing stress on the metal, using tools that eliminate tension, and following a precise order of operations. Thinking like a jeweler or a watchmaker, rather than just a builder, transforms the process from a source of frustration into an opportunity for exquisite detail. Many aftermarket kits also include resin parts, which require their own distinct and critical safety protocols to avoid health risks.
This guide abandons the platitude of “be careful” and instead provides a complete methodology. We will deconstruct the process, revealing why conventional methods fail and how a professional approach guarantees success. We will cover the essential tools that provide control, the techniques for creating perfect angles, the science of making brass pliable, and the steps for a durable paint finish. By the end, you will have the knowledge to manipulate these delicate parts with confidence and precision, turning flat brass into a stunning, three-dimensional masterpiece.
To navigate this detailed process, the following sections will guide you step-by-step from foundational tool selection to advanced finishing techniques, ensuring you master every aspect of working with photo-etched parts.
Summary: How to Fold Delicate Brass Parts Like a Jeweler
- Why standard tweezers launch photo-etch parts into orbit (and what to use instead)?
- How to use a hold-and-fold tool for perfect 90-degree angles?
- Color PE or Brass: which is better for instrument panels?
- The “2D effect” error: when flat metal parts look unrealistic in a 3D cockpit
- When should you heat brass parts to make them pliable?
- How to Paint Photo-Etched Brass So the Color Doesn’t Flake Off During Handling?
- Why You Must Treat Resin Parts Differently Than Plastic to Avoid Lung Damage?
- How to Paint Realistic Cockpit Instruments in 1:How to Start Building Static Aircraft Models Without Spending Over $100?
Why standard tweezers launch photo-etch parts into orbit (and what to use instead)?
The primary reason standard tweezers are the enemy of photo-etch is spring tension. The act of pinching creates stored energy. If your grip falters for even a millisecond, that energy is released, catapulting the part. This is especially true for the smallest components, where the contact surface is minimal. Furthermore, the pointed tips of conventional tweezers concentrate all pressure on a tiny point, increasing the risk of marring the soft brass or causing an uncontrolled bend. The challenge is immense when you consider that the smallest photo-etched parts can measure as tiny as 0.2mm, making them almost impossible to grip securely with a tool designed for plucking.
To achieve stress-free manipulation, you must abandon the pinch. The solution lies in tools that either hold the part passively or use a gentler method of pickup. Reverse-action (or cross-locking) tweezers are a game-changer; they are open by default and close when you apply pressure, meaning their resting state is to grip the part firmly but gently. This eliminates finger fatigue and the risk of a sudden release during long, delicate placement operations. For the most fragile pieces, a vacuum pickup pen offers the ultimate in gentle handling, using suction to lift parts without applying any mechanical pressure at all. Another effective, low-tech method involves applying a small amount of poster putty to the tip of a toothpick, creating a sticky, pressure-free tool for lifting and placing tiny components.
Cutting the part from its fret is the first point of failure. Never use a soft cutting mat, as it allows the part to deform before it’s cut. Instead, place the fret on a hard surface like a ceramic tile or a small piece of glass. Placing a piece of masking tape over the part before cutting can also prevent it from flying away. Use a brand-new, sharp craft knife blade to make a clean, decisive cut, minimizing burrs and stress on the part’s connection points.
How to use a hold-and-fold tool for perfect 90-degree angles?
Achieving a crisp, perfect 90-degree angle on a brass part is impossible with freehand methods. The metal will always curve or bow slightly. A hold-and-fold tool is a specialized micro-vise designed specifically for this purpose. Its function is simple but critical: it provides a hard, straight edge to clamp the part precisely along the intended fold line, isolating the bending stress exactly where you want it. This total immobilization of the part is the secret to a sharp, controlled bend, preventing the rest of the piece from deforming.
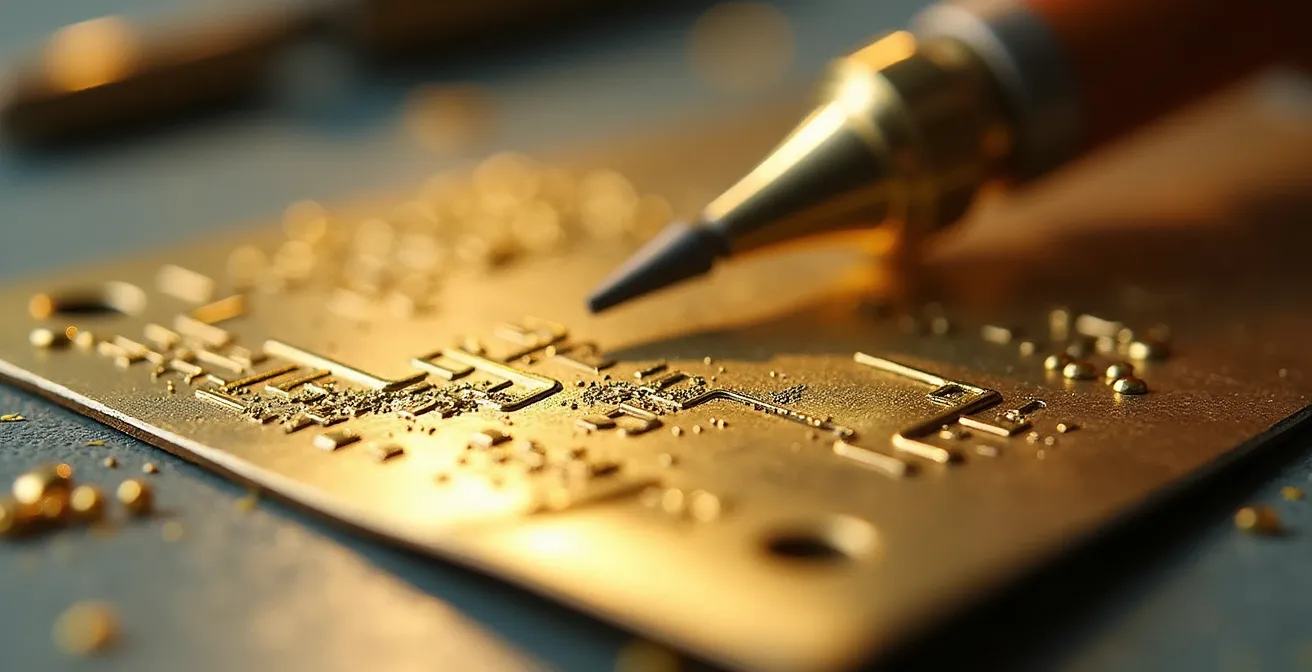
The technique is more about leverage than force. After securely clamping the part in the tool with the fold line perfectly aligned with the tool’s edge, you don’t push it with your finger. Instead, slide a thin, flat blade—an old-fashioned single-edge razor blade is ideal—underneath the portion to be folded. By gently and evenly lifting the blade, you use its entire width to apply uniform pressure along the fold line. This action results in a perfectly straight, crisp bend without twisting or rounding. The tool’s design, with its various machined fingers and edges, allows you to create a wide variety of bend radii and complex shapes by choosing the appropriate profile for the job.

As this image demonstrates, the precision of the setup is paramount. The tool acts as an anvil, providing the unyielding edge needed for a professional result. For parts requiring multiple folds, the golden rule is to work methodically. Plan your sequence of bends from the inside out and handle only one part at a time. This deliberate pace prevents the loss of small components and ensures each fold is executed correctly before moving to the next.
Action Plan: Perfect Bends with a Hold and Fold Tool
- Secure the Foundation: Clamp the part tightly in the hold-and-fold tool, ensuring the bending line is perfectly flush with the tool’s edge.
- Select the Right Lever: Slide a single-edge razor blade under the section of the part you intend to bend.
- Execute the Fold: Lift the blade with steady, even pressure along the entire length of the fold to create a perfect angle.
- Manage Complexity: For parts with multiple bends, plan your sequence and work on one fold at a time to maintain control.
- Vary the Profile: Utilize the different fingers and edges on the tool to create complex shapes and varied bend radii as required.
Color PE or Brass: which is better for instrument panels?
Choosing between pre-colored photo-etch (Color PE) and bare brass for cockpit instrument panels is a critical decision that depends heavily on scale, desired realism, and your willingness to invest time. Color PE offers the immense advantage of speed; the parts are pre-painted with incredible detail, often including readable dials and placards that would be impossible to replicate by hand, especially in smaller scales like 1/72. You simply glue them in place. However, this convenience comes with a trade-off: the pre-printed surface is flat, offering a limited two-dimensional effect, and the paint is notoriously fragile and can chip or flake off during folding.
Bare brass, on the other hand, demands more work but offers superior realism and durability, particularly in larger scales like 1/48 and above. Since you paint the parts *after* folding and assembly, there is no risk of chipping. More importantly, it allows you to create a genuine three-dimensional effect. You can add depth that pre-painted parts inherently lack. This is where techniques like the “Instrument Sandwich” become essential. As professional modelers recommend, this involves layering the bare brass overlay panel over a clear plastic sheet and a decal or painted backplate with the instrument dials. This assembly creates a true illusion of glass-covered instruments, a level of depth Color PE cannot match.
The following table, based on a comparative analysis of photo-etch types, breaks down the key differences:
| Aspect | Color PE | Bare Brass |
|---|---|---|
| Best Scale | 1/72 and smaller | 1/48 and larger |
| Paint Durability | Risk of chipping during folding | Paint after folding for best adhesion |
| 3D Effect | Limited – pre-printed surface | Excellent – can add clear epoxy for glass effect |
| Assembly Speed | Fast – ready to use | Slower – requires painting |
| Weathering Options | Limited – can look too sterile | Full control for realistic weathering |
Ultimately, the choice is strategic. For a quick, clean build in a small scale, Color PE is an excellent option. For a large-scale competition piece where ultimate realism and weathering are the goals, the time invested in bare brass will yield a far more convincing and three-dimensional result.
The “2D effect” error: when flat metal parts look unrealistic in a 3D cockpit
The most common mistake when using photo-etched parts is failing to overcome their inherent flatness. A cockpit is a three-dimensional space, and simply gluing a perfectly flat metal part onto a surface can look jarringly unrealistic. Even the most detailed etching can’t hide the fact that the part has no physical depth. Research shows that most photo-etched parts for scale models range in thickness from 0.1mm to 0.2mm, making them essentially two-dimensional planes in a 3D environment. The art of using PE effectively lies in creating the *illusion of volume and depth*.
One of the most powerful techniques is to create physical separation. Instead of gluing a panel directly onto a surface, place tiny, hidden spacers made from plasticard between the PE part and the cockpit wall. This small gap creates real shadows, instantly suggesting thickness and depth. For parts that are meant to be flexible, like seatbelts or canvas covers, pre-shaping is non-negotiable. Gently bend and form the brass part over the seat or structure it will be attached to *before* gluing. This ensures it conforms naturally to the contours, looking like it has weight and is affected by gravity.
Where physical depth is not possible, you must create it visually. A dark pin wash applied carefully around the edges of a PE part will create an artificial shadow line, tricking the eye into seeing depth that isn’t there. This is especially effective for instrument panel bezels and raised details. You can also attack the unnatural flatness of the surface itself. A perfectly smooth PE floor plate, for instance, looks sterile. By stippling it with a thick primer before painting, you can create a subtle, non-slip texture that breaks up the flat plane and adds a layer of realism. By layering these techniques—physical separation, pre-shaping, and visual effects—you can transform a flat piece of brass into a convincing component of a three-dimensional world.
When should you heat brass parts to make them pliable?
Heating brass, a process known as annealing, is a critical but often misunderstood technique. Its purpose is to soften the metal, making it far more pliable and less prone to cracking during complex shaping. However, it is not necessary for every bend. For simple, straight-line folds, especially 90-degree angles made with a hold-and-fold tool, annealing is overkill and can make the part too soft to hold a crisp edge. The decision to anneal should be a strategic one, reserved for specific situations where the metal’s workability is paramount.
The primary indicator for annealing is the need for complex or compound curves. If you need to form a brass part into a cylinder, a cone, or any shape that curves in multiple directions simultaneously, attempting to do so with cold brass will result in kinking and cracking. Annealing is essential here. The thickness of the part is another factor; brass parts thicker than 0.15mm become significantly more resistant to bending, and heating them is required if multiple folds are planned. As one expert modeler noted, the decision also carries risks. In a discussion on the Ships of Scale forum, a member shared this crucial insight:
Etched parts should be annealed if soft curves are needed. It softens the metal and makes easier to bend. However, I have built several kits that are totally photoetched and annealing a set of landing gear or a wing spar for an airplane could be a disaster.
– Jeff (Ships of Scale Forum Member), Ships of Scale Forum Discussion
This highlights the core principle: anneal for form, not for structure. The process involves holding the part with reverse-action tweezers and passing it gently through the tip of a candle flame. You are looking for a subtle change in color; the moment it begins to glow a dull red, remove it from the heat and let it air cool. Using a blowtorch is far too aggressive and will likely destroy small parts. This controlled application of heat restores the brass’s malleability, allowing you to shape it into organic forms that would otherwise be impossible.

How to Paint Photo-Etched Brass So the Color Doesn’t Flake Off During Handling?
Paint flaking off smooth brass is a near-universal problem, and the cause is simple: lack of surface adhesion. The perfectly smooth, non-porous surface of photo-etched brass offers nothing for paint to grip onto. The solution is a meticulous, three-stage surface preparation process that creates both a mechanical and chemical bond, ensuring your paint job is as durable as the metal underneath. Skipping any of these steps is a guarantee of future chipping and flaking.
The first step is to create a mechanical key. The smooth surface must be roughened up on a microscopic level. This can be done by lightly scuffing the entire surface of the brass part with a fiberglass pen, very fine-grit sandpaper (1000-grit or higher), or a gentle abrasive pad. The goal is not to remove material, but to create millions of tiny scratches that will give the primer a physical surface to bite into. This step is the most critical for creating a durable finish.
Next comes the chemical clean. Even after scuffing, the parts will be covered in finger oils, dust, and residual chemicals from the etching process. It is essential to remove this residue to allow the paint and glue to stick properly. A thorough wipe-down with isopropyl alcohol or a dedicated degreaser is mandatory. After cleaning, you must apply a specialized metal primer. Standard acrylic or enamel primers will not bond effectively. You need a self-etching lacquer primer, such as Tamiya Metal Primer or Mr. Metal Primer. These primers contain acids that lightly etch the metal surface as they dry, creating an unbreakable chemical bond. For simple bends, it’s often easier to prime and paint the parts while they are still on the fret. For complex shapes requiring significant bending, it’s better to fold the bare brass first, then prime and paint to avoid stressing the paint film.
Why You Must Treat Resin Parts Differently Than Plastic to Avoid Lung Damage?
While this guide focuses on brass, many high-detail modeling projects involve another common aftermarket material: polyurethane resin. It is critically important to understand that resin is not plastic. The dust created from sanding, cutting, or drilling resin parts is a serious respiratory hazard. Unlike plastic shavings, which are relatively inert, fine resin dust contains chemicals that can cause chronic lung damage and severe allergic reactions with repeated exposure. Treating resin with the same casual approach as styrene plastic is a significant health risk that must be actively managed.
The cornerstone of safe resin handling is respiratory protection. The fine particulate matter is easily inhaled and can become lodged deep within the lungs. Therefore, when working with resin parts, it is an absolute requirement that respiratory protection must be at minimum N95/P2-rated. A simple paper dust mask is insufficient. This protection must be worn anytime you are creating dust, whether by sanding, sawing, or grinding. The single most effective way to control this hazard at its source is to switch exclusively to wet-sanding. By dampening the sandpaper and the part with water, you trap the resin dust in a slurry, preventing it from becoming airborne.
Beyond the dust hazard, resin parts require different preparation. They are cast in silicone molds that use a mold-release agent to prevent sticking. This oily residue remains on the parts and will repel paint and glue completely. Before any assembly or painting, it is mandatory to scrub every resin part with warm, soapy water and an old toothbrush to remove this agent. Finally, because resin is more brittle than plastic, standard sprue cutters can shatter it. A razor saw should be used to carefully separate parts from their casting blocks, providing a clean, controlled cut without risking damage to the component.
Key Takeaways
- Ditch standard tweezers for stress-free tools like reverse-action tweezers or vacuum pens to prevent parts from launching.
- A hold-and-fold tool is non-negotiable for achieving crisp, perfect 90-degree angles by isolating pressure on the fold line.
- Paint will not stick to bare brass without proper surface preparation: you must mechanically scuff, chemically clean, and apply a self-etching metal primer.
How to Paint Realistic Cockpit Instruments in 1:How to Start Building Static Aircraft Models Without Spending Over $100?
While mastering the delicate art of photo-etch takes you far beyond the scope of a sub-$100 starter kit, the principles of precision are universal, especially when creating realistic cockpit instruments. A beautifully detailed instrument panel is a focal point that can elevate an entire model, and achieving this realism relies on a layering technique that builds up depth and detail systematically. Simply painting a black panel with white dots is the equivalent of the “2D effect” in brass parts—it looks flat and unconvincing.
The process begins with the backplate of the instrument panel. This solid piece should be painted a bright white or light silver. This isn’t the final color, but a reflective base that will make the instrument dial details pop with maximum visibility. Once dry, the photo-etched front panel, already painted in the final cockpit color (typically black, dark grey, or interior green), is glued over the top. This creates the basic “sandwich” with the white showing through the dial openings.
The magic happens in the next step: creating the illusion of glass. Using a fine-tipped applicator or a toothpick, apply a small drop of a clear gloss medium into each dial opening. Products like Tamiya Clear X-22 or a two-part clear epoxy work perfectly. The liquid’s surface tension will cause it to form a perfect, dome-shaped lens that magnifies the detail underneath and realistically simulates the glass cover of a real instrument. To complete the effect, use the tip of a 000-size brush to add tiny dots of red, yellow, or blue paint on the panel to represent switches, buttons, and warning lights. The final touch is a very subtle dark grey or black panel line wash, which adds a final layer of depth and separation between each instrument, making the entire panel come to life.