The realism of an aircraft diorama is decided on the ground, not in the air.
- An aircraft model, no matter how perfectly built, looks like a toy if its support equipment is historically inaccurate in type, color, or condition.
- Authenticity is not about collecting objects, but about building a coherent “operational narrative”—a believable moment frozen in time.
Recommendation: Treat every piece of Ground Support Equipment (GSE) as a critical part of the story, ensuring its presence, appearance, and placement are justified by the aircraft’s specific time, location, and mission.
As a diorama builder, you’ve spent countless hours achieving the perfect paint finish and precise decal placement on your aircraft model. You place it on its base, add a few accessories, and step back. Yet, something feels wrong. The scene lacks life; the meticulously crafted airplane suddenly looks like a toy. The source of this dissonance is almost always the Ground Support Equipment (GSE). The common advice is to “do your research” or “match the scale,” but this misses the fundamental point.
The core issue is a failure in storytelling. A diorama is not a static display of objects; it is a snapshot of an operational moment. That fuel truck, starter cart, and set of wheel chocks are not mere decorations. They are characters in a silent play, and their appearance must align with the script dictated by the aircraft’s specific era, theater of operations, and immediate situation. A pristine, bright yellow start cart next to a battle-weary 1944 P-51 Mustang on a muddy English airfield is a glaring historical contradiction that shatters the illusion of reality.
This guide moves beyond generic advice. We will adopt the perspective of a military logistics historian to deconstruct the “visual grammar” of an authentic diorama. Instead of just listing what to buy, we will explore the operational logic that dictated which equipment was used, how it looked, and where it was placed. This approach transforms the selection of GSE from a frustrating guesswork exercise into a deliberate act of historical storytelling.
By understanding the principles of operational narrative and logistical footprints, you will learn how to make every element on your base work in concert to create a cohesive and deeply convincing scene. This article will break down the key considerations, from validating colors and weathering to choosing between kit types and positioning every last piece with purpose.
Summary: How to Build a Historically Accurate Diorama Ecosystem
- Why a yellow start cart looks wrong next to a 1944 Mustang?
- How to weather yellow support gear so it looks used but not abandoned?
- Detail or Ease: are expensive resin tractors worth the assembly pain?
- The visual jar when 1:How to Start Building Static Aircraft Models Without Spending Over $100?
- How to position wheel chocks so they look like they are actually holding weight?
- Why Clean Models Look like Toys: Adding Authentic Weathering to Scale Aircraft?
- Military vs Civil Aircraft Models: Which Collection Retains Value Better?
- What Defines a High-Fidelity Replica for Serious Aviation Collectors?
Why a yellow start cart looks wrong next to a 1944 Mustang?
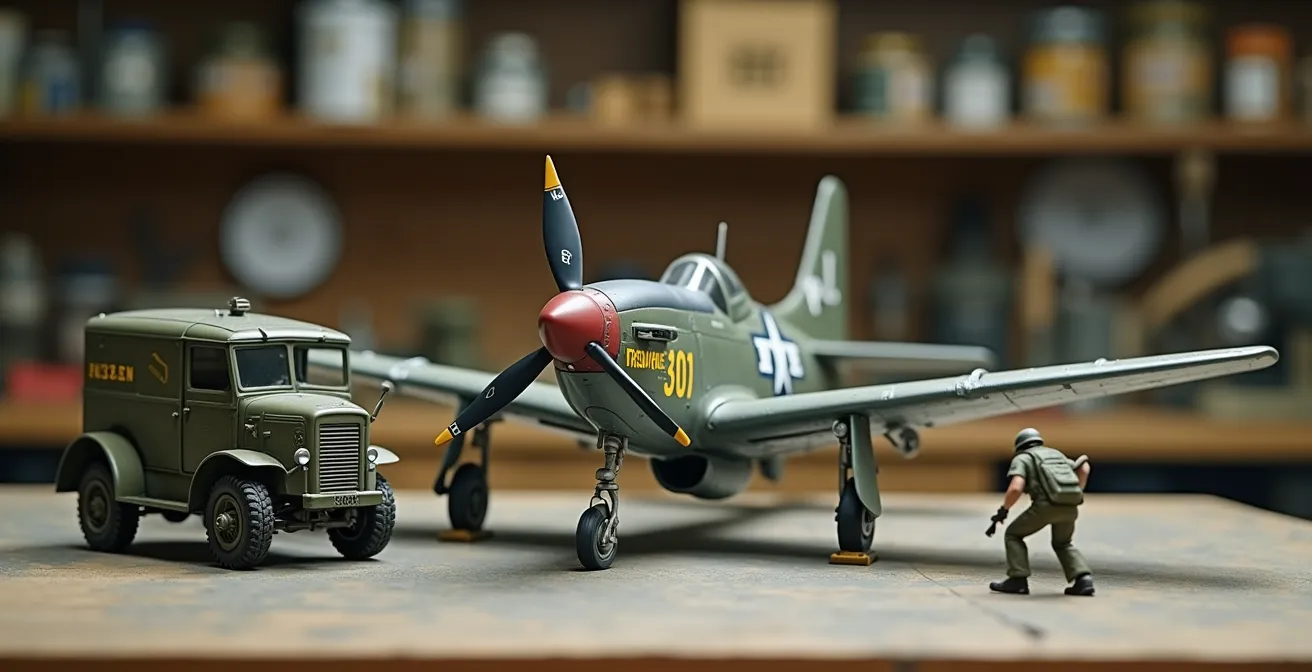
The most immediate and jarring error in a diorama is anachronistic color. The bright, high-visibility “Safety Yellow” seen on modern airport ground equipment is a post-war convention. During World War II, the operational logic was camouflage and concealment, not airfield safety. For a 1944 P-51 Mustang in the European Theater of Operations (ETO), virtually all its associated ground equipment would have been painted in Olive Drab to match the vehicles and aircraft it served. The use of yellow or blue was largely restricted to pre-1942 equipment or stateside training facilities where the risk of enemy air attack was negligible.
This illustrates a core principle: GSE color is dictated by operational context, not a universal standard. A historian’s approach requires you to ask: What was the primary threat in this specific time and place? In the ETO of 1944, it was enemy aircraft. Therefore, equipment was camouflaged. Furthermore, it’s not just about the color, but the type of equipment. A P-51 would be serviced by a USAAF B-4 or C-1 power unit, not a later MA-1A cart from the jet age. Fortunately, manufacturers are increasingly catering to this need for accuracy. An analysis of available kits reveals that accurate period-correct items are available, such as the B-4 and B-5 Maintenance stands used for P-51 Mustang support during WWII.
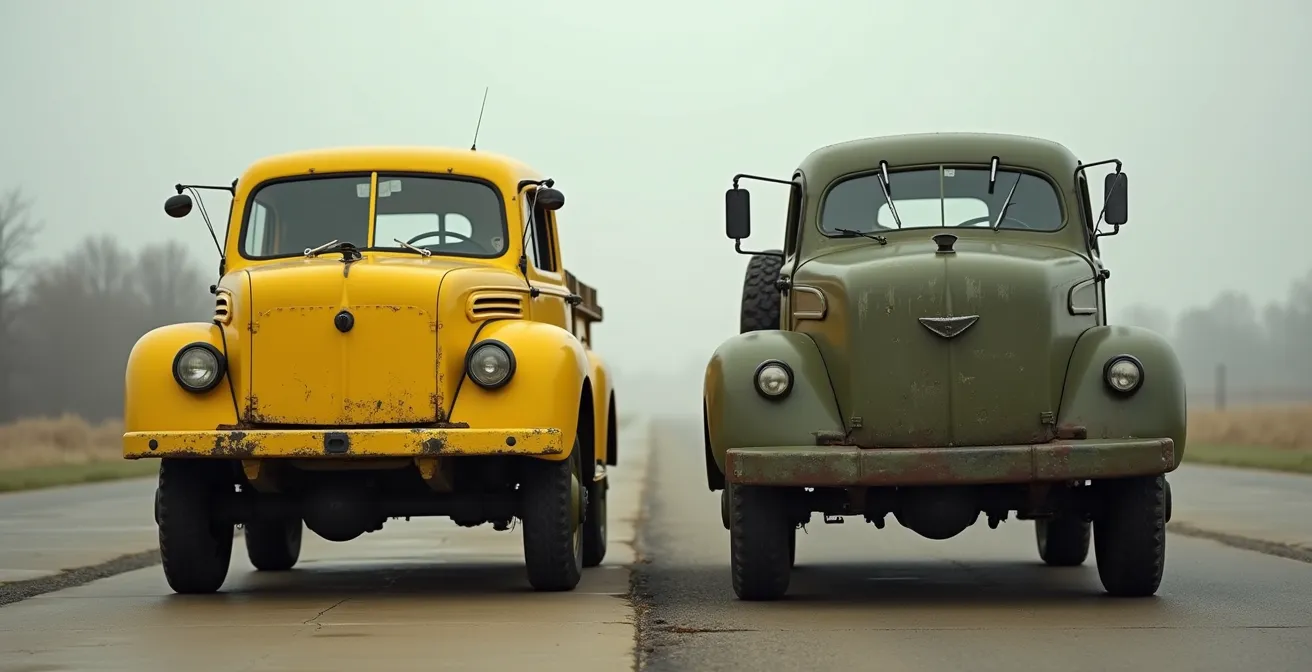
The image above starkly contrasts the visual harmony of correct Olive Drab equipment with the disruptive effect of an anachronistic yellow cart. Verifying the correct color and type is the first step in building a believable operational narrative. Research should focus on the specific theater and year; for instance, ETO operations standardized Olive Drab after 1943, making this the default choice for any late-war European scene. This commitment to detail transforms a model from a simple representation into a historical statement.
How to weather yellow support gear so it looks used but not abandoned?
Weathering is not about making things look old; it’s about making them look in-service. The goal is to tell the story of the equipment’s daily life, not its journey to the scrapyard. This is a subtle but critical distinction. An abandoned piece of equipment shows uniform rust and decay, while an operational piece shows wear in specific, logical places. The key is to think about how humans and the environment interact with the object.
Human wear patterns are the most important. Focus weathering on areas of frequent contact: handles, steps, control panel switches, and latches. These areas would show chipped paint, exposed metal polished by hands, and layers of grime. Conversely, areas that are hard to reach or protected would retain more of their original color and finish. Fluid stains are another powerful storytelling tool. They should be specific and logically placed. Think of dark, greasy hydraulic fluid stains near hoses and pistons, light, chalky residue from coolant overflows near a radiator, and subtle, matte stains from spilled fuel around a filler cap.
Environmental weathering must match the diorama’s location. A vehicle on a Pacific island base will show salt corrosion and faded paint from intense sun, while one in England will feature mud splatters and rain streaks. This is where a table of effects can be invaluable for maintaining consistency.
| Theater/Location | Primary Weathering | Secondary Effects | Color Shifts |
|---|---|---|---|
| Desert/North Africa | Heavy dust accumulation | Sand abrasion on edges | Sun-bleached yellows |
| European Theater | Mud splatters, rain streaks | Light rust on exposed metal | Darker, grimy tones |
| Pacific Islands | Salt corrosion | Tropical humidity effects | Whitish salt deposits |
| Home Base/Training | Minimal weathering | Regular maintenance visible | Retained original colors |
Balancing these effects is the final step. A sun-faded top surface should contrast with a less-faded, dirtier underside. This balance between environmental effects and human interaction is what creates the convincing illusion of a piece of equipment that is hard-working, maintained, but definitely not new.
Detail or Ease: are expensive resin tractors worth the assembly pain?
The choice between a basic, injection-molded plastic GSE kit and a high-detail, multi-part resin kit is a critical decision in the diorama planning stage. It’s not simply a matter of cost, but of narrative purpose. The primary question to ask is: What is this object’s role in my story? Is it a background element meant to add ambiance, or is it a focal point meant to be examined closely?
Basic plastic kits are excellent for populating the background. They are affordable, quick to assemble, and provide the necessary shape and form to suggest a busy airfield. Their details are often softer or molded-on, which is perfectly acceptable for an object that will be seen from a distance or partially obscured. Their purpose is to support the scene, not to be the star.
Expensive resin kits, on the other hand, are designed to be centerpieces. They offer a level of fidelity that plastic often cannot match, with fine, separately-molded parts, sharp details, and unparalleled accuracy for a specific vehicle variant. This detail comes at the cost of higher price and significantly more complex assembly, often requiring specialized tools and adhesives. A resin tractor is best used when it is a key part of the narrative—for example, a specific type of tug known to be used in a documented historical event you are recreating. The decision can be guided by a simple matrix.
However, there’s a third way. Modelers can achieve near-resin quality by “super-detailing” a more affordable plastic or basic resin kit. As demonstrated by product lines from manufacturers, there are now many mid-range options available. An analysis of kits from Aircraft In Miniature shows a range of GSE like MB-4 and Sentinel tractors. A skilled modeler can enhance these with scratch-built wiring, photo-etched details for grilles and panels, and brass replacements for thick plastic parts, creating a high-fidelity piece without the cost of a full high-end resin kit.
| Factor | Basic Plastic Kit | Detailed Resin Kit | Recommendation |
|---|---|---|---|
| Diorama Position | Background placement | Focal point/foreground | Use resin for centerpiece |
| Historical Accuracy | Generic representation | Specific unit/mission | Resin for documented events |
| Assembly Time | 2-4 hours | 8-12 hours | Consider deadline |
| Cost Range | $15-30 | $50-120 | Budget per importance |
| Detail Level | Molded-on details | Separate fine parts | Match aircraft detail level |
The visual jar when 1:How to Start Building Static Aircraft Models Without Spending Over $100?
The “visual jar” is that subconscious feeling that something is wrong with a scene, a subtle discord that breaks the illusion of reality. It often has little to do with the cost of the kits and everything to do with a lack of internal consistency. Avoiding these visual contradictions is paramount for a believable diorama, and it is a discipline of logic, not budget. These are the “grammatical errors” of your visual narrative.
The most common error is a logical disconnect in activity. If a starter cart is hooked up and a pilot is in the cockpit, the wheel chocks should be removed or in the process of being removed. Having an aircraft ready for engine start while being securely chocked for long-term parking tells two contradictory stories at once. Similarly, the state of the equipment must match the state of the aircraft. A heavily weathered, mud-splattered aircraft just returned from a mission cannot be parked on a pristine tarmac being serviced by gleaming, clean equipment. All elements must share the same history.
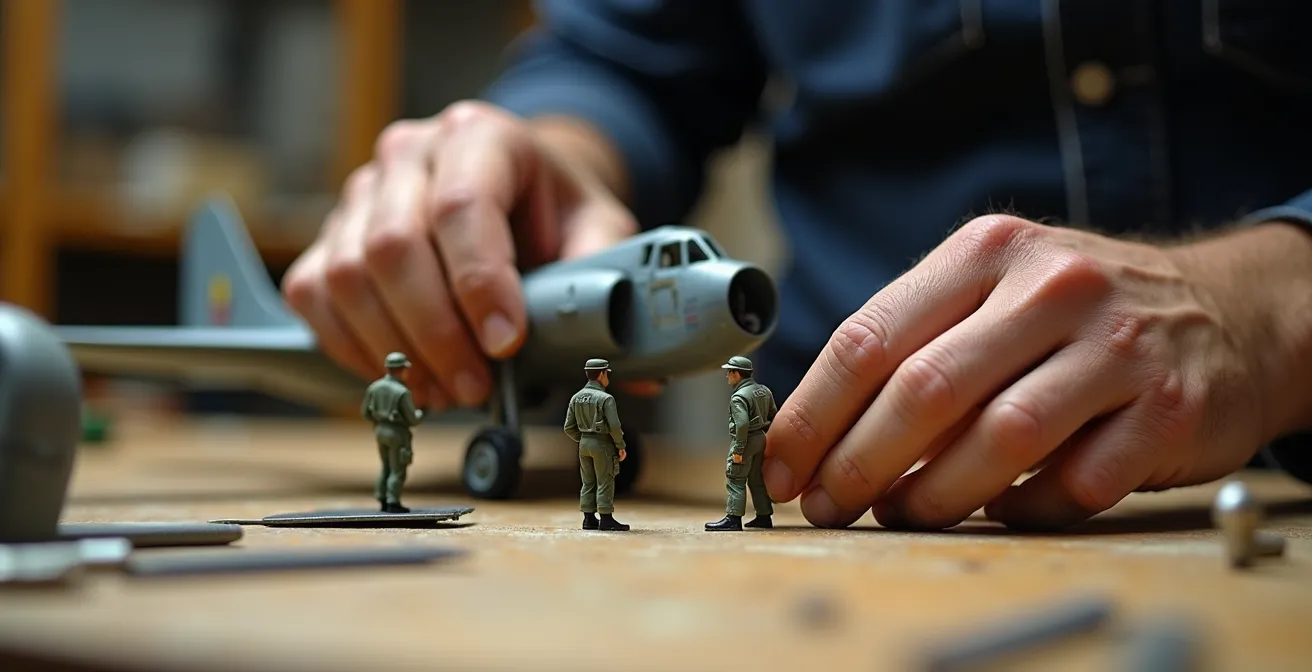
Scale consistency is another critical factor. While it seems obvious, small discrepancies can create a significant visual jar. Mixing a 1:50 scale truck with a 1:48 scale aircraft is a frequent mistake. Though the difference seems minor, it creates a subtle forced-perspective effect that the human eye detects as unnatural. Professional modelers stress this point, noting that even a 2% scale difference can break the illusion. The solution is to source all diorama elements—figures, vehicles, and accessories—from ranges specifically designed for a single, unified scale.
Finally, the artistic finish must be unified. All elements should share the same sheen level. A matte-finished combat aircraft should not be serviced by a high-gloss fuel truck. This consistency in paint finish ties the entire scene together, making it read as a single, cohesive environment rather than a collection of disparate models.
How to position wheel chocks so they look like they are actually holding weight?
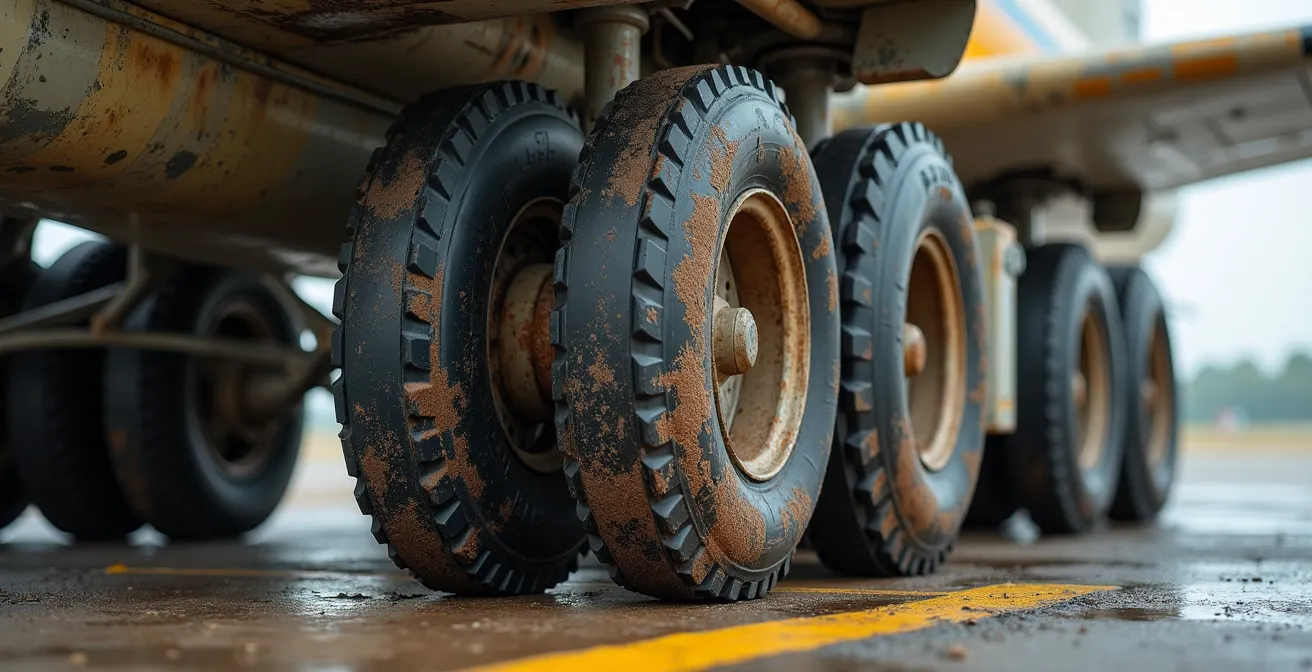
The humble wheel chock is one of the most powerful storytelling devices in a diorama, capable of conveying an aircraft’s status with its placement alone. Yet, it is often treated as an afterthought, simply glued next to a tire. To make chocks look like they are performing their function—holding back the immense weight of an aircraft—requires attention to three key areas: tire compression, placement logic, and integration with the ground.
First, an aircraft tire is not a perfect circle of hard rubber; it deforms under weight. To simulate this, you must create a “flat spot” on the bottom of the model’s tire. Gently sand the tire where it will meet the ground and the chock until a slight flattening is visible. When the chock is pushed against this flattened area, it creates the visual impression of compression and weight, instantly making the connection between the two objects feel real and functional.
Second, the placement of the chocks tells a story. Are they placed fore and aft of all wheels? This signifies the aircraft is securely parked for an extended period, perhaps overnight or for maintenance. Are they on one side of the main wheels only? This suggests a temporary stop, such as a quick refueling. Are they in the process of being removed by a ground crew figure? This clearly indicates the aircraft is preparing for departure. This “storytelling guide” helps create a dynamic and logical scene.
Action Plan: Auditing Your Wheel Chock Realism
- Tire Compression: Examine your aircraft’s tires. Have you sanded a slight flat spot on the bottom to simulate weight and provide a flush surface for the chock?
- Operational Intent: Does the chock’s position (single-side, fore-and-aft) match the story you are telling (temporary stop vs. secure parking)?
- Ground Integration: Is the chock sitting unnaturally on top of the base, or is it slightly pressed into the groundwork (plaster, mud) to show it’s been there for a while?
- Debris Accumulation: Have you added a small amount of dust, dirt, or leaves around the edges of the chock to show it has settled into its environment?
- Material Weathering: Does the chock’s finish match its material and environment? Wooden chocks should show splinters and oil stains; metal ones may have chipped paint and light rust.
Finally, the chocks must be integrated into the groundwork. A chock sitting perfectly on top of a muddy field looks fake. While the groundwork (plaster, acrylic mud, etc.) is still slightly soft, gently press the chocks into it. This embeds them realistically into the surface. After it dries, adding a small amount of fine scenic dust or debris around the base of the chocks will further anchor them in the scene, suggesting they have been in place for some time.
Why Clean Models Look like Toys: Adding Authentic Weathering to Scale Aircraft?
A factory-fresh, perfectly clean model of a military aircraft, especially one depicted in an operational setting, almost always looks like a toy. The reason is simple: operational aircraft are tools, and tools get dirty. Authentic weathering is the crucial process that breathes life and history into a model, transforming it from a sterile replica into a believable machine with a past. However, the most common mistake is to weather the aircraft in isolation. The secret to true realism is creating a cohesive weathering environment where the aircraft, its GSE, and the ground itself all tell the same story.
The process should start with the base. The type of dirt, dust, or mud on the ground is the primary “pigment” for your entire scene. For example, if you are depicting a dusty airfield in North Africa, all elements must share that same dusty finish. A study of professional techniques shows that modelers use products to add muddy or dusty areas to the ground first. This same dust color should then be applied to the aircraft’s tires, wheel wells, and lower fuselage, as well as the wheels and lower chassis of the fuel truck and bomb cart.
This environmental link is the foundation. Next, add operational connections. An oil drip from the aircraft’s engine should create a small puddle on the tarmac, and the tires of the GSE vehicle parked nearby might have a slight sheen from driving through it. Exhaust stains from the aircraft should be mirrored by a light dusting of soot on the top surfaces of any equipment positioned behind the engines. These details physically and visually link the separate elements into a single, interactive scene.
Finally, unify the effects of weather. If the sun is harsh, as in a Pacific theater, the fading on the top surfaces of the aircraft’s wings should be consistent with the fading on the hood of the jeep and the shoulders of the ground crew’s uniforms. Every element existed in the same world, under the same sun and in the same rain. When the weathering is cohesive, the entire diorama becomes a believable, living environment, and the “toy-like” appearance vanishes.
Military vs Civil Aircraft Models: Which Collection Retains Value Better?
When considering the long-term value of a model aircraft collection, the debate between military and civil subjects is common. While military models benefit from extensive documentation and a wide public interest in historical conflicts, civil aircraft dioramas can achieve significant value through a different route: rarity and specialized historical knowledge, particularly concerning their GSE.
The availability of kits is a major factor. The market is saturated with GSE for popular military subjects like WWII fighters or modern jets. In contrast, accurate GSE for a specific 1950s civilian airliner is exceptionally rare. A modeler who successfully researches and builds or scratch-builds the correct period-specific passenger stairs, baggage carts, and tow tractor for a vintage airliner is creating something truly unique. This scarcity immediately increases the prestige and, therefore, the potential value of the piece. The research itself is more challenging, as documentation for civil GSE is often harder to find than for its military counterparts, making a well-executed diorama a testament to the builder’s dedication.
Case Study: Value Through Historical GSE Crossovers
A fascinating niche that adds significant value is the depiction of post-war civilian aviation repurposing military equipment. In the years immediately following WWII, fledgling airlines often used surplus USAAF equipment to service their first aircraft. A diorama showing an ex-military Clarktor tractor towing a DC-3 in an early civilian airline livery represents a deep historical insight. It tells a specific story of transition and ingenuity. Collections that feature these well-researched “crossover” moments demonstrate an expert-level understanding that is highly prized by serious collectors, showcasing how manufacturers like Aircraft In Miniature serve both military and civil dioramas with unique items like Dakota Passenger Steps alongside military tractors.
Ultimately, the value of any collection, military or civil, is maximized when it transcends individual models and becomes a series of well-executed, historically sound dioramas. A complete and accurate scene, telling a compelling story with both the aircraft and its full GSE ecosystem, will always be more valuable than a standalone model, regardless of the subject. The effort invested in researching and creating accurate ground support elevates a collection from a display of replicas to a curated museum of moments.
Key Takeaways
- Historical accuracy is an ecosystem; the GSE must be as period-correct as the aircraft itself in type, color, and markings.
- Weathering tells a story of use, not abandonment. It must be logical, specific to the environment, and consistent across all elements of the diorama.
- Every object in the scene has a narrative role. Use high-detail resin for focal points and simpler plastic kits for background elements to manage cost and effort.
What Defines a High-Fidelity Replica for Serious Aviation Collectors?
For a serious collector, a “high-fidelity replica” is far more than an accurately shaped and painted model. It is an evidence-based, three-dimensional historical argument. The ultimate standard is not just accuracy, but plausibility. Every single element in the diorama, from the aircraft to the smallest oil drum, must be justified by a logical and coherent operational narrative, as if it were a museum-quality display frozen in time.
This “ecosystem approach” means that the aircraft is only the starting point. As professional collectors emphasize, a high-fidelity display requires a complete and researched range of support equipment. The presence of every vehicle and accessory must answer the question: “What is happening right now in this specific place?” Is the aircraft being refueled? Then the fuel truck must be of a type used by that unit in that theater, its hoses must be correctly positioned, and a ground crew figure should be plausibly interacting with it. According to an overview of available kits, brands like Gemini Jets and Herpa provide this full ecosystem, including tugs, belt-loaders, and ‘Follow Me’ cars, enabling the creation of a complete operational moment.
This commitment to an evidence-based narrative is what separates a good modeler from a true collector. A high-fidelity display is built upon a foundation of research. The choice of every piece of GSE should be traceable to period photographs, unit histories, or technical manuals. The weathering should match the documented geographical context, and the placement of each element must follow operational logic. This rigorous process transforms the diorama from a simple model into a historical document.
Ultimately, a high-fidelity replica is defined by its ability to tell a convincing and detailed story without a single word. It is a complete, self-contained world where every element is in its right place for the right reason, creating an immersive and intellectually satisfying experience that holds up to the most intense scrutiny. This is the standard to which serious aviation collectors aspire.
To put these historical principles into practice, the next logical step is to begin planning your diorama not around an aircraft, but around a specific, verifiable operational moment.