Decal silvering isn’t a random failure; it’s a predictable optical effect caused by microscopic air pockets trapped under the decal film on an uneven surface.
- A mandatory, mirror-smooth gloss varnish is the only way to eliminate the surface’s rough micro-topography, which is the root cause of silvering.
- Solvents are not magic; they are chemical tools to be selected based on decal thickness and paint resilience to ensure full adhesion.
Recommendation: Treat the entire process—from surface prep to final varnish—as a single system of achieving a unified, light-refracting surface.
That tell-tale milky, silvery sheen under a freshly applied decal on a perfect matte paint job is one of the most frustrating sights for a model builder. You followed the common advice: you used water, maybe even a setting solution, but the problem persists, leaving a finish that looks more like a sticker than a painted-on marking. The frustration is understandable because the conventional wisdom often misses the fundamental science of the failure.
The issue isn’t just about “trapped air”; it’s a failure in physics. Silvering is the result of optical refraction. It’s the visual effect of light scattering through thousands of microscopic air pockets trapped between the decal film and the paint. This happens because a matte surface, at a microscopic level, is not flat. Its micro-topography is a rugged landscape of peaks and valleys. The decal film, like a stiff sheet of plastic, bridges over these valleys, trapping air and creating the silvery effect.
To truly solve this, you must stop thinking like a simple applicator and start thinking like a surface chemist. The key isn’t a single trick, but a systematic approach to managing surface preparation, liquid surface tension, chemical adhesion, and final textural uniformity. It’s about creating an environment where it’s physically impossible for air to become trapped.
This guide will deconstruct the entire process from a technical standpoint. We will analyze the mandatory surface preparation, the proper methods for decal application and recovery, the chemical properties of different solvents, and the critical final steps to unify your model’s finish. By understanding the ‘why’ behind each step, you can build a repeatable process that guarantees perfect, painted-on results every time.
text
For those who prefer a visual demonstration, the following video provides a detailed look at the process of applying waterslide decals, complementing the technical principles discussed in this guide.
text
To navigate this technical breakdown, the article is structured to follow the logical workflow of decal application. The following summary outlines each critical phase we will cover, from foundational surface preparation to advanced troubleshooting.
Summary: A Systematic Approach to Eliminating Decal Silvering
- Why a mirror-smooth surface is mandatory before applying any decal?
- How to cut close to the design to minimize visible edges?
- How to lift and reposition a decal that grabbed the surface too quickly?
- The needle trick: how to puncture and settle an air bubble under a dry decal?
- Gloss vs Matte final coat: how to unify the decal texture with the paint?
- Micro Sol vs Mr. Mark Softer: Which Solvent Won’t Melt Your Decals?
- Applying Hundreds of Stencils: How to Avoid “Decal Fatigue” and Alignment Errors?
- How to Research Historical Liveries When Archival Photos Are Black and White?
Why a Mirror-Smooth Surface Is Mandatory Before Applying Any Decal?
The absolute, non-negotiable first principle in preventing silvering is that decals must be applied to a high-gloss surface. Attempting to apply them directly onto a matte or satin finish is the primary cause of failure. As established, a matte finish is microscopically rough, creating a “micro-topography” of peaks and valleys. A decal’s carrier film is relatively rigid and cannot conform to these tiny imperfections on its own. It bridges the valleys, trapping air underneath, which refracts light and creates the characteristic silvering effect.
A gloss varnish fills in these microscopic valleys, creating a perfectly smooth, glass-like plane. On this surface, the decal can achieve full contact, leaving no room for air to be trapped. Water between the decal and the gloss surface is easily squeezed out, allowing the decal’s adhesive to bond directly and completely. This principle is not a matter of opinion; it is a matter of surface physics. Many builders try to skip this step to save time, only to spend hours trying to fix the inevitable silvering later.
Case Study: The DMW Silvering Prevention Method
Dave’s Model Workshop consistently demonstrates that applying decals exclusively to a prepared gloss surface completely prevents silvering. Their method involves applying a setting agent to help the decal settle, followed by another gloss coat over the dried decals. This second gloss coat serves to eliminate the raised lip edges of the decal film and provides a robust, sealed layer that protects the marking from subsequent weathering processes.
The process is straightforward: after your base colors are applied and cured, apply one or more light coats of a high-quality gloss varnish. Allow this to cure completely (typically 24 hours) before beginning any decaling work. This single step does more to prevent silvering than any other technique or chemical product combined. It is the foundation upon which all other steps are built.
How to Cut Close to the Design to Minimize Visible Edges?
Even on a perfect gloss surface, a large area of clear carrier film around a decal can become visible after the final matte coat is applied. This “halo” effect detracts from the painted-on look. The solution is to meticulously trim away as much of the excess carrier film as possible before soaking the decal. This reduces the surface area of the film that needs to be blended into the paintwork and minimizes the potential for visible edges or silvering at the decal’s perimeter.
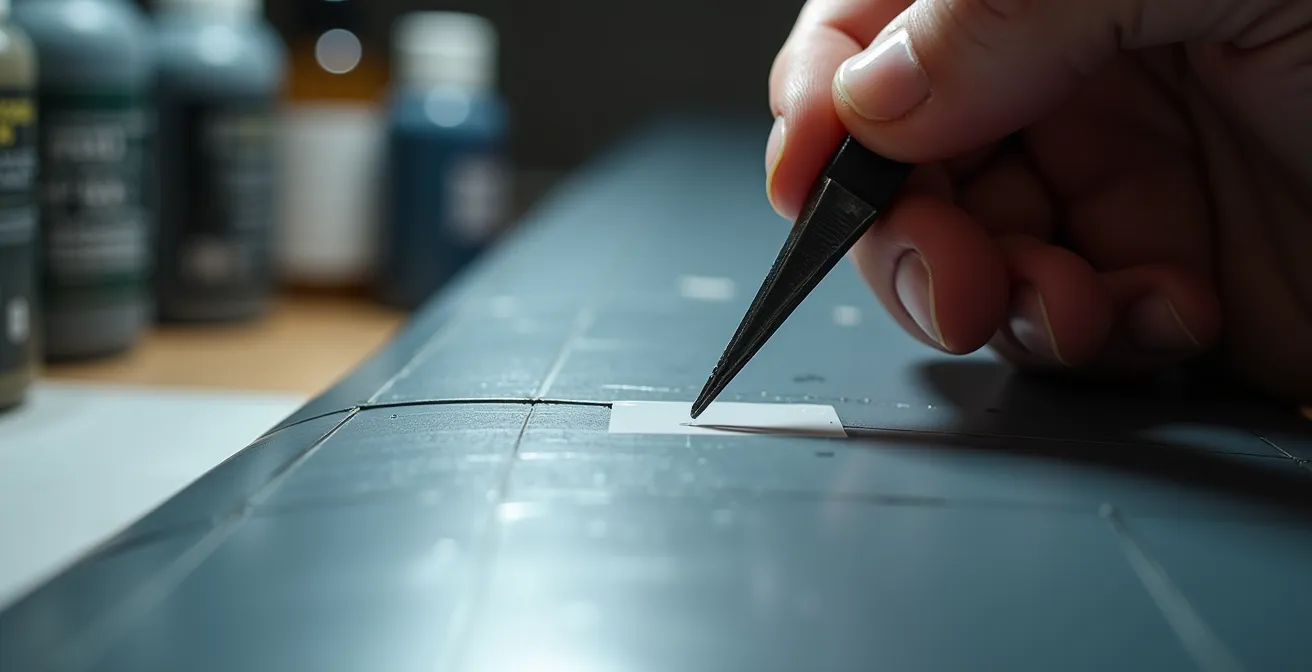
This requires precision and a sharp tool. A brand-new No. 11 hobby knife blade is essential. A dull blade can tear the decal paper or leave a ragged edge on the film. For intricate markings, such as letters or numbers, you can even cut away the film inside the character. For example, with the letter ‘D’, a careful incision can remove the clear film from its center. While this level of detail is painstaking, its impact on the final result is significant, as it makes the marking appear truly integrated with the surface.
This paragraph introduces the concept of precision cutting. To better understand the required level of detail, the illustration below shows the technique in a macro view.
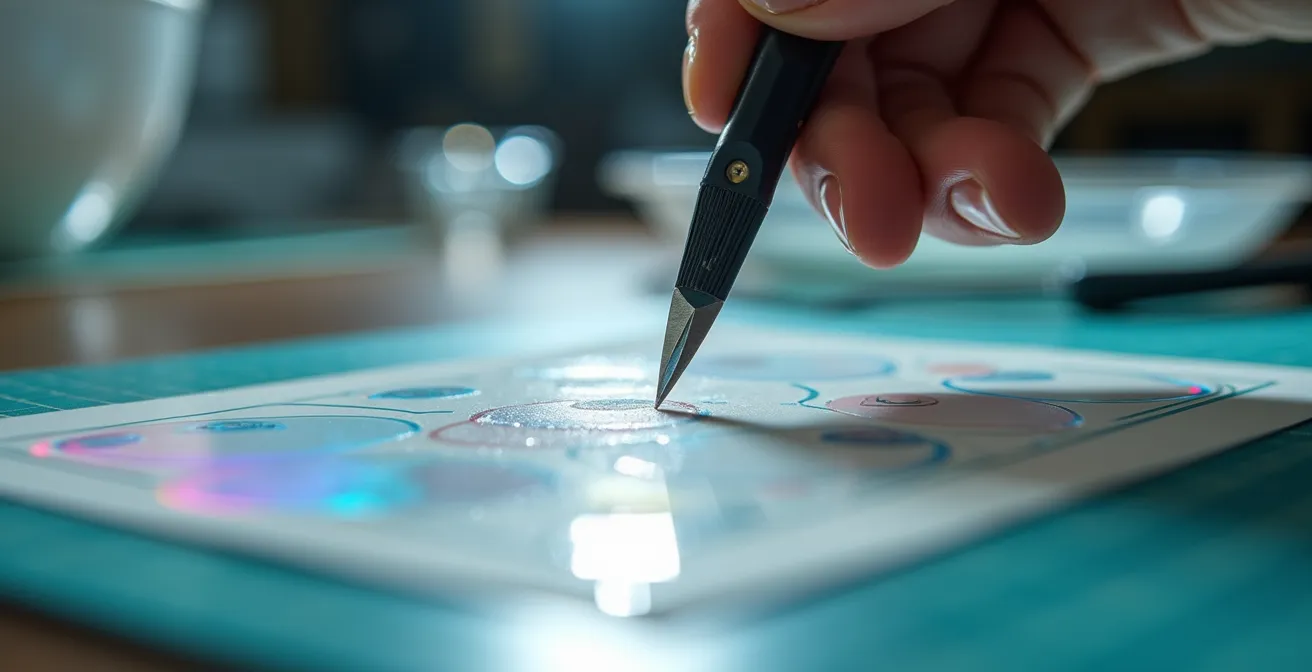
As this image highlights, the goal is a clean, decisive cut. Some modelers prefer to trim the film after the decal has been soaked and is on the model, but this carries a high risk of scratching the underlying paint. The safest and most controlled method is to perform all trimming on a cutting mat before the decal ever touches water. This preparation, though tedious, is what separates a good finish from a great one.
How to Lift and Reposition a Decal That Grabbed the Surface Too Quickly?
Occasionally, a decal will “grab” the model’s surface almost immediately, preventing proper positioning. This happens when the decal’s adhesive activates too quickly or when there is insufficient water to act as a lubricant. The instinct is to force it, but this will stretch or tear the fragile decal. The key to safely lifting and repositioning it lies in re-introducing a liquid medium and understanding the role of water temperature.
If a decal is stuck, do not push it. Instead, apply a generous drop of lukewarm water or decal setting solution (like Micro Set) to the edge of the decal. Let capillary action draw the liquid underneath. After a few seconds, the decal should be free to move again. The temperature of the water used for the initial soak plays a huge role in this behavior. Hot water can make the adhesive overly aggressive, while cold water may not activate it enough. Lukewarm water provides the best balance of workability and adhesion.
The following table, based on common modeling experience, outlines how water temperature affects decal behavior and can help you diagnose and prevent premature adhesion.
| Water Temperature | Soak Time | Adhesive Behavior | Risk Level |
|---|---|---|---|
| Cold | 30+ seconds | Slow activation | Low adhesion risk |
| Lukewarm | 10-15 seconds | Optimal activation | Balanced |
| Hot | 5-10 seconds | Rapid activation | High – may dissolve adhesive |
Furthermore, it is important to be aware of contaminants. Expert modeling forum discussions reveal that oils from your skin can act as a surfactant, interfering with the adhesive. Always handle decals with tweezers. If a decal refuses to adhere properly, it may be due to such contamination. The solution is to clean the area with isopropyl alcohol, re-apply a gloss coat, and use a new decal if necessary.
The Needle Trick: How to Puncture and Settle an Air Bubble Under a Dry Decal?
Even with careful preparation, a stubborn air bubble or an area of silvering can appear after a decal has dried. At this point, simply pressing on the bubble is ineffective and will likely damage the decal. The correct approach is to create a path for the trapped air to escape and then use a solvent to force the decal film down into the void. This is commonly known as the “needle trick,” though an even better tool exists.
While a needle can work, it creates a circular puncture that can be more visible than necessary. According to advanced techniques from expert modelers, using the tip of a new No. 11 knife to make a tiny slice is superior. The slice is less noticeable than a round hole and can be oriented along a panel line to be virtually invisible. Once the puncture is made, apply a small amount of a strong decal softening solution (like Micro Sol or Mr. Mark Softer) directly onto the bubble.
The solvent will penetrate the hole, dissolving the decal film slightly and making it extremely pliable. As the solvent evaporates, it will pull the film down, conforming it to the surface and expelling the trapped air. Do not touch the decal while the solvent is working; it will be incredibly fragile. The decal may wrinkle and look “destroyed” initially, but it will flatten out as it dries. Multiple applications may be necessary for severe silvering.
Action Plan: Recovering from a Trapped Air Bubble
- Puncture the Bubble: Use the tip of a very sharp hobby knife to make a tiny slice in the center of the bubble or silvered area. For smaller bubbles, a sharpened needle can be used.
- Apply Softening Solution: Place a small drop of a decal softening solution (e.g., Micro Sol) directly over the puncture. Allow it to work untouched.
- Assess and Repeat: Once fully dry (several hours), inspect the area. If the bubble remains, repeat the application of the softening solution.
- Camouflage as a Last Resort: If the silvering cannot be fully eliminated, consider using matching paint to carefully touch up the affected area or disguise it with weathering effects like chipping or stains.
- Seal the Repair: After the repair is complete and fully cured, seal the decal with a gloss varnish before proceeding to weathering or final coats.
Gloss vs Matte Final Coat: How to Unify the Decal Texture with the Paint?
After all decals have been applied, settled, and allowed to cure for at least 24 hours, the model will have a patchwork of textures: the matte or satin of the original paint and the high gloss of the decal areas. The final and critical stage of the process is sheen unification. The goal is to create a single, consistent surface texture across the entire model, making the decals and paint indistinguishable from one another. This is achieved through the careful application of final varnish layers.
The process begins by applying another full coat of gloss varnish over the entire model. This step is crucial and often misunderstood. Its purpose is to “seal” the decals and, most importantly, to completely hide the edges of the decal’s carrier film. The gloss varnish has the same refractive index as the decal film, so when it flows over and around the edge, it makes that clear film “disappear.” This creates a truly unified, smooth surface ready for weathering.
The split view below illustrates the stark difference between an unsealed decal on a matte surface and a decal that has been properly integrated with gloss varnish.

Only after this sealing gloss coat has fully cured should you proceed to any weathering steps. Once weathering is complete, the final texture is applied. Whether you want a dead flat matte, a satin sheen, or a high gloss finish, this is the last coat you will apply. This final varnish layer unifies the underlying paint, decals, and weathering under a single, consistent sheen, completing the illusion that the markings are painted on. Skipping any part of this multi-layer process is what leaves visible decal edges and inconsistent finishes.
Micro Sol vs Mr. Mark Softer: Which Solvent Won’t Melt Your Decals?
Decal solvents are essential tools, but they are not one-size-fits-all. They are aggressive chemicals designed to partially dissolve the decal’s polymer film, making it soft and pliable enough to conform to complex surface details like panel lines, rivets, and curves. Using a solvent that is too strong can completely melt a decal, while one that is too weak will have no effect. The choice between popular products like Microscale’s Micro Sol and Gunze’s Mr. Mark Softer depends on the decal’s thickness and manufacturer.
Generally, decals from different manufacturers have different properties. For instance, decals from Japanese manufacturers (like Bandai or Tamiya) are often thicker and more robust than those from European companies (like Eduard or Cartograf). Thicker decals require a stronger solvent. Mr. Mark Softer is widely considered to be a more “hot” or aggressive solvent than Micro Sol, making it ideal for stubborn, thick decals. Conversely, it can easily destroy thin, delicate decals.
The following table provides a general comparison of common decal solutions, but it is critical to always test a solvent on a spare decal from the same sheet before applying it to your model. This will show you how that specific decal reacts.
This comparative analysis is drawn from a comprehensive test of decal setting solutions which provides a baseline for their relative strengths.
| Product | Strength Level | Best For | Caution Notes |
|---|---|---|---|
| MicroSet | Mild | Adhesion enhancement | Goes on model before decal |
| MicroSol | Moderate | Surface detail conforming | Only needed for detail areas, can dissolve decals |
| Mr. Mark Softer | Strong | Japanese decals | Much stronger than Microsol, test on spare first, never allow to puddle |
| Solvaset | Very Strong | Stubborn thick decals | Apply and run away, will look destroyed initially |
It’s also important to note that product formulas can change. For example, a 2023 comparative test revealed that the newer “Mr. Mark Softer Neo” formula appears significantly weaker than the original, requiring more applications than Micro Sol to achieve a similar effect. The cardinal rule is: start with the mildest solution you have (like Micro Set, which is primarily a wetting agent) and only escalate to stronger solvents if the decal fails to conform.
Key Takeaways
- Silvering is a physical problem of light refraction, solved by creating a microscopically smooth gloss surface before decaling.
- Decal solvents are powerful chemical tools that must be matched to the decal’s thickness and brand; always test on a spare first.
- The final finish is a multi-layer system: a sealing gloss coat to hide decal edges, followed by weathering, and then a final unifying matte or satin varnish.
Applying Hundreds of Stencils: How to Avoid “Decal Fatigue” and Alignment Errors?
Modern scale models, particularly aircraft, can come with hundreds of tiny stencil decals. Applying them is a marathon, not a sprint, and “decal fatigue” is a real phenomenon that leads to sloppy alignment and mistakes. In fact, modeling contest judges consistently report that silvered or poorly applied decals remain one of the most obvious and common mistakes they see. A systematic and patient approach is required to maintain quality from the first decal to the last.
First, break the task into manageable sessions. Plan for several hours of uninterrupted time over two or three days rather than trying to do it all at once. Work on the model in sections—for example, complete the top of one wing, then the bottom, then move to the fuselage. This prevents you from accidentally smudging or damaging freshly applied decals while handling the model.
A good support system for the model is also crucial. Using a jig or even just fabric-covered chair arms allows you to rotate and hold the model at different angles without putting pressure on wet decals, much like working on a rotisserie. After each session, it’s good practice to wipe away any dried solvent residue with a soft, lint-free cloth dampened with water. Once all decals are applied and fully cured, a spot coat of clear gloss over each one can help seal the edges and smooth the transition before the final overall varnish coats are applied.
Ultimately, managing a large decaling project is about workflow and environment. Work in a well-lit area, keep your tools organized, and take breaks when you feel your concentration slipping. A single misaligned stencil can stand out on the final model, so maintaining a high standard of work throughout the entire process is essential for a contest-worthy finish.
How to Ensure Accuracy When Applying Historically Researched Markings?
Researching historical liveries, especially from black and white archival photos, is a discipline in itself. It involves cross-referencing sources, understanding paint standards of the era, and interpreting shades of gray. However, once the research is done, a final hurdle remains: ensuring the decals you use will perform correctly and accurately represent that research. The most accurate color research is meaningless if the decal silvers or reacts poorly with your chosen finishing products.
A critical, often overlooked factor is that not all decal printing operations are identical. Different manufacturers use different paper, ink formulations, and carrier film thicknesses. This means two decals depicting the exact same marking can behave in completely different ways. A solvent that works perfectly on a Cartograf decal might instantly destroy one from an older kit manufacturer. This variability makes universal application rules nearly impossible and reinforces the need for testing.
Before committing a historically significant decal to your model, you must verify its properties. This involves applying the following principles to your specific decal sheet:
- Test on a Spare: Always use a spare, non-essential marking from the decal sheet to test your entire process: water temperature, setting solution, and softening solvent.
- Verify Solvent Compatibility: Test both mild and strong solvents to see how the decal reacts. Does it wrinkle and then flatten, or does it disintegrate? This will tell you how aggressive you can be when settling it over surface details.
- Read the Methodology: When using aftermarket decal sets, read the manufacturer’s instructions carefully. They often provide specific recommendations for their products, which can be invaluable for avoiding common pitfalls.
In essence, applying historical markings is the culmination of two distinct research phases: the historical research into the livery itself, and the practical, chemical research into the properties of the decal you are using to represent it. Neglecting the second phase is a common cause of failure that can undo hours of careful historical investigation.
Apply this systematic, chemistry-driven approach to your next project to permanently eliminate silvering and achieve markings that are truly indistinguishable from paint.