The long-term preservation of your model aircraft hinges on selecting a case not as a mere dust cover, but as a scientific conservation tool against irreversible UV damage.
- UV radiation causes photo-oxidation, a chemical reaction that breaks down plastic polymers, leading to yellowing and brittleness.
- Archival-grade, cell-cast acrylic with inherent UV filtering properties is the superior material for both protection and optical clarity.
Recommendation: Prioritize acrylic cases with specified UV-blocking capabilities and robust construction to ensure the archival integrity of your collection.
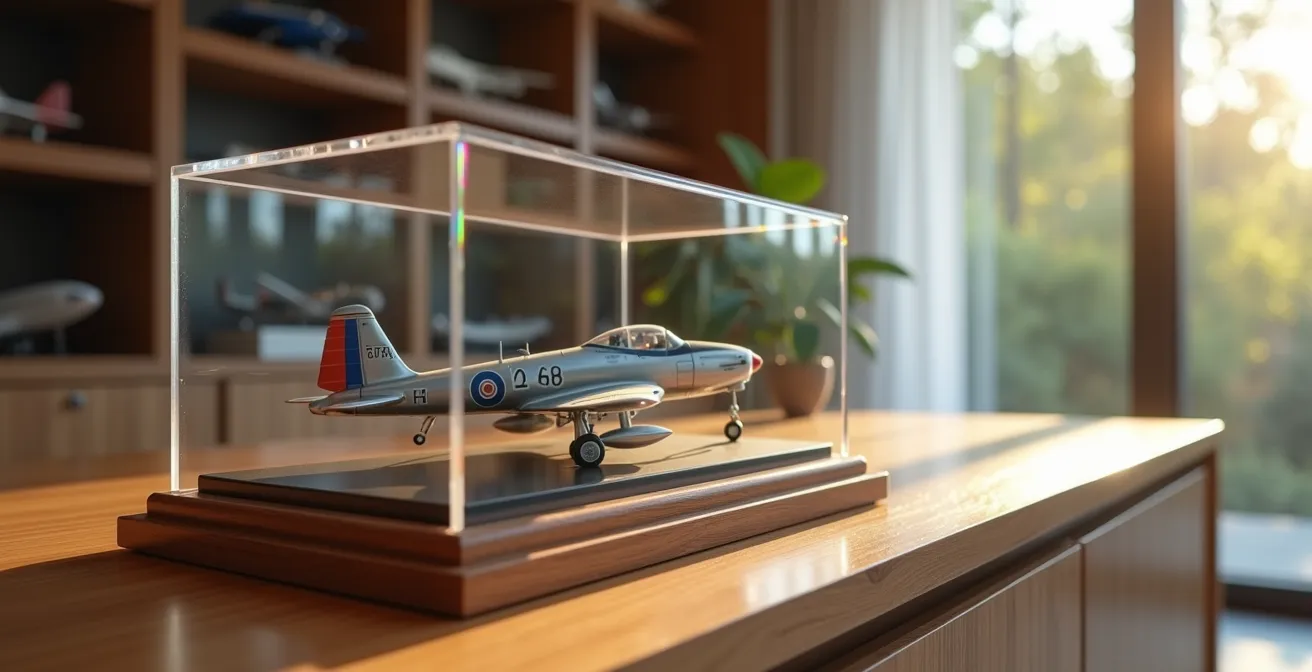
As a collector, you have invested countless hours and considerable expense into creating a pristine model aircraft. It sits displayed, a testament to your skill and passion. Yet, a silent, invisible threat is at work every moment it is exposed to light: ultraviolet radiation. Many collectors rightly worry about dust, but the most insidious damage comes from the sun’s rays, which can transform a brilliant finish into a yellowed, brittle shadow of its former self, especially in a sunlit room.
The common advice is to “keep models out of the sun” or simply “buy an acrylic case.” While well-intentioned, this counsel is insufficient for a serious collector. It fails to address the fundamental science of material decay. The true challenge isn’t just shielding a model, but actively preserving it. This requires a shift in mindset—from seeing a display case as a box to understanding it as a micro-environment. The key lies not in avoiding light, but in filtering it.
This guide adopts a curatorial approach to this problem. We will dissect the science behind UV degradation, known as photo-oxidation, and establish a clear framework for selecting a case that provides genuine, long-term archival protection. We will explore the material science, design principles, and aesthetic considerations that separate a simple container from a true preservation vessel, ensuring your collection remains as immaculate as the day you completed it.
To navigate the critical aspects of this selection process, this guide is structured to address the most pressing concerns for any serious collector. The following sections provide a detailed, scientific road map to making an informed decision.
Summary: How to Select an Archival-Grade Acrylic Case to Prevent UV-Induced Yellowing on Your Models
- How UV rays yellow clear decals and embrittle plastic over time?
- How to polish scratches out of acrylic cases without creating a haze?
- Weight vs Clarity: which material is better for large dioramas?
- The design flaw in cheap cases that lets dust in from the bottom
- How to calculate the “breathing room” around a model for visual balance?
- Military vs Civil Aircraft Models: Which Collection Retains Value Better?
- Why Die-Cast Metal Models Are Outperforming Plastic in Investment Portfolios?
- How to Build Custom Display Stands That Support Heavy 1:How to Start Building Static Aircraft Models Without Spending Over $100?
How UV rays yellow clear decals and embrittle plastic over time?
The yellowing and embrittlement of model plastics is not a simple aging process; it is a specific chemical reaction known as photo-oxidation. Ultraviolet (UV) radiation, a component of natural sunlight and some artificial lighting, acts as a catalyst. When UV photons strike the polymer chains of the plastic—most commonly polystyrene in model kits—they initiate a process of degradation. This reaction breaks the long, interconnected polymer chains, a phenomenon called chain scission. As these chains break, the material loses its structural integrity, becoming increasingly brittle and prone to cracking.
This process is particularly destructive to materials with low inherent UV resistance. Plastics like polystyrene, polyvinyl chloride (PVC), and polyethylene are all highly susceptible to this form of decay. The visual evidence of this damage is twofold. First, the breakdown of chemical bonds can create chromophores—parts of a molecule that absorb light and cause the yellow or brownish tint we associate with old plastic. Second, the physical integrity is compromised. A study published in SpringerPlus demonstrates that just 840 hours of UV exposure causes significant cracking in polystyrene. This is a crucial consideration for a model displayed in a room with a window, as it represents less than a year of intermittent sun exposure.
Clear decals are often the first victims. The thin varnish and carrier film offer almost no protection, and the inks themselves can fade or shift in color. The underlying white or light-gray plastic of the model then begins its own degradation, creating a cascade of irreversible damage. Therefore, a protective case must do more than block dust; it must actively filter out the harmful spectrum of UV light to halt photo-oxidation at its source and ensure the archival integrity of the artifact.
How to polish scratches out of acrylic cases without creating a haze?
Even with the utmost care, an acrylic display case can acquire fine scratches that mar its optical clarity. Attempting to polish these without the correct materials and technique will often result in a hazy, swirled finish that is worse than the original scratch. From a conservator’s perspective, the process must be methodical, using progressively finer abrasives to restore a glass-like surface. The key is to avoid circular motions, which create visible swirls, and to use a polish designed specifically for acrylic.
The professional standard involves a multi-step system. For example, a heavy scratch requires a more abrasive compound first, followed by a finishing polish. The technique is as important as the product. You must polish in straight, back-and-forth lines, and then switch to a motion at a 90-degree angle to the first pass with the next finer grit. This cross-hatching pattern ensures that you are removing the previous set of scratches, not just deepening them.
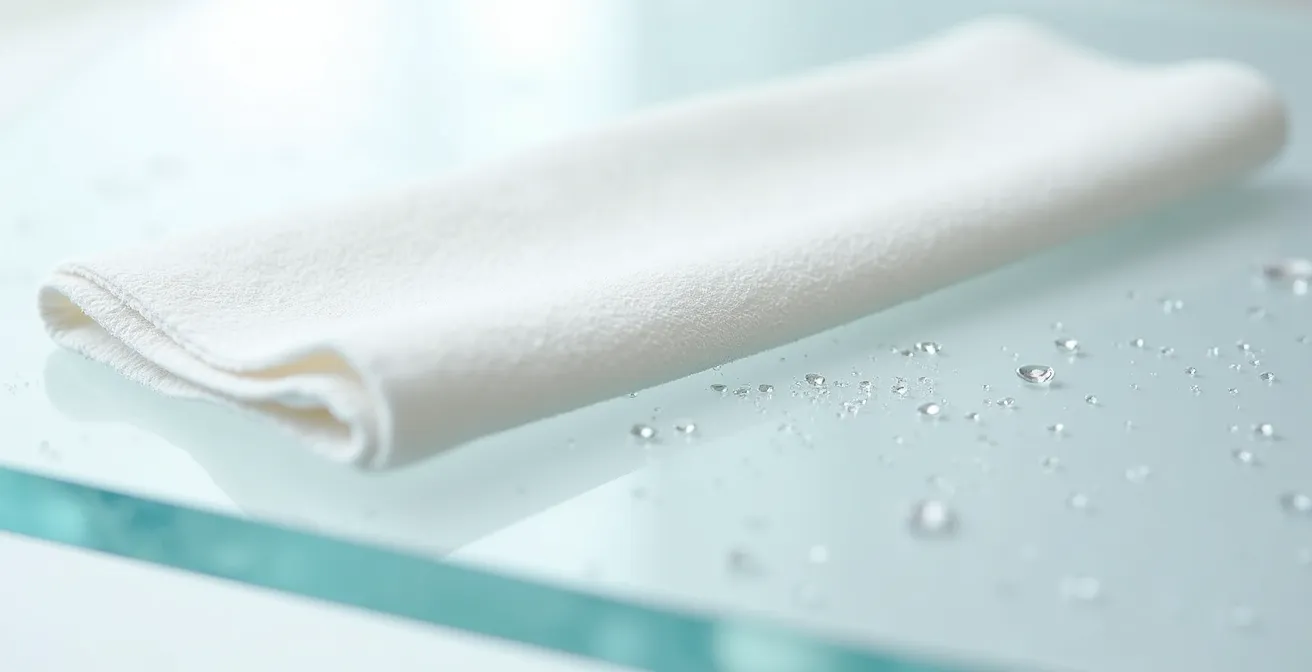
This macro photograph illustrates the proper technique. Notice the straight, overlapping lines of the polishing motion, which prevent the formation of hazy swirls.
A disciplined approach yields a flawless result. The final step involves a light, uniform application of a fine finishing polish to the entire surface, which removes any micro-scratches and restores the original luster. This ensures the case remains an invisible, optically pure window to your collection, rather than a distraction.
For a reliable result, a structured system like the one offered by NOVUS is highly recommended. Their 3-step process is a perfect example of this progressive refinement:
- Step 1: Clean. The surface must be free of dust and grit before any polishing begins. Use NOVUS No. 1 or a similar cleaner.
- Step 2: Heavy Scratch Removal. As the official NOVUS guide advises, for noticeable scratches, “Apply NOVUS No. 3 liberally…polish with a firm back-and-forth motion at right angles to the scratches.” This removes the deepest damage.
- Step 3: Light Scratch and Haze Removal. “When the worst scratches have been polished out, reapply NOVUS No. 2 uniformly in a circular motion to the entire surfaces using short, circular strokes and light pressure” to blend the repair and restore a uniform sheen.
Weight vs Clarity: which material is better for large dioramas?
When displaying large models or extensive dioramas, the choice of case material becomes a critical engineering and aesthetic decision. The two primary options are traditional glass and modern acrylic (plexiglass). While glass has a reputation for clarity and scratch resistance, it presents significant logistical challenges for large-scale displays. Its primary drawback is its immense weight, which requires reinforced shelving and makes handling cumbersome and hazardous. Furthermore, large panes of standard glass can exhibit a slight green tint, subtly distorting the colors of the model within.
Acrylic, by contrast, is approximately 50% lighter than glass of the same thickness, dramatically simplifying installation and reducing structural load. This weight advantage is consistent regardless of the thickness required. However, not all acrylic is created equal. For high-end displays, the superior choice is cell-cast acrylic. As the Delvie’s Plastics technical team notes, this material offers unparalleled benefits.
For high-end dioramas, cell-cast acrylic offers superior optical clarity (less distortion when viewed at an angle) and is better for creating strong, invisible solvent-welded seams.
– Delvie’s Plastics Technical Team, The Complete Guide to Maintaining and Protecting Acrylic Plexiglass
This superior optical clarity and the ability to be chemically welded into seamless, structurally sound boxes make it the definitive choice for museum-quality dioramas where an unobstructed view is paramount.
The unsupported span of the acrylic directly dictates the minimum required thickness to prevent bowing or flexing. A larger diorama requires thicker, more rigid material. The following data, based on an analysis of material requirements, provides a clear guide for specification.
| Unsupported Span | Minimum Acrylic Thickness | Weight Comparison to Glass |
|---|---|---|
| Less than 18 inches | 3mm (1/8 inch) | 50% lighter |
| 18-30 inches | 4.5mm (3/16 inch) | 50% lighter |
| Over 30 inches | 6mm (1/4 inch) | 50% lighter |
For any large-scale project, the conclusion is clear: acrylic offers the structural and optical performance of glass without the prohibitive weight, making it the superior material for ambitious displays.
The design flaw in cheap cases that lets dust in from the bottom
A display case’s primary function is to create a sealed micro-environment. However, many inexpensive cases fail at this fundamental task due to a critical design flaw: they do not seal at the base. These cases often consist of a simple five-sided acrylic box that lifts off a flat base. While this seems convenient, the seam between the acrylic walls and the base is rarely airtight. This gap creates an entry point for dust, which is the enemy of any pristine model finish.
The problem is exacerbated by subtle air currents and temperature changes in a room. As the air inside the case expands and contracts, it “breathes,” pulling in dust-laden air from the surrounding environment. Over time, a fine layer of dust settles on the model, defeating the purpose of the case. Furthermore, if the base sits flush on a shelf, any dust on the shelf surface can be drawn up into the case. Without feet to elevate the base, there is no buffer zone.
A well-designed case solves this problem through superior construction. High-quality cases, such as those from Better Display Cases, often use a two-piece setup where the acrylic top has a lip that fits securely *over* the edge of the base, creating a much tighter seal. Another premium design involves a fully assembled box with a sliding, removable back panel. This creates a more rigid and sealed structure, with access provided only when needed. Critically, the inclusion of rubber feet on the base is not just to prevent scratches; it elevates the entire case, creating a dead-air space underneath and minimizing the intake of dust from the shelf surface. Choosing a case with these design features is a crucial step in ensuring true, long-term protection from environmental contaminants.
How to calculate the “breathing room” around a model for visual balance?
The presentation of a model is as important as its preservation. A case that is too small makes the model appear cramped and insignificant, while an overly large case can make it seem lost. The space around the model, or “breathing room,” should be calculated to achieve curatorial balance, enhancing the model’s presence. This is not arbitrary; it is guided by established principles of visual composition, most notably the Golden Ratio.
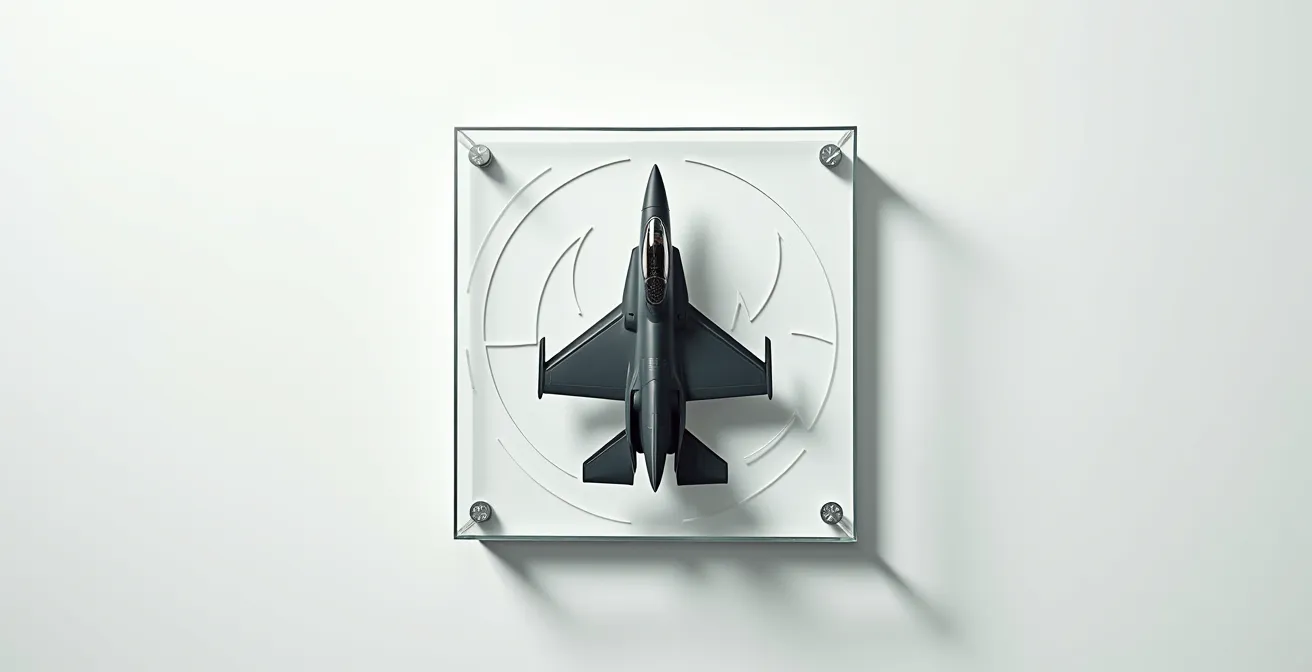
The Golden Ratio (approximately 1.618) is a principle found in art, architecture, and nature that creates aesthetically pleasing proportions. When applied to a display, it suggests that the footprint of the model (its length and width) should occupy roughly 50-60% of the base area of the case. This ensures there is sufficient negative space to frame the object without overwhelming it. This top-down view of a fighter jet model illustrates how applying the Golden Ratio creates a sense of intentionality and harmony in the display.
Beyond this two-dimensional rule, one must consider the three-dimensional dynamics of the model. A jet posed in a steep climb requires significantly more vertical space above its nose to convey a sense of upward motion. Conversely, a long, low-profile bomber like a B-52 requires more horizontal space in front and behind it to suggest its scale and forward trajectory. The space should complement the story the model is telling. A bare minimum of two to three inches of clearance on all sides is a good starting point, but the final dimensions should be guided by these artistic principles.
Your Curatorial Checklist for Visual Balance
- Apply the Golden Ratio: Measure your model’s footprint (length x width). Calculate the ideal base area by dividing the model’s area by 0.6. This gives you a target for the case’s interior base dimensions.
- Assess Vertical Dynamics: For models in dynamic poses (climbing, diving), add extra clearance in the direction of implied movement. A static, on-the-ground model needs less vertical room.
- Account for Horizontal Scale: For models with long fuselages or wide wingspans (bombers, airliners), ensure the case length and width are proportionally generous to avoid a cramped look.
- Check Minimum Clearance: Verify that there is at least a 2-3 inch gap between the model’s extremities (wingtips, tail, nose) and the case walls in all directions.
- Evaluate the Narrative: Step back and consider the overall composition. Does the empty space feel balanced and intentional, or does it feel accidental? Adjust if necessary to enhance the model’s story.
Military vs Civil Aircraft Models: Which Collection Retains Value Better?
From an investment perspective, the value of a model aircraft collection is driven by rarity, condition, and, most importantly, demand. While both military and civil aircraft have dedicated followers, military models often exhibit stronger and more consistent value retention. This can be attributed to several key factors, primarily the power of historical narrative and a broader, more established collector base.
Military aircraft are tied to specific conflicts, legendary pilots, and technological milestones that resonate deeply within popular culture. A Spitfire from the Battle of Britain or an F-4 Phantom from the Vietnam War is not just a model of a machine; it is a tangible piece of history. This historical context creates a powerful emotional connection and a durable market. Collector communities, like the Albuquerque Scale Modelers who contributed to the local airport’s museum, often focus on aircraft with local or national significance, such as the “Rio Grande Navy” collection of test aircraft. This community-driven curation and storytelling create a stable ecosystem of demand.
Civil aircraft, on the other hand, tend to appeal to a more niche audience of aviation enthusiasts and former airline employees. While rare models of iconic airliners like the Concorde or Boeing 747 certainly hold value, the market is generally smaller. Their value is often tied to the nostalgia for a specific livery or airline that may have a limited following. Military models, by tapping into broader themes of history, conflict, and technological supremacy, simply appeal to a larger demographic, which is a fundamental driver of long-term investment value. The sheer volume of military subjects available also allows for deeper, more specialized collections, which are highly sought after.
Why Die-Cast Metal Models Are Outperforming Plastic in Investment Portfolios?
In the world of collectibles, perceived permanence is a powerful driver of value. While meticulously built plastic kits are works of art, die-cast metal models are increasingly seen as a more stable asset class, often outperforming their plastic counterparts in investment terms. This divergence can be explained by three core principles: materiality, scarcity, and market accessibility.
First, there is the undeniable factor of materiality. Die-cast models, crafted from metal, possess a physical heft and cold-to-the-touch quality that humans intrinsically associate with value and durability. Plastic, no matter how well finished, can feel ephemeral by comparison. A metal model feels like a permanent object, an industrial artifact in miniature, which gives it a psychological edge as a long-term store of value.
Second is the built-in model of scarcity. Die-cast models are typically produced by manufacturers in limited, numbered runs. A production of 1,000 units is declared from the start, creating immediate, verifiable rarity. A plastic kit, conversely, can be produced in the tens of thousands over many years. While a perfectly built and painted plastic model is a unique object, its “rarity” is based on the builder’s skill, which is subjective and harder to quantify for a general investor. The die-cast model’s rarity is an objective, marketable fact.
Finally, die-cast models offer greater market accessibility. They are sold as finished, museum-quality products, ready for display. This opens the market far beyond the core group of skilled hobbyists to include history buffs, aviation enthusiasts, and general collectors who appreciate the subject but lack the time or skill to build a kit. This wider buyer pool creates more liquid and competitive secondary markets, driving up prices for sought-after models. A plastic model’s value is tied to a smaller pool of buyers who can appreciate the specific quality of the build, making it a less liquid asset.
Key Takeaways
- UV protection is not a feature, but a necessity to prevent the scientific process of photo-oxidation that causes yellowing and embrittlement.
- The quality of an acrylic case lies in its material (cell-cast for clarity), its design (airtight seals, raised feet), and its proper maintenance (correct polishing techniques).
- The presentation of a model is a curatorial act; using principles like the Golden Ratio for spacing elevates a simple display into a compelling exhibit.
How to Build Custom Display Stands That Support Heavy 1:How to Start Building Static Aircraft Models Without Spending Over $100?
Entering the world of static aircraft modeling can seem daunting, with an overwhelming array of tools, paints, and kits. However, from a curatorial standpoint, the foundation of any great collection is a solid beginning. It is entirely possible to acquire all the essential, high-quality tools and your first modern kit for a budget of under $100. The key is to focus on what is truly necessary and avoid the temptation of non-essential gadgets.
A successful start hinges on a few core items. A quality hobby knife is non-negotiable for precise cutting. Sprue cutters allow for the clean removal of parts from their frames, minimizing damage. Proper plastic cement creates strong, welded bonds, unlike craft glue. Finally, a small set of sanding sticks and basic paints are all that’s needed for your first project. The most critical investment, however, is the kit itself. Choosing a modern, well-engineered kit from a manufacturer like Tamiya will provide a far more enjoyable and successful experience than struggling with an old, poorly fitting kit, even if it is cheaper.
As the experts at Building Scale Model Aircraft point out, manufacturers provide a clear guide for newcomers.
Most kit models indicate the skill level required to assemble the model on the box. For example, Revell-Monogram uses a skill level ranging from 1 to 3, with 1 being the easiest to build.
– Building Scale Model Aircraft, Construction Guide for Beginners
This system is your ally. Starting with a “Level 1” kit builds confidence and fundamental skills. An initial, well-chosen toolkit not only keeps costs down but also establishes a foundation of quality workmanship that will define your collection for years to come.
To begin, focus your budget on this essential list:
- Quality Hobby Knife: Essential for precise cutting and trimming (approximately $10-15).
- Sprue Cutters: For clean removal of parts from frames ($10-15).
- Plastic Cement: The proper bonding agent for polystyrene ($5).
- Sanding Sticks: Multiple grits for smoothing surfaces ($5-10).
- Basic Paint Set: A few primary colors for your first model ($10-15).
- Modern Kit Selection: A well-engineered Tamiya, Airfix, or similar quality kit ($25-40).
By approaching your collection with this curatorial mindset—from the very first kit you build to the archival-grade case you display it in—you are not merely collecting objects. You are preserving artifacts, ensuring their history and your craftsmanship endure for decades to come. The next logical step is to assess your current collection and display environment against these preservation standards.