In summary:
- You can build a high-quality beginner toolkit for under $30 by focusing on essentials like good nippers and cement.
- Avoid frustration by starting with modern, “new tool” kits (Level 1-2) with fewer than 50 parts.
- Prevent common mistakes like foggy canopies and damaged parts by using the right glue (PVA) and proper cutting techniques.
- A complete entry into the hobby, including your first two kits and all necessary supplies, is achievable for less than $100.
The dream of recreating a piece of aviation history on your desk is a powerful one. You see a beautifully finished model of a Spitfire or a Mustang and think, “I want to do that.” But then, doubt creeps in. The wall of complex kits, the dizzying array of expensive-looking tools, and the fear of spending a fortune only to end up with a glue-smudged mess can feel overwhelming. Many believe that static modeling is an expensive, inaccessible hobby reserved for those with deep pockets and years of experience. This leads most aspiring builders to either give up before they start or make a critical first mistake.
They often jump into a highly detailed, “Level 5” kit, assuming more parts mean a better experience. The reality is that this path almost always leads to frustration. The key isn’t about having the most tools or the most complex kit. The secret to a successful and affordable entry into this hobby lies in strategic frugality and mistake-proofing your process from the very beginning. It’s about knowing exactly where to invest your first $30 in tools to get the best results, and how to spend the rest of your sub-$100 budget to guarantee a rewarding experience, not a disappointing one.
This guide provides a different path. Instead of just listing supplies, we will build a complete roadmap that focuses on bypassing the common frustration points that cause beginners to quit. We will show you how to build a capable toolkit on a tiny budget, how to identify a great kit before you even open the box, and how to master the fundamental techniques that separate a satisfying build from a failed project. This is your plan for starting smart, building with confidence, and launching your modeling journey for under $100.
For those who prefer a visual deep-dive into the craft, the following video offers a complete build of a detailed Fw-190 model, showcasing many of the advanced techniques you’ll aspire to master as you progress in the hobby.
This article is structured to guide you step-by-step, from understanding the primary pitfalls to mastering the essential skills. Follow this roadmap to ensure your first foray into model aviation is a success.
Contents: How to Start Aircraft Modeling on a Budget
- Why 60% of beginners quit after their first “Level 5” model kit?
- How to build your first toolkit for under $30 without sacrificing quality?
- How to Start Building Static Aircraft Models Without Spending Over $100?
- The rookie mistake that fogs canopies and how to prevent it
- How to light your workspace cheaply to see imperfections before painting?
- How to Identify Quality Injection-Molded Kits Before Opening the Box?
- How to Remove Parts from Sprues Without Gouging the Plastic Surface?
- How to Organize Your Kit Assembly Sequence to Avoid Painting Disasters?
Why 60% of beginners quit after their first “Level 5” model kit?
The most common reason a promising modeling career ends before it truly begins is a mismatch between ambition and experience. A beginner sees a box with dramatic art of a complex jet fighter, labeled “Skill Level 5,” and assumes it represents the pinnacle of the hobby. They buy it, open the box to find over 200 tiny parts, and are immediately hit with decision fatigue. The intricate instructions, the sheer volume of pieces, and the expectation of achieving the box art quality on the first try create a “frustration barrier” that is nearly impossible to overcome.
Experienced builders know that success is built gradually. A “Level 5” kit is designed for someone who has already mastered the fundamental skills on simpler projects. When a novice tackles one, they often run into predictable issues:
- Rushing the process: Overwhelmed by the steps, they skip crucial instructions, leading to parts that don’t fit later.
- Unrealistic expectations: They expect a perfect result without the practice or specialized tools required for such a complex build.
- Damaging parts: The tiny, delicate components of an advanced kit are unforgiving to improper tools and techniques.
The solution is simple: start with a Level 1 or Level 2 kit. These models, typically with 30-50 parts, are specifically designed to teach you the core skills of assembly, seam cleanup, and basic painting. They allow you to build confidence and experience a successful completion, which is the fuel that will power you toward those more complex projects in the future. Starting simple isn’t a compromise; it’s the smartest strategy for long-term enjoyment of the hobby.
How to build your first toolkit for under $30 without sacrificing quality?
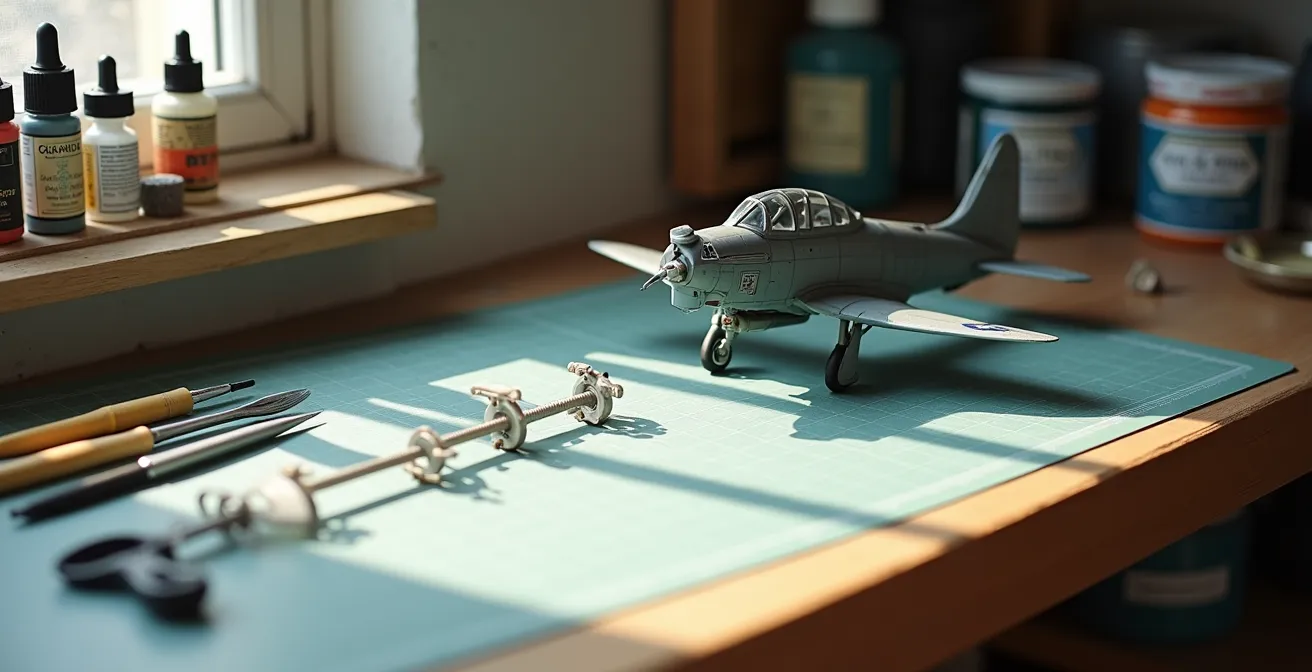
The wall of tools at a hobby shop can be intimidating, with specialized gadgets costing hundreds of dollars. The truth is, you don’t need any of them to start. The principle of strategic frugality is key: spend your limited budget on the few tools where quality makes a massive difference, and save on the rest. You can assemble a highly effective beginner’s toolkit for well under $30 that will serve you for your first several models. The goal is to get tools that prevent frustration, not create it.
For instance, a good pair of flush-cut nippers is a non-negotiable investment. Using scissors or cheap, bulky cutters will stress the plastic and leave ugly marks that are difficult to fix. Conversely, you absolutely do not need an airbrush, a complex drill set, or photo-etch bending tools when you are just starting out. These are specialized instruments you can explore much later in your modeling journey. In fact, some experienced builders recommend that a budget of just $10 to $50 for essential tools and glue can support 3-5 model builds, proving that a large initial investment is unnecessary.
This comparative table shows where to focus your budget. The “essentials” are the items that will deliver the most quality and prevent the most common frustrations for the lowest cost.
| Essential Tools ($20-30) | Cost | Nice-to-Have (Can Wait) | Cost |
|---|---|---|---|
| Quality flush-cut nippers | $15 | Airbrush system | $100+ |
| #11 hobby knife + blades | $8 | Pin vise drill set | $25 |
| Tamiya Extra Thin Cement | $5 | Panel line scribers | $20 |
| 320-600 grit sandpaper | $2 | Photo-etch bending tool | $30 |
By focusing your spending on these four essential items, you equip yourself for success without breaking the bank. This minimalist approach is the foundation of an enjoyable and affordable start in the hobby.
How to Start Building Static Aircraft Models Without Spending Over $100?
With the right plan, $100 is more than enough to launch your model-building hobby, not just for one kit, but for your first two projects. This roadmap is designed to get you all the essential tools and supplies while leaving a reserve for your next build, ensuring the momentum continues. The key is to buy a starter set for your first kit, which bundles paints and brushes, and then supplement it with a few key, high-quality individual items.
Brands like Airfix offer fantastic “Starter Sets” that include a simple, well-engineered kit (often a classic like a Spitfire), small pots of acrylic paint, two brushes, and a tube of cement. While the included cement and brushes are basic, they are sufficient for your first build and the value is unbeatable. This bundle will cost around $20-25 and immediately solves your initial paint and kit problem. Then, you use the rest of your budget to build the high-quality core toolkit we discussed previously.
Here is the complete shopping list to get you started for under $100:
- $20-25: Airfix Starter Set (or similar) with kit, paints, and brushes.
- $15: Quality flush-cut nippers (e.g., Tamiya, Xuron).
- $8: #11 hobby knife with a pack of extra blades (e.g., X-Acto).
- $5: Tamiya Extra Thin Cement.
- $15: A basic set of 6-8 additional acrylic paints to expand your palette.
- $10: A self-healing cutting mat.
- $5: A variety pack of sandpaper or sanding sticks (400, 600, 800 grit).
- $22 (approx.): Reserve funds for your second kit and any needed supplies.
This list brings your total to exactly $100. You end up with a high-quality, re-usable toolkit, paints, and two model kits. This is the most efficient and cost-effective way to bypass the financial barrier and dive straight into the fun part: building.
The rookie mistake that fogs canopies and how to prevent it
There is no greater heartbreak for a beginner modeler than to finish a beautifully painted cockpit, only to attach the clear canopy and watch it turn milky white and foggy. This single mistake has ruined countless models and is a major source of frustration. The culprit is almost always using the wrong type of glue. Most beginners reach for standard plastic cement or, even worse, super glue (cyanoacrylate or CA glue) to attach clear parts. This is a critical error.
Standard model cements work by melting the plastic to create a weld, which will distort and craze clear plastic. Super glue is even more sinister. As it cures, it releases vapors in a process called “cyanoacrylate bloom.” These vapors are drawn to moisture and contaminants on surfaces, where they settle and form a fine white, powdery residue. On a clear canopy, this creates the dreaded fogging effect, which is impossible to remove. Modeling forums are filled with tests showing that this bloom can fog clear parts several inches away from the application point.
The solution is both simple and cheap: use a specialized canopy glue or standard white PVA glue (like Elmer’s). These adhesives work differently:
- They are water-based: They release no harmful vapors that can fog the plastic.
- They dry crystal clear: Any small smudges or excess glue will become invisible as it cures.
- They are non-permanent at first: If you make a mistake, you can wipe it away with a damp cloth before it sets.
For a foolproof attachment, always apply a tiny amount of PVA glue to the fuselage frame with a toothpick—never directly onto the clear canopy itself. Gently place the canopy and let it dry for 10-15 minutes. This one simple change in your process will forever mistake-proof your builds against canopy fogging.
How to light your workspace cheaply to see imperfections before painting?
You can’t fix what you can’t see. One of the most overlooked aspects of a quality build is proper lighting. Many beginners work under the warm, ambient light of a standard household lamp. This type of lighting is very forgiving and excellent at hiding the very flaws you need to find and fix, such as seam lines, scratches from sanding, or small gaps in parts. You complete your assembly thinking everything is perfect, apply a coat of paint, and are horrified to see every single imperfection suddenly leap out. This is another major frustration point that is easily avoided.
You don’t need a professional, expensive lighting rig. The solution is a cheap desk lamp and the right kind of light bulb. The secret lies in two concepts: light temperature and raking light. Professional modelers emphasize that 5000K-6500K daylight LED bulbs reveal 90% more surface imperfections than warm incandescent lighting. This color temperature mimics natural daylight and has a crisp, white quality that doesn’t hide flaws. A daylight LED bulb costs only a few dollars and is one of the highest-impact upgrades you can make.

Once you have the right bulb, use the “raking light” technique. Instead of positioning your lamp directly overhead, place it low and to the side of your model. This sharp angle creates long, dramatic shadows across the surface, making even the slightest seam line or scratch stand out like a canyon. By periodically inspecting your work this way *before* you paint, you can find and fix all the small imperfections that would otherwise ruin your final finish. This simple, no-cost technique, combined with a cheap daylight bulb, will elevate the quality of your builds immediately.
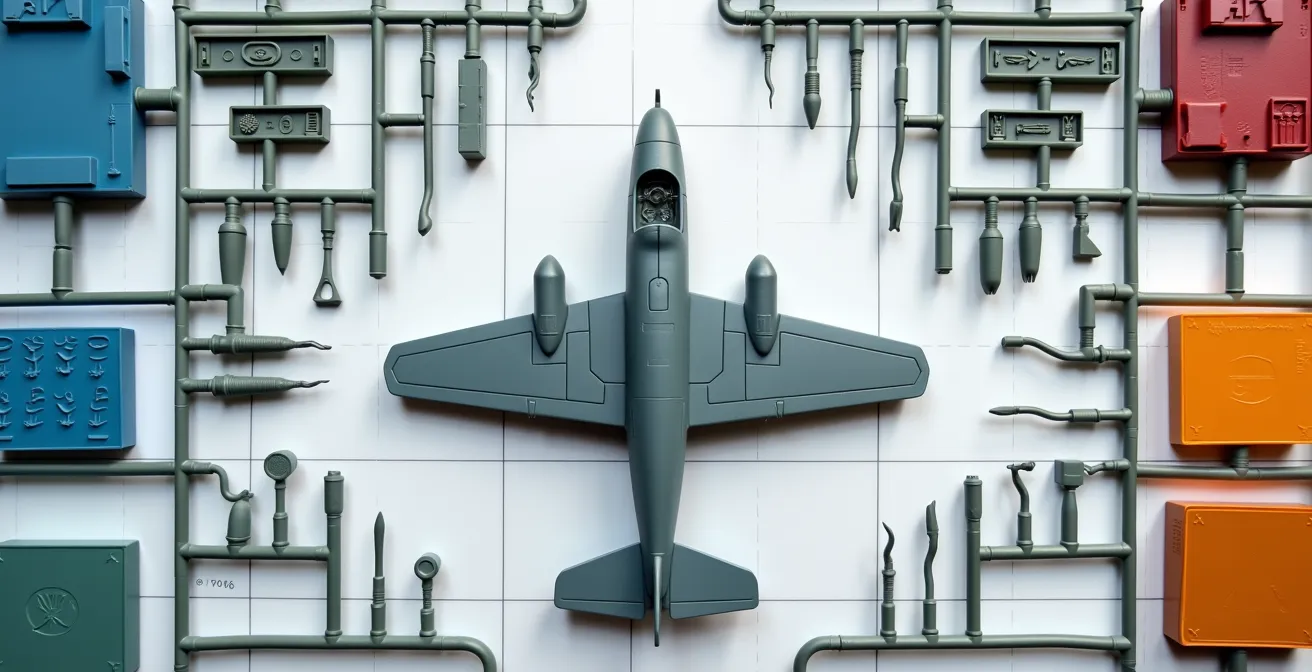
How to Identify Quality Injection-Molded Kits Before Opening the Box?
Not all model kits are created equal. The age of a kit’s tooling—the original molds used to produce the plastic parts—is the single biggest factor in determining its quality. A kit released this year might actually be a “rebox” of a mold from the 1970s. These older kits are notorious for poor fit, thick parts, and raised panel lines (which look like tiny ridges) instead of the crisp, engraved lines of modern kits. Building an old, poor-quality kit can be a frustrating experience, even for an expert. Learning to spot them before you buy is a crucial skill in tooling intelligence.
Luckily, you can often judge a kit’s quality from the outside of the box, without needing to see the plastic inside. Here is a simple 3-step check to perform before any purchase:
- Check the copyright date on the box. Look for the © symbol. This date often reflects the year the tooling was created, not the year the box was printed. If the date is from before 2000, approach with caution.
- Look for engraved vs. raised panel lines. Examine the photos or illustrations of the finished model on the box art. Do the lines on the aircraft’s surface look like fine, recessed grooves (good, modern) or tiny raised ridges (bad, outdated)?
- Do a quick online search. As one veteran modeler wisely advises, a quick search on a site like Scalemates.com is the ultimate insurance. This database archives nearly every model kit ever made and will tell you the exact origin year of the tooling, revealing if a “new” kit is just a 1978 mold in fresh packaging. Tooling from 2010 onwards typically guarantees excellent fit and detail.
Spending two minutes on this research can save you hours of frustration sanding and filling parts that don’t fit. Choosing a modern, well-engineered kit is a cornerstone of the mistake-proofing strategy. It ensures the parts fit together as they should, allowing you to focus on the fun of building, not the chore of fixing a bad product.
How to Remove Parts from Sprues Without Gouging the Plastic Surface?
The very first physical action you take in building a model—removing a part from its runner, or “sprue”—is a place where disaster can strike. Using the wrong tool or technique can gouge the part, leave a deep nub that’s hard to remove, or create white stress marks in the plastic. This initial damage can be demoralizing and difficult to repair. The professional secret to perfectly clean parts is the “two-cut method.”
This technique requires a good pair of flush-cut nippers, which is why they are a top priority for your budget toolkit. Professional builders consistently report that $15 quality flush-cut nippers prevent white stress marks in 95% of cuts compared to just 40% with cheap diagonal cutters from a hardware store. That investment pays for itself immediately in reduced stress and cleanup work. Once you have the right tool, the method is simple:
- First Cut: Don’t try to cut the part flush against the surface. Instead, make your first cut on the sprue runner itself, about 1-2mm away from the part. This removes the part from the tree but leaves a small nub attached to it. This cut absorbs all the stress, protecting the part itself from damage.
- Second Cut: Now that the part is free, take a fresh #11 hobby knife blade and carefully shave the remaining nub flush with the part’s surface. The blade acts like a small plane, slicing the plastic away cleanly.
- Final Polish: If there’s any remaining trace, a light pass with 400-600 grit sandpaper will make it perfectly smooth.
For very tiny parts that might fly away when cut, apply a small piece of masking tape over the part before the first cut. The tape will hold it securely, preventing it from getting lost to the “carpet monster.” Mastering this simple, two-cut method is a fundamental skill that will dramatically improve the fit and finish of your models from the very first step.
Key Takeaways
- Strategic investment in a few key tools (nippers, knife, cement) is more important than a large quantity of cheap ones.
- Avoiding frustration is the primary goal; this is achieved by choosing modern, simple kits and learning mistake-proofing techniques.
- Planning your assembly and painting sequence *before* you cut any parts is the ultimate strategy for a successful build.
How to Organize Your Kit Assembly Sequence to Avoid Painting Disasters?
The final pillar of a successful build is planning. Many beginners follow the instruction manual step-by-step, gluing everything together, only to realize they can no longer reach areas that need to be painted, like the inside of a cockpit or a deep wheel well. This leads to a painting disaster where you are trying to poke a brush into an impossible space. The solution is to adopt a “sub-assembly mindset” and plan your work before you ever cut a part.
A sub-assembly is a small section of the model, like the cockpit or the engine, that you build and paint as a separate, mini-project before it gets integrated into the main assembly. The cockpit is the perfect example. It must be fully assembled, painted, detailed, and weathered *before* the two fuselage halves are glued together around it. Once the fuselage is closed, the cockpit becomes “trapped” and almost completely inaccessible. The same logic applies to wheel wells, jet intakes, and bomb bays. The key is to read the entire instruction manual *first*, identifying these trapped areas and planning to complete them early.
Before starting any new kit, go through this simple planning process to save yourself from painting yourself into a corner. It will transform the way you build and ensure a much more organized and rewarding process.
Action Plan: Your Pre-Build Planning Checklist
- Read the Manual First: Read the entire instruction manual from start to finish before cutting any plastic. Get a complete overview of the build.
- Highlight Paint Callouts: Use a highlighter to mark every step that requires painting. This gives you a visual map of all painting tasks.
- Identify Sub-Assemblies: Circle the major sub-assemblies (cockpit, landing gear, engine) that must be painted before being attached to the main airframe.
- Test Fit Everything: Before applying any glue, dry-fit the main components (fuselage halves, wings) to check for gaps and see how accessible different areas will be after assembly.
- Prioritize the Cockpit: Always plan to build and paint the cockpit as your very first sub-assembly, as it is almost always the first area to become inaccessible.
This strategic approach shifts your thinking from just following steps to orchestrating a build. It is the final piece of the mistake-proofing puzzle and the technique that will give you the confidence to tackle any kit, no matter the complexity.
By following this roadmap, you can confidently enter the world of static aircraft modeling without fear of the cost or complexity. Start smart, invest strategically in a few good tools, and focus on mastering the fundamental techniques to avoid frustration. Your journey to building beautiful replicas of aviation history is not only possible, but it can start today for under $100.