The common belief is that “hot” thinners are solely to blame for melting a model’s surface. The reality is more complex: the plastic itself is a reactive chemical compound. The specific grade of polystyrene—its purity and the presence of additives—determines its vulnerability. This guide shifts the focus from the thinner to the plastic, explaining the molecular interactions that cause damage and providing the chemical knowledge to prevent it.
You followed the instructions, prepared the surface, and loaded your airbrush with a high-quality lacquer paint, thinned to perfection. But as the mist settles, a horrifying sight unfolds: the once-crisp panel lines and delicate rivets on your model begin to soften, warp, and melt into an indistinct mess. For many modelers, this experience is a painful rite of passage, often blamed on a “hot” thinner or a simple mistake. However, this isn’t a failure of technique; it’s an uncontrolled chemical reaction. The surface of your model kit is not a passive canvas, but an active polymer membrane with its own distinct properties and vulnerabilities.
The modeling world is filled with anecdotal advice: “Brand X has soft plastic,” or “Only use Brand Y thinner.” While born from experience, these statements lack the foundational understanding of *why*. The truth lies in the chemistry of polystyrene. Different manufacturers use varying grades of High-Impact Polystyrene (HIPS), some blended with additives like styrene-butadiene to improve impact strength, which in turn alters their chemical resistance. The issue isn’t just that the thinner is aggressive; it’s that the specific polymer structure of your kit was susceptible to that particular solvent’s power.
This article will dissect the problem from a chemical engineer’s perspective. We will move beyond the jargon of “soft” and “hot” to explore the science of polymer grades, solvent power, and surface energy. By understanding the plastic itself as an active chemical agent, you will learn not only how to prevent these disasters but also how to manipulate these properties to your advantage for better construction, gap filling, and finishing. We will analyze the material’s behavior under chemical and thermal stress, turning potential catastrophes into controlled, predictable processes.
This comprehensive guide delves into the chemical properties that govern how your model kits behave. By exploring the underlying science, you will gain the knowledge to make informed decisions about materials and techniques, ensuring your projects are built on a foundation of chemical understanding.
Table of Contents: A Chemical Analysis of Model Kit Plastics
- Soft vs Hard Plastic: how to adjust your cutting technique?
- How to use the plastic’s own melting point to fill small gaps?
- Why do serious modelers prefer neutral grey polystyrene over colored parts?
- The “Orange Peel” effect: why primer is essential on certain plastics
- How to stretch heated sprue to create free antennae and rigging?
- How to Identify Quality Injection-Molded Kits Before Opening the Box?
- Thin vs Thick Cement: Which Glue Works Best for Joining Fuselage Halves?
- Why You Must Treat Resin Parts Differently Than Plastic to Avoid Lung Damage?
Soft vs Hard Plastic: how to adjust your cutting technique?
The terms “soft” and “hard” plastic are common in the modeling community, but they are chemically imprecise. What modelers perceive as softness or hardness is actually a function of the polystyrene’s composition. Pure polystyrene (PS) is relatively brittle. To counteract this, manufacturers create High-Impact Polystyrene (HIPS) by blending it with additives. Most commonly, dyed polystyrene sheets contain additives of styrene-butadiene (PS-SB), which significantly increases impact strength and flexibility. A “soft” plastic is often one with a higher percentage of these flexible additives, making it less prone to snapping but more likely to gouge or tear during cutting.
This chemical difference necessitates a change in technique. A brittle, “hard” plastic responds well to the “score and snap” method, where a shallow cut creates a stress point for a clean break. Attempting this on a “soft,” flexible plastic will often result in a bent part or a ragged tear. For these more pliable polymers, a different approach is needed. Instead of a standard sharp blade that can wedge the plastic apart, a specialized plastic cutting knife is more effective. This tool is designed to remove a small sliver of material, carving a channel rather than forcing the edges apart. This prevents the “plowing” effect where the blade pushes up ridges of soft plastic along the cut line.
Conversely, a very hard, brittle plastic may chip or crack if too much pressure is applied. Here, multiple light passes with a sharp blade are superior to a single deep cut. Understanding the material’s properties—whether it is more likely to fracture or deform—is the key to a clean separation from the sprue. A simple test on a piece of the sprue can reveal its nature: if it bends significantly before breaking, it’s a flexible grade; if it snaps with little flex, it’s a more brittle grade.
Action plan: Sprue diagnostic protocol for plastic identification
- Perform Ease of Use Test: Assess how easily the plastic can be worked. True HIPS is easy to cut, shape, and glue with common hobby knives and sandpaper. If it feels gummy or overly resistant, it may have a high concentration of additives.
- Apply Scoring Test: Score a line on a flat piece of sprue with a knife, then bend the piece away from the scored line. A high-quality, brittle HIPS will snap off cleanly along the line. A more flexible grade will resist and tear.
- Check Cutting Behavior: Use a plastic cutting knife or the back of a hobby blade to scribe a line. Observe if it removes a clean “V” groove or if it pushes up soft ridges of plastic on either side. The latter indicates a more flexible, “softer” polymer.
- Test Heat Sensitivity: When sanding or drilling, even with hand tools, pay close attention to heat generation. Pliable plastics with more additives often have a lower melting point and can quickly turn into a molten mess from friction-induced heat.
How to use the plastic’s own melting point to fill small gaps?
One of the most elegant techniques in modeling involves turning the plastic’s greatest vulnerability—its low melting point—into a powerful construction tool. This method, known as creating “sprue goo” or “sprue glue,” relies on the principle of autogenous welding. Unlike adhesive glues that simply stick two surfaces together, solvent-based plastic cements work by chemically melting the plastic. Technical analysis shows that this dissolving action breaks apart molecules on both surfaces. When the parts are pressed together, the solvent evaporates, and the polymer chains from both pieces intermingle and re-solidify, forming a single, continuous piece of plastic. This creates a bond that is as strong as the plastic itself.
We can harness this principle for gap-filling. By dissolving small pieces of a kit’s own sprue in a jar of liquid cement (like Tamiya Extra Thin), you create a viscous paste. This “sprue goo” is chemically identical to the model’s parts. When applied to a gap, it doesn’t just fill it; it chemically welds to the surrounding plastic. As the solvent evaporates, the dissolved polystyrene solidifies, leaving a seamless, permanent fill that has the exact same hardness, texture, and color as the rest of the model. This makes it far superior to conventional putties, which can shrink, crack, or react differently to sanding and painting.
The consistency of the goo can be controlled by the ratio of sprue to solvent. A thinner mix is excellent for filling fine hairline cracks and panel lines, while a thicker, paste-like consistency is ideal for larger gaps or for sculpting and reshaping small details. The key is to use the sprue from the actual kit you are working on. This guarantees a perfect chemical and color match, ensuring the filled area is indistinguishable from the original plastic once sanded and primed. This technique transforms waste material into a custom, high-performance filler.
Why do serious modelers prefer neutral grey polystyrene over colored parts?
While kits molded in vibrant colors or multiple shades might seem appealing to beginners, experienced modelers almost universally prefer kits molded in a single, neutral grey. This preference is not aesthetic; it is rooted in the practical science of surface analysis and paint application. The primary reason is that neutral grey provides the optimal background for spotting surface imperfections. The human eye perceives shape and texture most effectively through the interplay of light and shadow. On a neutral grey surface, tiny scratches, sink marks, glue smudges, and sanding flaws cast subtle shadows that are immediately visible. The same flaws on a white surface can be washed out by light, while on a black surface they can be lost in darkness. Colored plastics, especially bright reds, yellows, or blues, introduce a “color noise” that actively camouflages these critical surface defects, making proper surface preparation nearly impossible.
The second reason is chemical and optical neutrality. A grey base coat is the most efficient foundation for achieving accurate final colors. A model molded in bright red plastic, for example, will require numerous, heavy coats of primer to fully obliterate the underlying color. Even then, the base color can subtly shift the hue of overlying light colors like yellow or white, a phenomenon known as “color bleed-through.” A neutral grey base has a balanced luminance that does not significantly alter the perception of colors painted over it. It allows for the true hue of the paint to be achieved with fewer, thinner coats, which is critical for preserving fine surface detail.
Finally, there’s the issue of material consistency. While manufacturers state that plastics are identical apart from the color, the pigments themselves can sometimes subtly affect the plastic’s properties. Some pigments might make the plastic slightly more brittle or resistant to certain cements. By working with a standard grey HIPS, modelers have a consistent, predictable baseline for how the material will cut, sand, and glue. This removes a significant variable from the complex equation of building a model, allowing the artist to focus on construction and painting rather than wrestling with unpredictable material behavior.
The “Orange Peel” effect: why primer is essential on certain plastics
The dreaded “orange peel” effect—a rough, stippled paint finish—is often the direct result of a powerful solvent attacking a vulnerable surface. This is the core of the problem for modelers who have experienced melted details. Lacquer thinners are prized for their ability to produce a smooth, durable finish, but their high “solvent power” is a double-edged sword. They are chemically aggressive enough to re-dissolve or “reactivate” underlying layers of paint. This is especially true when applying lacquers over less-resilient paint types like acrylics or enamels.
As the Hearns Hobbies Technical Team warns, this can be a recipe for disaster:
The solvent base in lacquers might reactivate the layers of acrylic and enamel paints, causing an untidy mess as the layers may merge or seep into one another. It is therefore advised to first test the new layer on a small portion before fully applying new paint.
– Hearns Hobbies Technical Team, RC Educational Expert Tips
The solution to this chemical warfare is a primer. A high-quality primer does more than just help paint adhere; it acts as a chemical barrier. A good surfacer or primer is formulated to have strong adhesion to the bare plastic while being highly resistant to the solvents in subsequent paint layers. It effectively isolates the vulnerable polystyrene from the aggressive lacquer thinner, preventing the thinner from reaching and melting the plastic surface. Furthermore, primers are essential for managing the “surface energy” of the plastic. Polystyrene is a low-energy surface, meaning liquids (like paint) tend to bead up rather than flow out smoothly. Primer creates a higher-energy, uniform surface that promotes even paint flow, which is itself a defense against orange peel.
Understanding the compatibility of different chemical families is critical. The following table, based on data from paint chemistry experts, illustrates why layering requires careful thought.
| Paint Type | Solvent Base | Plastic Reaction | Recommended Thinner |
|---|---|---|---|
| Acrylic | Water-based | Minimal reaction | Acrylic thinner |
| Enamel | Oil-based | Moderate reaction | Enamel thinner |
| Lacquer | Solvent-based | May reactivate acrylic and enamel layers, causing layers to merge or seep into one another | Lacquer thinners can be used for all three types |
The table highlights a crucial fact: while lacquer thinners are versatile, their power is the source of the risk. Without a barrier primer, applying a lacquer over enamel or directly onto certain polystyrene grades is a gamble. The primer is not just a step in the process; it is a required safety measure in a multi-stage chemical system.
How to stretch heated sprue to create free antennae and rigging?
The technique of stretching sprue is a classic example of manipulating a material’s fundamental physical properties. It relies on a concept from polymer science known as the Glass Transition Temperature (Tg). The Tg is the temperature at which a rigid, glassy polymer like polystyrene becomes soft, rubbery, and pliable. It is not a true melting point, but rather a range where the long, tangled chains of polymer molecules gain enough energy to begin sliding past one another. When you heat a piece of sprue over a candle flame, you are pushing it past its Tg.
The process is a delicate balance of heat and tension. The sprue is heated evenly by rotating it near (but not in) the flame until it begins to sag. This indicates it has reached its glass transition state. At this exact moment, it is removed from the heat and pulled apart with a smooth, steady motion. As the plastic is stretched, the tangled polymer chains are forced to align in the direction of the pull. Simultaneously, the plastic cools rapidly in the open air, “freezing” the polymer chains in this new, highly aligned, and extremely thin configuration. The speed of the pull dictates the thickness of the final strand: a quick, sharp pull results in a very fine, hair-like filament perfect for radio antennae or biplane rigging, while a slower, more deliberate pull creates a thicker rod suitable for pipes or structural elements.
This technique’s success is directly tied to the plastic’s quality. High-quality HIPS, which has excellent dimensional stability, is ideal for this process. Technical specifications often highlight that HIPS possesses excellent dimensional stability and is easy to fabricate, which translates to predictable and uniform stretching. Lower quality plastics with inconsistent mixing or impurities may stretch unevenly, resulting in lumpy or weak filaments. The technique is a microcosm of materials engineering: applying a controlled amount of thermal energy to temporarily overcome the material’s internal structure, reshaping it, and then rapidly cooling it to lock in the new form.
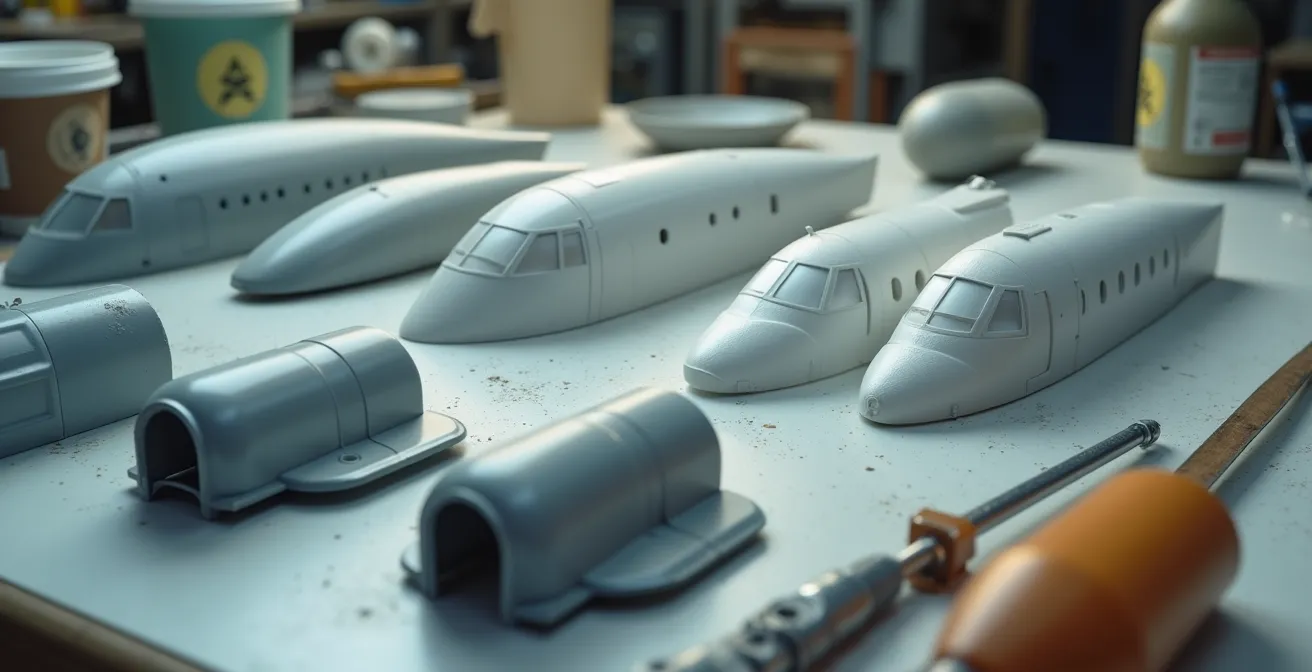
How to Identify Quality Injection-Molded Kits Before Opening the Box?
Assessing the quality of an injection-molded kit before purchase is a critical skill that can save both money and frustration. While you can’t inspect every part, several external indicators can reveal the level of precision and care invested by the manufacturer. The first sign is the clarity and sharpness of the box art and instructions. Manufacturers who invest in high-quality tooling and engineering often extend that philosophy to their packaging. Clear, well-researched graphics and professionally designed instruction manuals suggest a commitment to quality that likely carries over to the plastic itself.
Next, look at the sprue layout, if visible through a plastic wrap. A quality kit will have a logical, uncluttered layout with parts grouped by assembly step. Look for thin, consistent sprue gates (the points where the parts attach to the frame). Thick, clumsy gates are harder to clean up and can damage the part upon removal. Check for “flash”—thin webs of excess plastic leaking from the mold seams. The presence of significant flash indicates old or poorly maintained molds, a major red flag for part fit and detail quality. Conversely, the complete absence of flash and sharp, crisp details on the visible parts are hallmarks of modern, precision-molded kits.
Finally, consider the manufacturer’s reputation and the kit’s vintage. Brands like Tamiya, Eduard, and Wingnut Wings (when it was active) built their reputations on precision engineering. Newer toolings from any major brand are almost always superior to their older counterparts from the 1970s or 80s. Be wary of kits labeled “Box Scale,” an older practice where the model was sized to fit a standard box rather than a consistent scale. Industry standards have since solidified, with plastic kits primarily available in 1:72, 1:48, 1:32, and other consistent scales. A kit adhering to a standard scale is a sign of a more modern and serious design approach.
Thin vs Thick Cement: Which Glue Works Best for Joining Fuselage Halves?
The choice between thin and thick solvent cement for joining large components like fuselage halves is a strategic one, based on understanding their different chemical properties and application methods. The ideal approach often involves using both types in a two-stage process. Thick cement, which has a higher viscosity and a longer “open time” (the window before it starts to set), is best used for the initial tacking. It is applied sparingly to key internal structural points like bulkheads and alignment tabs before the halves are brought together. Its gel-like consistency prevents it from running, and its slower evaporation rate allows for minor adjustments to alignment after the parts are joined.
Once the fuselage halves are tacked in place and held securely with clamps or tape, the real work of creating a seamless structural bond begins. This is where thin cement excels. Thin cement is almost water-like in consistency and works by capillary action. Instead of being applied before joining, it is applied *after* the parts are pressed together. A fine-tipped brush is touched to the exterior seam line, and the ultra-low viscosity cement is instantly wicked deep into the joint. It flows along the entire length of the seam, melting and welding the plastic from the inside out. This creates a continuous, strong bond without the risk of excess glue oozing out and marring the exterior surface detail.
This dual-cement method combines the best of both worlds. The thick cement provides the initial grab and allows for precise alignment, acting as an internal framework. The thin cement then provides the primary structural weld, flowing into every crevice to create a single, solid piece of plastic. Applying only thick cement to the entire seam risks a weak bond if the cement dries before the parts are fully joined, and it almost guarantees messy squeeze-out. Using only thin cement can be difficult for initial alignment as it sets very quickly. The combination of the two types provides both control and strength, leading to a perfectly joined fuselage with a minimal need for post-assembly filling and sanding.
Key Takeaways
- The terms “soft” and “hard” plastic refer to the amount of flexible additives (like styrene-butadiene) mixed with the base polystyrene.
- A primer’s main role is to act as a chemical barrier, protecting vulnerable plastic from aggressive solvents in lacquer paints.
- Neutral grey plastic is preferred by experts because it reveals surface flaws and provides a neutral base for accurate color application.
Why You Must Treat Resin Parts Differently Than Plastic to Avoid Lung Damage?
While often included in the same high-detail kits, polystyrene plastic and polyurethane resin are fundamentally different materials with drastically different safety requirements. Polystyrene is relatively inert; its primary hazard is related to flammable solvents. Resin, however, presents a serious toxicological risk. According to the Occupational Safety and Health Administration (OSHA), the significant hazard in polyurethane resins is the presence of unreacted isocyanates. The OSHA safety data confirms that exposure to highly toxic isocyanates can have severe, cumulative, and irreversible health effects.
The danger is not just from fumes but from physical dust. When you sand, cut, or drill a resin part, you are creating a fine, airborne dust. Unlike plastic dust, this isn’t just an inert particle; it can contain unreacted isocyanate compounds. Inhaling this dust is the primary vector for exposure. This can lead to a condition called respiratory sensitization, an allergic, asthmatic-type reaction that can become permanent and be triggered by even minute exposures later in life. The risk is insidious because the effects are cumulative and may not be apparent until significant damage has been done.
As the OSHA Technical Manual explicitly states, the consequences are severe:
Irritation may be severe enough to produce bronchitis and pulmonary edema. Polyurethane resins contacting eyes may cause severe irritation. Respiratory sensitization (allergic, asthmatic-type reaction) may occur, with evidence of cross-sensitization between isocyanates.
– OSHA Technical Manual, Section III: Chapter 1 – Health Hazards
Because of this, treating resin like plastic is a dangerous mistake. Working with resin requires a strict, non-negotiable safety protocol. The workspace must have excellent ventilation, and personal protective equipment (PPE) is not optional. A simple dust mask is insufficient. Only a NIOSH-approved respirator with organic vapor cartridges and P95 or P100 particulate pre-filters can provide adequate protection. The risks associated with resin are not theoretical; they are well-documented occupational hazards that must be respected.
Action plan: Complete resin safety protocol for modelers
- Use an Approved Respirator: Always wear a NIOSH-approved half-face or full-face respirator equipped with organic vapor (OV) cartridges to filter hazardous fumes and VOCs.
- Add Particulate Pre-filters: Equip your respirator’s OV cartridges with P95 or, preferably, P100 particulate pre-filters. This is absolutely essential for any task that creates dust, such as sanding, sawing, or drilling.
- Never Underestimate Resin Dust: Treat all resin dust as hazardous. It contains unreacted chemical components that can cause severe respiratory irritation and long-term sensitization upon inhalation. Wet sanding can help minimize airborne dust.
- Ensure Proper Ventilation: Work in a well-ventilated area, separate from living spaces. An active ventilation system (like a fan exhausting to the outside) is the primary environmental control for removing hazardous fumes and reducing airborne concentrations.
By approaching your workbench with the mindset of a chemist—understanding your materials, their reactions, and the necessary safety protocols—you transform model building from a game of chance into a predictable and rewarding engineering discipline. Start by testing your solvents and glues on a spare piece of sprue to confirm their behavior, and always prioritize your safety, especially when working with different material families like resin.