Upgrading to resin parts means you are no longer a hobbyist, but a handler of hazardous industrial materials; treating them like plastic exposes you to irreversible health risks.
- Resin dust is a fine-particle irritant and potential sensitizer that can cause chronic lung damage. Simple dust masks are insufficient.
- Adhesives like epoxy and CA glue release volatile organic compounds (VOCs) that require dedicated air extraction, not just an open window.
Recommendation: Immediately adopt a professional safety mindset. This involves using the correct personal protective equipment (PPE), implementing engineering controls like wet-sanding, and establishing strict workshop decontamination protocols.
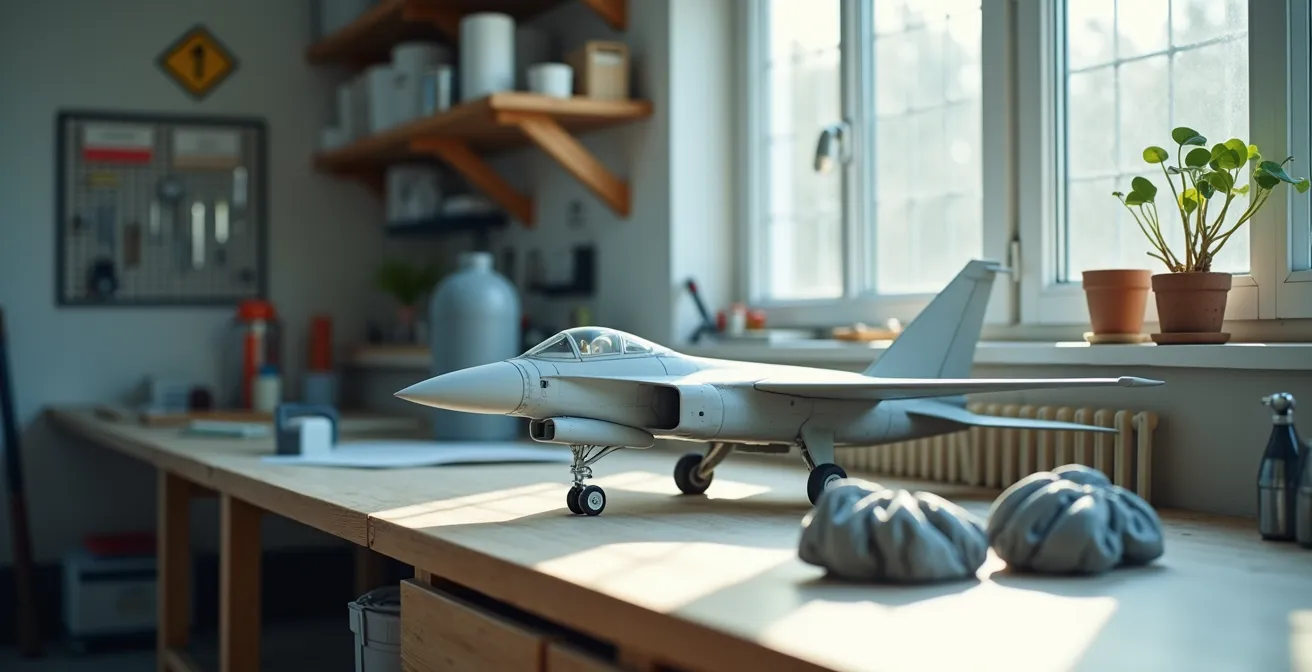
The moment you open a mixed-media aircraft kit is thrilling. The crisp, intricate detail of the polyurethane resin cockpit, ejection seat, or engine promises a level of realism that injection-molded plastic simply cannot match. For the intermediate modeler, it feels like the next logical step toward mastery. However, this is a critical misunderstanding. The transition from plastic to resin is not just a skill upgrade; it is a fundamental shift in material handling that comes with serious, non-negotiable health and safety obligations. The common advice to simply “wear a mask” or “work in a ventilated area” is dangerously inadequate.
The truth is that every resin component on your workbench should be treated with the same respect as a hazardous material in a professional workshop. The microscopic dust created from sanding is a potent respiratory irritant, and the glues required to bond it are chemically aggressive. Without a proper understanding of the risks and the implementation of strict safety protocols, you are exposing yourself to the danger of cumulative exposure, which can lead to chronic respiratory conditions and chemical sensitization—an irreversible allergic reaction that can end your ability to enjoy the hobby altogether.
This guide abandons generic advice. Instead, it provides a series of imperative, non-negotiable safety protocols through the lens of a health and safety specialist. We will systematically deconstruct the common tasks associated with resin parts and rebuild them with safety at their core. You will learn not just *what* to do, but *why* each step is critical to protecting your long-term health, particularly your lungs, ensuring you can continue to build incredible models for decades to come.
To navigate this critical information, we will address the most common procedures and questions that arise when working with resin, breaking down each task into a safe, repeatable workflow. This structure will allow you to build new safety habits directly into your modeling process.
Summary: A Safety-First Guide to Working With Resin Aircraft Model Parts
- Cyanoacrylate vs Epoxy: which glue holds heavy resin nose cones securely?
- How to scrub mold release agent off resin parts to prevent paint peeling?
- Is the extra cost of a resin cockpit truly visible in 1:How to Start Building Static Aircraft Models Without Spending Over $100?
- The hot water trick to fix warped resin wings safely
- How to remove casting blocks without snapping the delicate part?
- Thin vs Thick Cement: Which Glue Works Best for Joining Fuselage Halves?
- How to Eliminate Fuselage Seams So They Disappear Under a Coat of Silver Paint?
- What Defines a High-Fidelity Replica for Serious Aviation Collectors?
Cyanoacrylate vs Epoxy: which glue holds heavy resin nose cones securely?
The choice between Cyanoacrylate (CA) and epoxy for securing heavy resin components is not just about bond strength; it is a critical health and safety decision. Both adhesives are effective, but their risk profiles are vastly different. CA glue cures rapidly, releasing a sharp burst of fumes that are an immediate irritant to the eyes, nose, and lungs. Epoxy, on the other hand, has a long curing time, leading to prolonged, low-level off-gassing of its constituent chemicals. This extended duration increases the window for cumulative exposure. It is a documented fact that about 10% of people develop reactions when overexposed to epoxy resin or hardener, a condition known as chemical sensitization.
From a safety standpoint, the fast cure time of CA glue is an advantage if, and only if, it is used with immediate and effective ventilation. A dedicated extraction fan pulling fumes away from your face is mandatory. For epoxy, continuous extraction is required for the entire cure period, which can be up to 24 hours. Given the risk of developing a lifelong sensitivity, many professionals now favor CA glue for its short exposure window, combined with activators that eliminate the need for mechanical sanding, thus reducing dust generation.
The following table breaks down the risk profiles of each adhesive, which must be considered before starting any assembly involving resin parts.
| Property | Cyanoacrylate (CA) | Epoxy | Safety Recommendation |
|---|---|---|---|
| Fume Toxicity | High – immediate irritation | Moderate – prolonged exposure risk | CA requires immediate ventilation; Epoxy needs continuous extraction |
| Cure Time | 5-60 seconds | 5 minutes – 24 hours | CA = short exposure window; Epoxy = extended PPE use required |
| Skin Contact Risk | Instant bonding to skin | Delayed sensitization possible | Nitrile gloves mandatory for both |
| Dust Generation During Prep | Light scuffing sufficient | Heavy sanding often needed | CA reduces resin dust exposure |
Ultimately, neither adhesive is “safe” without proper controls. However, for large, heavy parts like a nose cone, a slow-setting, high-strength epoxy provides a stronger, more durable bond. The imperative is to manage its extended risk window with unwavering discipline regarding ventilation and personal protective equipment (PPE).
How to scrub mold release agent off resin parts to prevent paint peeling?
The term “scrubbing” is itself a red flag from a safety perspective. Manually scrubbing resin parts, even when wet, risks abrading the surface and releasing microscopic resin particles into your cleaning solution and the air. The mold release agent must be removed for proper paint adhesion, but a “no-touch” method is the only professionally responsible approach. The industry standard for this task is an ultrasonic cleaner. This device uses high-frequency sound waves to create cavitation bubbles in a cleaning solution (water with a drop of dish soap is sufficient), which gently and effectively dislodge the release agent without any physical abrasion.
This method not only preserves every ounce of fine surface detail but, more importantly, it completely eliminates the risk of generating airborne dust or creating a contaminated slurry through manual scrubbing. It is a perfect example of an “engineering control” that removes the hazard at its source, which is always superior to relying on PPE alone.
Case Study: Professional Modeler’s Transition to No-Touch Cleaning Methods
The Model Aces workshop documented a pivotal shift in their procedures after experiencing skin sensitization issues from cleaning agents. Their study found that adopting ultrasonic cleaners for all resin parts did more than just eliminate direct skin contact. It also resulted in superior preservation of fine surface details compared to manual methods and, critically, prevented the creation of any resin dust particles, which are a byproduct of even the most careful mechanical cleaning.
However, the process is not complete once the parts are clean. The water in the ultrasonic cleaner is now contaminated with resin residue and mold release agents. Pouring this down any drain is irresponsible and, in many areas, illegal. You must follow a strict disposal protocol.
Action Plan: Contaminated Water Disposal Protocol
- Never pour cleaning water containing resin particles down any drain.
- Allow contaminated water to evaporate in a well-ventilated area away from living spaces and pets.
- Once evaporated, cure any remaining solid resin residue under a UV light until it is fully hardened.
- Dispose of the dried, cured residue as hazardous waste according to your local municipal regulations.
- Clean the container with paper towels and also dispose of these towels as hazardous waste.
By investing in an ultrasonic cleaner and adhering to a strict disposal protocol, you transform a hazardous task into a safe, efficient, and more effective part of your workflow. This is the mindset of a true high-fidelity modeler.
Is the extra cost of a resin cockpit truly visible in 1:How to Start Building Static Aircraft Models Without Spending Over $100?
This question is typically answered with a simple “it depends on the scale.” From a health and safety perspective, this is a dangerously incomplete analysis. The true “cost” of a resin cockpit is not just its purchase price; it includes the mandatory investment in safety equipment and the health risk incurred during its preparation and installation. The significant sanding, cutting, and fitting required for a full cockpit generates a high volume of hazardous resin dust. Therefore, the decision must be framed as a risk/reward analysis.
A crucial, often-overlooked cost is the recurring expense of proper respiratory protection. A simple paper dust mask is useless against the fine particulate matter from resin. A P100-rated respirator is the minimum requirement. The filters on these respirators are not permanent; they must be replaced regularly. The cost of $15-30 per month for P100 respirator filters, based on CDC NIOSH recommendations for similar materials, must be factored into the “extra cost” of that resin cockpit. When you combine this recurring cost with the risk of dust exposure, the value proposition changes dramatically, especially for smaller scales where the detail is barely visible.
The following table provides a more responsible framework for making this decision, balancing the visibility of the final detail against the inherent risk of producing it.
| Scale/Configuration | Visibility Level | Dust Generation Risk | Risk/Reward Ratio |
|---|---|---|---|
| 1/72 Closed Canopy | Very Low | High (extensive fitting) | Poor |
| 1/48 Closed Canopy | Low-Medium | High | Marginal |
| 1/32 Open Canopy | Very High | High | Good |
| 1/72 Wheels Only | Medium | Low (drop-fit) | Excellent |
For modelers transitioning to resin, the smartest strategy is to start with low-risk, high-impact “drop-fit” parts like wheels, exhausts, or seats. These require minimal modification, generate far less dust, and allow you to practice safe handling techniques before committing to the high-risk, high-cost proposition of a full cockpit replacement.
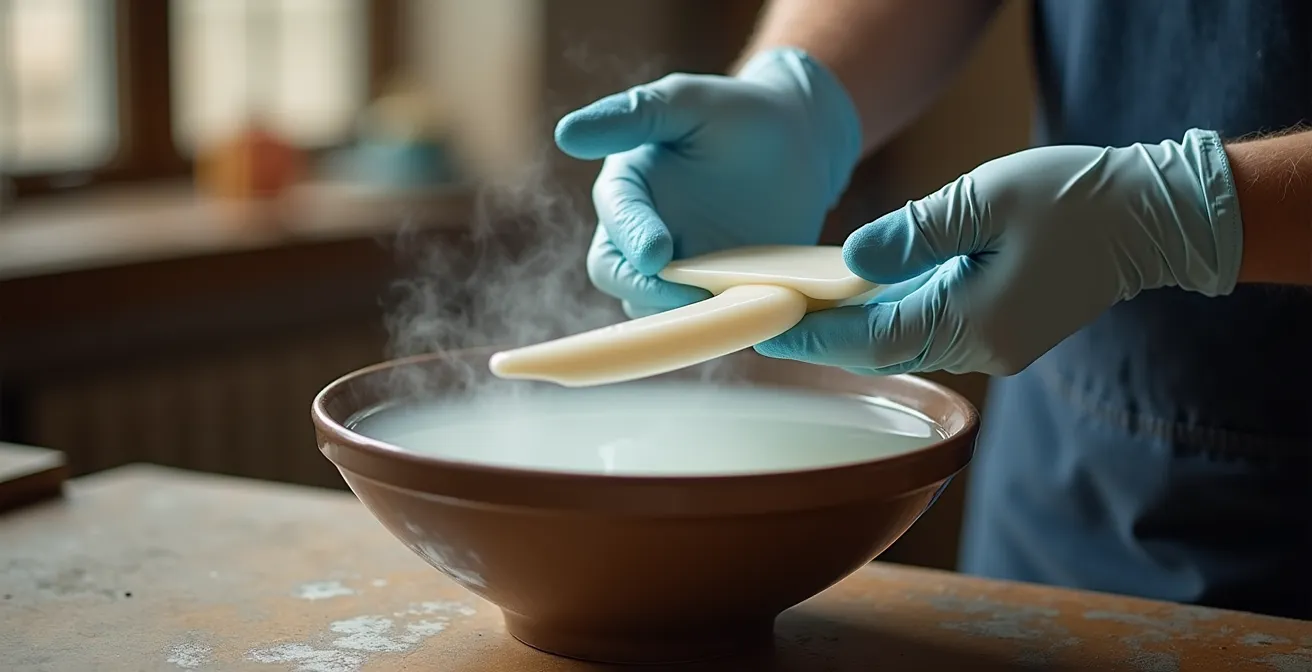
The hot water trick to fix warped resin wings safely
The “hot water trick” is a common technique, but it is frequently performed in a way that creates a new, invisible hazard: Volatile Organic Compounds (VOCs). While the technique is effective for making resin pliable, heating polyurethane resin can cause it to off-gas harmful chemicals. According to OSHA technical guidelines, significant VOC off-gassing from polyurethane resins begins above 60°C (140°F). Many modelers, using water from a kettle, far exceed this temperature, unknowingly releasing vapors into their workspace. A standard dust respirator offers zero protection against these chemical vapors.
The safe execution of this technique is a process of precise temperature control. The water must be hot enough to soften the resin but remain well below the off-gassing threshold. This is not a task for guesswork; a thermometer is a required piece of safety equipment. Furthermore, the procedure must be performed in an area with active ventilation to disperse any potential vapors, and thermal gloves are necessary to prevent burns.
The following protocol is not a suggestion; it is a mandatory workflow for safely performing this task. Any deviation introduces unnecessary risk.
Action Plan: Safe Hot Water Reshaping Protocol
- Heat water to a maximum of 50°C (122°F). You must use a thermometer to verify the temperature.
- Wear thermal-resistant gloves to protect your hands. A dust respirator is ineffective against vapors.
- Immerse the warped part for a maximum of 10-15 seconds. Over-soaking can damage the part.
- Gently reshape the part and hold it in the correct position as it cools.
- Cool the part gradually in room-temperature water. Avoid thermal shock from cold water, which can cause cracking.
- Dispose of the used water outdoors or allow it to evaporate. Never pour it down a kitchen or bathroom drain.
By treating this common trick with the seriousness of a laboratory procedure—controlling temperature, ensuring ventilation, and using proper PPE—you can correct warped parts without exposing yourself to chemical hazards. This discipline is what separates a hobbyist from a craftsman.
How to remove casting blocks without snapping the delicate part?
The primary danger in removing resin casting blocks is not snapping the part; it is the immense volume of highly respirable, toxic dust generated in the process. Any method that creates airborne dust in a home environment without professional-grade extraction is unacceptable. Dry sawing, and especially the use of a high-speed rotary tool, are exceptionally hazardous. A rotary tool pulverizes resin into a fine aerosol that can hang in the air for hours, bypassing ineffective masks and settling on every surface in your room. It is the single most dangerous tool a modeler can use on resin.
The only professionally responsible method for dust control is particle containment at the source. This is achieved by performing all cutting and sanding operations while the part is submerged in water. This “submerged cutting” technique physically prevents any dust from becoming airborne. The particles are trapped in the water, which can then be disposed of safely.
Case Study: Submerged Cutting Technique Implementation
On the Starship Modeler forums, a community of experienced builders documented their widespread adoption of the submerged cutting technique. By performing all sawing and initial sanding in a shallow tray filled with a few inches of water, they reported the complete elimination of airborne resin dust. While the technique requires more patience, it provides 100% dust containment, making it the benchmark for safety in home workshops that lack industrial ventilation systems.
The choice of tool is also critical. A fine-toothed razor saw creates coarser, less-respirable particles compared to other methods. The following table clearly illustrates the danger level associated with each common removal method.
| Tool | Dust Particle Size | Dust Volume | Inhalation Risk | Control Method |
|---|---|---|---|---|
| Hobby Knife | Large chunks | Minimal | Very Low | Cut over newspaper |
| Razor Saw | Coarse (>100μm) | Moderate | Low | Wet cutting essential |
| Rotary Tool | Fine aerosol (<10μm) | Extreme | Very High | Avoid or use underwater only |
| Sanding (dry) | Mixed sizes | High | High | Never recommended |
Finally, your work is not finished when the part is free. Your workspace is now contaminated. A post-work decontamination routine is a mandatory final step to ensure hazardous particles are not tracked into the living areas of your home. This includes vacuuming with a HEPA-filtered vacuum, damp-wiping surfaces, and changing your clothes.
Thin vs Thick Cement: Which Glue Works Best for Joining Fuselage Halves?
This question contains a dangerous misconception for anyone working with mixed-media kits. Standard plastic cements, whether thin or thick, are completely ineffective and irrelevant when resin is involved. These cements work by melting the surface of polystyrene plastic, creating a chemical weld. They have zero effect on cured polyurethane resin. Attempting to use plastic cement on a resin-to-plastic or resin-to-resin joint will result in a complete bond failure.
As the technical team at Model Aces clarifies, the chemistry is fundamentally incompatible:
Polystyrene cement will not work on resin because it works by slightly dissolving the polystyrene parts creating a ‘solvent weld’. It does not react with resin.
– Model Aces Technical Team, Model Aces – Adding Aftermarket Details Guide
For any assembly involving a resin part, you must use a structural adhesive like epoxy or CA glue. This introduces a significant escalation in safety requirements. The ventilation needed for a quick application of plastic cement (an open window) is wholly insufficient for the fumes from CA glue or the prolonged off-gassing of epoxy. When building a mixed-media model, you must always default to the highest safety standard required by any single component. If your fuselage has a resin cockpit installed, the entire assembly process must now be governed by the stricter ventilation rules for resin adhesives.
The hierarchy of ventilation needs is absolute:
- Plastic Cement Alone: An open window with cross-breeze is often sufficient for brief applications.
- CA Glue on Resin: A dedicated extraction fan (minimum 100 CFM) pulling fumes directly away from the work surface is required.
- Epoxy on Resin: Continuous extraction is mandatory for the entire cure time, which can extend up to 24 hours.
- Mixed Assemblies: The entire project must be managed under the safety protocol of the most hazardous material present—in this case, the resin adhesives.
Therefore, the question is not about “thin vs. thick” cement. The correct question is, “Have I established the necessary extraction and PPE protocols to safely use the epoxy or CA glue required for this assembly?” If the answer is no, the project must not proceed.
How to Eliminate Fuselage Seams So They Disappear Under a Coat of Silver Paint?
Achieving a flawless seam under a metallic finish is a pinnacle of modeling skill, but on a model with resin components, the traditional “putty and sand” method is a high-risk activity. Dry sanding putty and resin creates a cocktail of toxic dust. A silver finish is unforgiving and reveals the tiniest surface scratches, tempting modelers to sand aggressively, thereby increasing their hazardous dust exposure. The safe and superior method is to minimize sanding entirely through better techniques and materials.
First, if sanding is unavoidable, it must be wet sanding. This technique is non-negotiable. As technical guides from Red Label Abrasives show, wet sanding reduces airborne particles by 95% compared to dry sanding. This engineering control virtually eliminates the respiratory hazard. The process involves using waterproof sanding papers and progressively finer grits (e.g., 600, 800, 1200, 2000), followed by a polishing compound to achieve a glass-smooth surface ready for paint.
Case Study: Professional Silver Finish Without Dust Generation
In a demonstration, Model Aces proved that a perfect, mirror-like surface for high-shine metallic paints could be achieved while generating zero airborne dust. Their process relied exclusively on progressively finer grits of wet sanding, followed by a final buff with polishing compound. This not only protected the modeler’s health but also prevented dust contamination in the workshop, which could otherwise ruin the final paint job.
Even better than wet sanding is eliminating sanding altogether. For fine seams, especially around resin inserts, a modern technique using UV-curing resin as a filler is both safer and more effective. This method provides a perfect fill with almost no post-processing required.
Action Plan: No-Sand Seam Filling Technique for Resin
- Apply a small bead of UV-curing resin precisely into the seam using a fine-tipped applicator like a toothpick.
- Use a flexible plastic spatula or a piece of clear tape to level the excess resin, making it perfectly flush with the surrounding surface.
- Before curing, carefully wipe away any overspill from the surrounding area with a lint-free cloth lightly dampened with isopropyl alcohol.
- Cure the resin instantly by shining a UV flashlight on it for 30-60 seconds. The seam is now filled with a hard, clear, non-shrinking material.
- If any minor high spots remain, they can be feathered in with a light pass of 800-grit wet sanding only, followed by polishing.
By substituting hazardous dry sanding with superior techniques like wet sanding and UV resin filling, you not only protect yourself but also achieve a higher quality result. The best finish comes from the safest methods.
Key Takeaways
- Resin dust is a serious respiratory hazard; all cutting and sanding must be done wet to prevent airborne particles.
- Standard plastic cement does not work on resin. The required adhesives (CA, Epoxy) release toxic fumes that mandate dedicated ventilation.
- The true cost of a resin upgrade includes mandatory, recurring expenses for proper PPE, like P100 respirator filters.
What Defines a High-Fidelity Replica for Serious Aviation Collectors?
For the serious collector and the master modeler, high fidelity transcends mere visual accuracy. It is not just about the number of rivets or the precision of panel lines. True fidelity is a holistic quality that encompasses the entire creation process. It is the embodiment of skill, research, and—critically—professional discipline. A model assembled with reckless, unsafe techniques is, by this definition, a flawed replica, regardless of its appearance. The invisible story of its construction is one of unnecessary risk, not mastery.
The highest level of the craft is achieved when expertise and safety become indistinguishable. This philosophy is perfectly articulated by the engineering team at JETMADS, a manufacturer of high-end resin kits:
The highest fidelity is achieved when an expert can look at a model and know it was built with techniques that were both precise and safe.
– JETMADS Engineering Team, JETMADS High-Detail Resin Aircraft Manufacturing Philosophy
This redefines the goal. The aim is not just to build a beautiful model, but to build it beautifully. This means respecting the materials by understanding their hazards. It means investing in and correctly using the proper safety equipment. The evidence supporting this approach is undeniable; a 2024 industry survey confirmed that professional resin artists report a 73% reduction in health issues after adopting full PPE protocols. Safety and quality are not opposing forces; they are two sides of the same coin.
A truly high-fidelity replica, therefore, is the product of a safe process. It’s a testament to a modeler who has mastered not only their airbrush and scribing tools, but also the principles of particle containment, chemical handling, and personal protection. The pristine finish is a direct result of a dust-free environment, and the crisp bonds are the work of someone who understands their adhesives and the associated risks.
Therefore, the next step in your journey to becoming a high-fidelity modeler is not to buy a more expensive kit. It is to conduct a thorough safety audit of your workshop and your techniques, and commit to a professional, safety-first mindset for every future project.